Tuesday, August 31, 2010

September CTMH Stamp of the Month Blog Hop: THRILLER!

The September stamp of the month, Thriller, is totally awesome in a not-so-scary Halloween way! Skulls are all the rage now (as I'm sure you know), and this set is so fun without being too cutesy or scary. Check out the thrilling projects a group of Close To My Heart consultants have made by joining me on this month's stamp of the month blog hop. If you're already hopping along, you should be coming from my friend Shirley's blog. You can start here and hop along by clicking on the link to go to Jamia's blog.

My card layout was inspired by the Wishes how-to guide sketch, "On the Ball." The original recipe is for a 5"x7" card, but I modified it to fit a standard-size (4.25"x5.5") side-fold card instead.

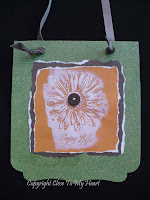
To create the focal image, I stamped the skull in black onto the White Daisy circle, then quickly sprinkled black embossing powder onto the image. After removing the excess powder, I heat set the image to give it a bit of gloss, shine, and dimension. If you try to emboss without embossing ink (like I did here) be sure to begin heat-setting your powders FROM THE BACK. If you point your heat tool at the front, you will probably blow off the powder before it can melt. If you point your tool at the back (but look at the front), you will melt the powder and get that smooth, glossy shine. Just hold your heat tool down low, pointing up, and your stamped image above it.
You can probably see both black flourishes that I stamped onto the card front. It looked a little plain, so I added the first (lower) flourish by stamping with black ink. When I got up the next morning, you could hardly see the black-on-black stamping! I was disappointed, but necessity is the mother of invention, right? I decided to stamp the flourish again and emboss it to make a "shadow" effect.
Don't you love those new Sunset Mini-Medleys? The button in the middle of my cluster and the two small "button" brads both came from this adorable collection of accents. You will love all matching the embellies you get for only $4.95!
No card would be complete without a decorated inside, and that is especially true with a dark card base like this black card. I cut a rectangle of White Daisy card stock about 1/4" smaller than my card base, and then I used some of my scraps for the decorative stripe and the saying comes from the September stamp of the month, "Scary Halloween to You." (Unfortunately I don't have a photo right now because I forgot to take a picture before mailing these off for a swap. When I get mine back I'll update this post.)
Thanks for stopping by and reading this long post! Let me know if you have questions about anything. I do read the comments and respond to any questions you might have. Now hop along to Jamia's blog for another thrilling project!

And the Winner Is...

{Since I have no idea how to get the Random.org number generator to show here, you're just going to have to trust me!}

... #15, Matthewsmommy said...
What a great show. Glad I'm a follower

Matthewsmommy, please email me at haleyd@myctmh.com so that I can get your prize in the mail! Thanks to everyone who played along!

Monday, August 30, 2010

Button Bracelet Photos

Scroll down for the links to the video tutorials if you'd like to learn how to make your own button bracelet.

Here's how to decorate clear buttons:

1. Choose your paper and cut it a bit larger than your button. (See step 5. It is easier to me to trim it after it's glued than to try to trim it accurately ahead of time.)

2. If you'd like to add glitter, apply a bit of Stardust Glitz Gel to the back side of the button and let dry.

3. Apply dots of Liquid Glass to the back of the button. Adhere to the paper (decorative side up). Don't worry if some of the adhesive oozes out. Just be sure to press the paper tightly against the button back.

4. Use a piercing tool to find your button holes. From the back, push a toothpick through the holes and ream out the holes. Any excess paper should stick to the inside of the button hole. Let dry.

5. Trim the paper with scissors, following the outline of the button.

6. Apply Liquid Glass to the back of the paper to seal it. Be sure the edges are sealed. Let dry.


Enjoy your buttons! These make adorable accents on cards, layouts, etc.

If you'd like to learn how to string them together to make a bracelet, be sure to scroll down to find my two video tutorials.

Finally, for your viewing pleasure, here's our little kitten trying to claim the button bracelet as his own. Sorry, Remy, but it's already spoken for!

Sunday, August 29, 2010

Celebrate You! (& a Little Color Theory)


Are these two cards fun or what? They use the NEW Party Pennants stamp set in two different NEW color schemes.

The first card uses Sunny Yellow, Sky, Lagoon, and Pear inks (plus Lagoon Mini Medley accents), while the color combo for the second card was taken straight from page 52-53 of the NEW Idea Book: Pear, Sunset, and Smoothie. Which card do you prefer and why? Since they are both 3"x6" card with basically the same exact design, it really comes down to the colors.

Now for the color theory. Can you picture a color wheel? Here's an image I found to share with you.

The first card uses an analogous color scheme, meaning that the colors are next to each other on the color wheel (blue - green -yellow). Remember how yellow and blue make green? Those are analogous colors.

The second card is actually a complimentary color scheme, because red and green are opposite each other on the color wheel. Now you may be thinking, "where's the red?" but truly Smoothie and Sunset are shades of red. Smoothie is more pink and Sunset is more orange, but they do fall in the red section.
Which color scheme do you prefer? Try your own analogous or complimentary color scheme (or feel free to copy mine).

Saturday, August 28, 2010

Giveaway!

Did you enjoy Creative University- Online? I certainly did! You can still watch all the videos- just not live- by clicking on the link in my sidebar at right.

I am going to give away the Olivia necklace I was wearing in my video to one lucky person who comments on this post by midnight 8/30/10. (Sorry, the bracelet was made for someone in particular.) To be eligible to win:
1. Follow my blog (or let me know in your comment you're already a follower).
2. Leave me a comment to let me know what type of online class you'd like to see me teach.

The random winner will be posted sometime on 8/31. Good luck!

Follow-Up Video Posted Now Too!

CUOL smIf you saw my first video about the button bracelet, you might be a little confused about the closure to put it on and keep it on, so I created a follow-up video (on my channel). You can access it directly right HERE, and it's only about 5.5 minutes. Thanks for looking!
*Pictures coming soon!

My First Official Ustream Video Tutorial: Button Bracelets

This afternoon teaching LIVE online at Creative University was so much fun! If you watched it live, thank you so much for joining in!

If you want to learn how to make a button bracelet, be sure to check it out (link below). (Part of it will be so silly because I am reading the chat comments and responding to them- you won't be able to see what was written and only hear my silly comments.) It was tons of fun, and I hope to record some videos on my own Ustream channel: InkyScrapper.

Rather than have this crazy video continually play here on my blog, click right HERE to watch it when you have time. It's 30 minutes or more though you really don't need all that time to get the "gist" of how to make a button bracelet. (I am planning on making a short follow-up video to show you the closure more carefully, but I'll let you know when it will air or is posted.)

If you'd like to see my first button bracelet, click HERE and then scroll down in that post.

Thanks again for watching!

Friday, August 27, 2010

Autumn/Winter CTMH Idea Book BLOG HOP

The upcoming Autumn/Winter Close To My Heart Idea Book will be released on Wednesday, September 1 (I am so excited!), so 40 Close To My Heart consultants are celebrating by hosting a blog hop to whet your appetite for the new products you'll find in it! (If you're coming from Cindy L.'s Papers, Pads, and Pictures blog then you're on the right path. Head to Paper Creations by Wendy after scrolling down through my post.) If you're just starting out, grab something to drink and a pad and pen (to write down all the things you have to have!), enjoy my post, and click the link at the end to hop to the next blog.

Since I went to Convention in July, I have had quite a bit of new product to play with for a while. It has been hard keeping it all under wraps! (Today is just the start of all the fun new products and projects, so be sure to come back here often. Thanks!) This gorgeous flamingo stamp set (D1438 Circle of Love) was given to us at Convention, and it has been killing me to keep it under wraps since then! Isn't it gorgeous? I don't know why, but I LOVE this stamp set!!! (It may be because I have a thing for birds, but that is for another day.)

I made this card for my downline (the wonderful gals who signed up under me as CTMH consultants) following the 8"x3.5" card sketch,"Lower Layers," from the Wishes how-to guide. I used the new colors Pear, Sky, Lagoon, Pacifica, and Gypsy to ink up this beautiful bird, the saying, etc. Each piece was ink distressed in the matching color or Pacifica. I used a little Lagoon ribbon and Purple Sparkles to dress up this beauty.

Do you embellish your envelopes and/or the insides of your cards? These simple steps can really delight the recipient! Going that extra mile won't take you much time at all. For this card, I just inked up the swirl with the different inks (cleaning between each stamping) and stamped it on the inside of the card and the front of the envelope. (I forgot to take a picture of the inside of the card but you get the idea with the envelope.) I even used my Sky and Pacifica markers for the addresses.

You can see all the NEW and exciting new Close To My Heart products on my website HERE. (If you find something you'd like for yourself and you don't already have a consultant, please contact me at haleyd@myctmh.com or visit my website.) Be sure to check them out online beginning 9/1. (Also, ask me how you can get your free Autumn Idea Book. It's easier than you think!)

Thanks so much for taking the time to visit my blog! Now hop on over to Paper Creations by Wendy for another sneak peek! Be sure to visit all the consultants' blogs. You won't want to miss a thing! Also, don't forget about Creative University- Online tomorrow! Check out my sidebar or scroll down for a recent post with more info. Have a creative weekend!

All supplies from Close To My Heart: D1438 Circle of Love stamp set; Summer Celebration and Summer Carnival card stock combo packs; Colonial White card stock; Pear, Sky, Lagoon, Pacifica, and Gypsy inks; Z1340 Lagoon Mini Medley accents; Z1326 Red, Pink, & Purple Sparkles Assortment

Thursday, August 26, 2010

Even Better (!) CTMH Hostess Rewards Program

Close To My Heart is making it even easier for hostesses to earn more CTMH rewards! (These exciting changes begin 9/1/10, so contact me NOW to schedule your fall gathering.) Here are the details in the CTMH Hostess Rewards Plus! program:

1. Start earning hostess rewards with a minimum of two people ordering a combined subtotal of $150. (That means $150 before shipping, handling, and tax.) (Also, beginning 10/1, you can have an entirely on-line gathering!)

2. New expanded choices of free CTMH products for hostesses: stamp sets (excluding specials like the stamp of the month), blocks, ink pads, markers, reinkers, cardstock packs (including combo packs), My Reflections Level 1 kits, My Reflections paper packs, and My Reflections My Stickease. (Bold items are new to the Hostess Rewards program.)

3. Earn the option to purchase one (or more) half-off item(s) sooner than ever! When party sales reach only $250, earn 1 half-off item. It can be one of the exclusive hostess-only collections or any other one item in the Idea Book (excluding stamps of the month and any current special offer). You earn 2 half-off items at $450, three at $650, etc.


See p. 104 of the Autumn/Winter 2010 Idea Book for complete details. Remember too that as one of my hostesses, you have three options:

1. Have a gathering in your home (or other location) with your friends. We'll create a fun project while learning tips, techniques, and tricks of the trade.

2. Have a gathering in MY home (that means no cleaning for you!) for you and your friends. We'll create a fun project while learning tips, techniques, and tricks of the trade.

3. Host an online-only "catalog party" and earn free products! (This feature will
begin 10/1.)

Wednesday, August 25, 2010

Quote of the Week

"Scrapbooking isn't about scraps of paper and photos. Scrapbooking is about scraps of life - yours and those special to you."


~Rebecca Sower
Current scraps of our lives:
*We got to launch our pontoon boat and go for a cruise this weekend!
*My Open House went well Tuesday evening.
*Macey's Open House is tomorrow evening (along with cross country practice).
*Ansley loved running cross country for the first time but isn't happy her sister went (and liked it) too.
*Ansley will get to be a teen leader at the 4-H dance Friday night, and Macey gets to go for the first time as a 4-Her, so it looks like *date night* (or at least date dinner?) for Logan and me!
*The girls still can't agree on a name for our adorable kitten. At least Franklin our big cat is tolerating him better. There's still a bit of hissing and spitting, but they've gotten almost nose-to-nose.
*We'll get to sign up for dance Saturday. I think all 3 of us girls will dance again this year.
*I'm looking forward to teaching online Saturday afternoon at CU-OL but have to figure out how to get all the techie stuff set up (and exactly what it is I'll be teaching!).
Hope you're having a great week! Happy Hump Day!

Tuesday, August 24, 2010

Coming Soon... Creative University- Online!

Photobucket

Mark your calendars, it's less than a week away! The first Creative University - ONLINE!

Nine hours of free classes, presented by Close to My Heart consultants to kick off the new Autumn/Winter Idea Book and Catalog. The Fabulously Artsy Tresa Black has assembled a top-notch team of co-hosts for this event, with a variety of demonstrations to showcase new products from Close to My Heart.

9am-6pm pacific
10am-7pm mountain
11am-8pm central
12pm-9pm eastern
Classes begin on the hour, so mark your calendars and set your alarms NOW!

Teachers:
Tresa Black
Bobie Glassette
Denise Anderson-Turley
{Me!}
Aaron Brown
Sheila Bennett
Christine David

The event is on Tresa's Ustream channel. Sign up (it's free!) to chat live with teachers and other viewers. Ustream account is not necessary to view the classes, but if you'd like to chat, you need to sign up.

Help promote this event: grab a badge from the sidebar!

Monday, August 23, 2010

Another Something Splendid Card

Isn't this card so cheery? I received it swapping at Convention, and unfortunately I don't know who the artist is. (If you know, please help me give credit where credit is due!)

Besides the colors of the Cherry-O paper pack, I love how this card opens: the left green panel opens and the pink polka dotted part on the right is part of the card base. I hope that makes sense! When you first look at it, you think that everything you're looking at is on the card front, but the card front is shorter than the base. Way cute!

Yesterday was our Heirloom/Recipe scrapbook layout class, and I can't wait to share the results with you. We had fun learning how to make all kinds of flowers to embellish our projects.

Logan got our pontoon boat fixed and put into the water Saturday (after all the rain), so we went out for our first family voyage. I even got to drive! It was so nice to be out on the cool water.

Have a great week! I will try to post often but as busy as we'll be I make no guarantees.

Saturday, August 21, 2010

Something Splendid Swap Cards

Where has this month gone? This week at least has been a blur- it was our first full week of school. It went well for all three of us, but of course we're still adjusting to getting up (and going to bed) early, not having all day to do things, etc. This next week will be incredibly busy as we have something every single day Sunday through Saturday. Yikes! Hopefully I can remember to take my vitamins because I'll need them!

I can't believe we're nearing the end of the month, and I haven't shared these beautiful cards with you! Each month, I participate in a stamp of the month swap. I create 8 identical cards and receive back all these gorgeous cards. The ladies in my group are so talented! (I mailed of my September stamp of the month cards yesterday, and I can't wait to show them to you- next month!)

Top photo, clockwise from top left: paper piercing adds such beautiful detail to an already gorgeous card (by Pam Beery); the crisscrosses are made using a bone folder or scoring blade and sanding (unknown artist); so fun and summery (Taralyn), and the embossed resist paint technique by Bridget Mahler


Clockwise again from top left: clear embossed sunflower; distressed card by yours truly; glitz glue gel flower center by TAS; and polka dots with the center flower stamp by Carla Ramirez


Can you see the sheen and shine of the clear embossing?

A close up of Bridget's artistic embossed resist paint technique (which is the technique we used at Stamp Camp for our wall hangings)
A close up of Pam's paper piercing and beautiful addition of Heavenly Blue sponged onto the flower image
Remember, the August stamp of the month, Something Splendid, is only available until the end of the month!

Friday, August 20, 2010

Macey at 3 (Layout)

Believe it or not, I still have Splendor paper left, but I am working my way through it! (This is the 3rd layout I've made with my paper pack.) Since my baby's 9, I've obviously had these pictures for a long time. (Wasn't she adorable?) This paper really inspired me to get busy with these pictures.

Having the new Magic how-to scrapbooking guide (available 9/1!) made this layout come together so nicely! Do you like it? You are going to LOVE the new Magic how-to book!!! This particular sketch is called "On With the Show," and though it called for three 4"x6" photos, I was able to tweak it to fit my two (5"x7" and 8"x10"). That is one thing about our guides: you can follow them exactly, or you can customize them for your photos or project.


Let me know if you'd like to reserve a copy of Magic now! You will LOVE it! I can't wait to share it with you.

All supplies from Close To My Heart: Splendor paper pack; Friendship Alphabet Large, Friendship Alphabet Small, A Flitter, and Treasures stamp sets; Buttercup, Goldrush, and Topiary inks; Designer Brads Splendor; Big Pinks Just Blooms (white ones); paper piercer


{Layout 2010 #41}

Thursday, August 19, 2010

Stamp Camp Wall Hanging

In addition to our layouts and cards, "campers" at my stamp camp made this wall hanging using the August stamp of the month, Something Splendid. We used the chipboard pages from an All-Sorts My Creations album as our backdrop, so that is why each one is a different shape. (We punched out the outside two of the three holes to serve as our hangers.)

Campers learned the "embossed resist" technique:
1. Stamp your image with Versamark or embossing ink.
2. Sprinkle on clear embossing powder and dump off excess.
3. Use a heat tool to melt the powder.
4. Paint over the image with acrylic paint. (Do NOT dilute the paint with reinker. If you'd like color, use that color paint.) It's nice to let your brush strokes show.
5. Let dry.
6. Use a wash cloth, rub over the image. The paint with rub off the clear embossed image, letting the background show through. (Someone else suggested using a credit card or other straight edge to chip off the embossing, but I haven't tried it that way.)
Didn't they do a great job? (Isn't this a great idea for a lovely gift, too?)

Wednesday, August 18, 2010

Daredevil Macey Layout

Our younger daughter is our more adventurous child. She won't rush blindly into things, but she has been known to throw most caution to the wind. (She got her nose out of joint this weekend when her sister learned to dive off the dock! She's not quite ready for that yet.)

I knew that I wanted to preserve this aspect of her personality, so I had started to save photos of her being, well, adventurous. (The funny thing is that her sister is in three of them, two enjoying the action with her.) The second layout suggested in the Splendor Workshop on the Go (from Stamp Camp) was perfect! (It's the "Asymmetric" sketch from Cherish, and having those instructions makes it so fast and easy to put together a layout. I did turn the left page to make it work better with my pictures.)

Since I had quite a few cute photos of the action on the bungee trampoline, I'm using a flip flap to add two more photos to the layout without taking up more space. (I will just pull off the adhesive strip to attach the flip flap to the page protector when I'm ready to put them in her album.)

Because the events and stories behind the photos were random, punching out circles of B&T paper and numbering them helped me identify what's going on in each picture in the journaling box. This allowed me to save space and add more pictures.

Do you like the peek at the NEW Old World Alphabet stamp set? It will be available 9/1!

{Layout 2010 #40}

Tuesday, August 17, 2010

Play Layout

At my recent stamp camp, we completed the first layout of the Splendor Workshop on the Go kit (only available until the end of the month!). Here is my version.

I couldn't believe how well these pictures worked with this layout!


For the right page, rather than use all 2.5" squares, I cropped the picture of my elder nephew to fit where two squares would go. I love how it looks! I couldn't stand to crop his sweet dirty knees from the picture. (BTW, if you can't read the journaling at right, it says that my sister is teaching her boys that all girls like flowers!)


Here is a close up of the Irresistibles chipboard shapes that come with the kit (but are also available separately). Do you see the white polka dots, leaf veins, and flower designs? Those are imprinted directly onto the chipboard itself. Just sponge color onto the white chipboard, and the printed pattern resists the ink. So easy and effective!


(Come back over the next few days to see what else I made with this kit. I hope you'll love it as much as I do!)
P.S. The Summer 2010 Workshops on the Go (Splendor, shown here; Passages; Cherry-O; and Zippidee) are only available until the end of this month! These great kits are only $29.95 and include the paper pack, an exclusive stamp set, an accessory, and a full-color instructional guide.

{Layout 2010 #39}

FREE Journaling Workshop!

Elle's Studio is sponsoring a three-week FREE journaling workshop from 8/8-28. We're not so far behind that we can't get caught up! As a scrapper, I find that the journaling can sometimes be the hardest part to me, so I look forward to reading through this series. Check it out HERE. {They're giving away prizes, too. ;)}

Monday, August 16, 2010

National Stamping Month "Triple Play"

If you're a stamper or a scrapper, then you are going to love the Triple Play special for National Stamping Month! With your kit, you will create three adorable mini albums! Click HERE for a PDF flyer or read on...

Here's what comes in the kit...
1 - My Acrylix® "Love This" Stamp Set
4 - Exclusive Inks Mini Stamp Pads (Desert Sand, Hollyhock, Indian Corn Blue and Sunset)
9 - 4 x 12 Panels (3 each of 3 color schemes) to build the albums
3 - 6 x 12 die cut sheets (precut to match the stamps)
1 - 72" Length Colonial White Grosgrain Ribbon
3 - Velcro Fasteners
1 - Fully instructional, easy to follow brochure

For Customers:
Dates: August 15–September 30, 2010
Customers can get the Triple Play kit beginning August 15 in the following ways:

1) Purchase the kit outright for $29.95.
2) Place a minimum order of $25 in My Acrylix stamps (excluding Stamp of the Month sets, Workshops on the Go exclusive stamp sets, and K-size custom stamps) and purchase the kit for only $15. (You will also be eligible to purchase the stamp of the month for 25% off!)
3) Place a minimum order of $40 in My Acrylix stamps (excluding Stamp of the Month sets, Workshops on the Go exclusive stamp sets, and K-size custom stamps) and purchase the kit for only $5. (You're very close to the $50 required purchase to get the stamp of the month at half off.)
The Triple Play offer is good on Gathering, Individual, and EZ Invite® orders. Customers may also order the kit on my MyCTMH® website and through EZ Invite online shopping. The kit is available while supplies last.

For Hostesses:
Dates: August 15–September 30, 2010
Hostesses who hold a qualifying Home Gathering with minimum sales of $300 will receive a Triple Play mini album kit FREE.

For New Consultants:
Dates: September 1–September 30, 2010
New Consultants who enroll during the month of September will receive the Triple Play mini album kit FREE as part of their New Consultant Kit. No additional tax or shipping/handling will be charged.

Let me help you get yours this month or next! (I have mine and the kit is absolutely darling. I can't wait to play!)

Sunday, August 15, 2010

CTMH Product Spotlight Blog Hop: Background Stamping Technique

This month's Close To My Heart product spotlight blog hop is featuring different background stamping techniques. With only seven blogs, it won't take you long to hop but you will sure learn a lot! (If you've arrived from Jen B.'s blog, you're following the path. Head to Toni's blog next!)

My layout uses a few simple techniques. Since the theme was tubing, I used several circular stamp images to mimic the tubes without (hopefully) going overboard. I stamped them in a random pattern (AKA random stamping), overlapping some of them as I stamped. To make it even easier (I'm all about Close To My Heart's motto "faster, simpler, easier!"), I also "cluster stamped," meaning that I placed several stamps on one block to stamp a few images at once. A little Cocoa ink sponged on the edges of the Colonial White card stock softens the edges too.

To random stamp successfully, think about an imaginary triangle. Stamp your first image, reink and stamp it again, thinking about making a triangle with the images. Your third time stamping should be the third point of the imaginary triangle. Now use one of those points as the start of a new triangle, and stamp twice more. Continue stamping in this not-so-random pattern until your background is complete. A good habit while random stamping is to turn your block a bit each time so that your stamp isn't always pointing in the same direction on your project. (What I am trying to explain is not at all easy to see with a bunch of circles!)

Finally, to add more interest to my stamping, I overlapped some of the circles. If you look really closely, I highlighted the centers of the Sweet Leaf "bursts" and the centers of the smallest Crystal Blue circles with dots of Liquid Glass. Also, can you see the Liquid Glass I added to the water photos? It is subtle but effective.

This layout is based on the sketch from the Moon Doggie Workshop on the Go (last fall), but I used the Emporium paper pack and the "gallon-quart-pint" rule for my color scheme. If you look at my layout, what color is used the most? That is the "gallon" color. The "quart" color is used less than the main one, and the "pint" color is used the least of all. (I did use Colonial White as my base too, but I'm not really counting that as a color here.) So can you guess my "gallon-quart-pint" colors?

My "gallon" color is blue, and I used two shades: Twilight and Crystal Blue. Sweet Leaf is my "quart" color, with a "pint" of Cocoa thrown in for good measure.

If you've read this far, you get extra credit for attending my "class.":) Be sure to hop to the head of the class by heading next to Toni's blog to check out her technique. You get an A+ for today's lesson!

Supplies from Close To My Heart: Emporium paper pack; Connections, Chocolate Alphabet Large, and Chocolate Alphabet Small stamp sets; Crystal Blue, Twilight, Sweet Leaf, and Cocoa inks; Winter Cozy Mini Medley accents; Liquid Glass; sponge

Other: McGill 3" file tab punch

{Layout 2010 #38}

Saturday, August 14, 2010

My Washer Pendants Featured at Craft Gossip!

What a surprise to receive an email from my mom, forwarded from a friend of hers (Thanks, Dianne!), about the Craft Gossip newsletter. They have some pretty cool crafts and projects featured over there. Click HERE to see what they had to say about my tutorial and then browse their site.

First Day of School & Splash Zone Layouts

If you truly want to scrapbook faster, simpler, easier, then you have to check out Studio J online scrapbooking!!! I was able to upload our first day of school photos and make a gorgeous layout this morning (the day after the first day of school) while lounging in my pjs and spending time with my hubby. What a wonderful way to start the day! ;)

Then, I saw that there are two exclusive "paper packs" that are only available in Studio J. One is more for Easter, and the other screams summer. I had to upload a few of our lake photos to make a "Splash Zone" layout too!

Some really exciting perks are coming to Studio J in September, so I am going to wait until then to print my layouts. I am really excited about recording our memories and preserving our photos while they are fresh.

Try it out yourself right HERE. There's no charge until you print (or purchase your JPG to print somewhere else).


{Layout 2010 #42 & 43}

Happy Mail!


Check out this beautiful thank-you card I received recently for donating items to the Operation Smile Silent Auction. I also received this adorable exclusive stamp set that you can't buy. It can only be given to you by Jeanette Lynton (Close To My Heart's founder and CEO). She even signed it!