Masking is a magical technique! You can do soooo much with a little creative masking, as you're sure to see along this technique blog hop. You can layer images without lots of cutting and pasting, you can use multiple colors on one stamp, and so much more. (If you're already hopping then you've probably arrived from Catherine's blog. From here you'll visit Darlys's blog next.)
For this hop, I wanted to show how you could use more than one color ink directly on your stamps using the masking technique.
Step One: Use a Post-It-style note or washi tape to cover up the part of the stamp that you do NOT want to ink up (in this case "memories"_.
Ink up the stamp in your color of choice (Smoothie).
Pull off the Post-It note and stamp image onto your project. (It's really helpful to have a trash can nearby!)
Next cover up the parts that you've already stamped so that all you can see is the portion that hasn't been stamped.
Ink up "memories" in Peacock ink. Remove the Post-Its and align with the previously-stamped portions.
Voila! Now you have a two-toned (or more) stamped image!
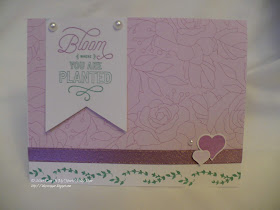
Here's another card from earlier this year that uses this masking technique. (TIP: You may want to use washi tape instead of post-its for "curvy" images.)
Thank you for checking out my Magically Masked project. Be sure to visit Darlys next!


Great job masking. Nice cards and photos of process.
ReplyDeleteExcellent! You make it look so easy!
ReplyDeleteGreat card. Love the change of color. TFS the step by step instructions.
ReplyDeleteBoth your cards are great! I love how you incorporated a the making memories into a card.
ReplyDeleteI love this technique, and it' easy - but I forget to do it! Thank you for the reminder.
ReplyDelete