Friday, October 30, 2020

Comfort & Joy Isn't Just for Christmas

When I saw the beautiful Comfort & Joy collection, I hoped that I could use it beyond Christmas.  Here's a layout I just made from my very first University of Georgia football game (last year).  Before you bash my team, just know that our daughter started her undergrad degree there last year and is now a member of the Redcoats marching band (and my dad went to Georgia Tech).  Go, Dawgs!


What do you think?  Not just for Christmas?


I added Scarlet glitter paper and tried out some cool techniques.  Can you see red stripe above my photo?  I played with our new Candy Apple distress oxide inks.  As you can see in the photo below, I applied ink directly to my Black cardstock then flicked black, red, and clear shimmer brushes onto the base page.  Here's what it looked like after it dried:


When I started building my pages, I realized that I needed some of this same technique on the right page.  Look at how bright the distress oxide ink is on the black cardstock before it dries!


Here's the completed right page.  My title and football were cut with my CTMH/Cricut Artbooking and Artistry cartridges.


Here's another tip: use 1/2" strips of cardstock as journaling strips that you adhere directly on your photos.  You can add to your story without detracting from photos!

Thursday, October 29, 2020

Bloom with Grace Scrapbooking Workshop

 The Bloom with Grace scrapbooking workshop is absolutely beautiful, and I am so pleased with how my Thanksgiving 2019 pictures look with this collection!  (There is no shame in being a year- or more- behind in your scrapbooking!  Scrapbook what YOU love!)

Close To My Heart corporate offered this workshop as a Facebook Live event, and I am so glad that I got to participate with the replay!  This first layout is the hardest, so definitely follow along with the experts.
For my title, I added a French Vanilla banner that I stamped with Espresso ink (retired alphabet set) and then distressed the edges.
Thankfully the workshop kit included the pretty leaf die cut!

{Blogger isn't liking my photo of my next layout as a two-page spread, so here are the individual pages.}

This layout was really easy to create with strips of paper and the gorgeous flower die cuts included in the workshop kit.  (This time, I wrote my own title.)

The first two layouts from the workshop will be going in my 2019 album, but this last one will go in our Family album.
I love how these pictures of my family and with my beautiful sister and cousins (who are sisters) turned out from Thanksgiving last year and how pretty they look with Bloom and Grace.


The embellishments are from the wooden Bloom with Grace embellishments plus stickers from the Bloom with Grace collection.

If you want to get yours, be sure to order before the end of the month!


Wednesday, October 21, 2020

Craft with Heart Birthday Cards

 Close To My Heart offers two cool subscription crafting options: Craft with Heart Scrapbooking and Craft with Heart Cardmaking.  (You can learn more HERE.)  The only things you need "extra" is adhesive!  I needed some birthday cards this weekend, and these were the perfect way to make some quick and cute cards.

Of course I veered from the instructions a teeny bit.
Instead of the provided black ink, I grabbed my new Blue Belle ink plus the October stamp of the month stamp set for "Happy Birthday!"  In addition to the included Blue Belle sequins, I added mini silver star glitter and embellished with some new Blue Belle glitter gems.

My second card is for a special young man who turned 14 on Sunday!  I can't believe that my nephew is now taller than me (even though I really should be surprised)!  I actually made this one according to the directions.  For the second card (the kit includes materials for 2 each of 12 different cards), I will stamp some stars in the white star shaker window base.

I have to say that the star shaker windows are so easy to put together!  I love them!


I went ahead and made this 3rd birthday card just to have on hand in case.  I used some 3D foam from the leftovers from the star shaker windows to pop up two of the flowers.  I will probably add some gold glitter gems from my stash (not included in the kit) before I give this card away.

Be sure to check out the subscription service (link above) if you'd like to make some easy yet stunning cards- or scrapbook layouts!

Monday, October 19, 2020

H2H Challenges: Christmas Is Coming Early

It is annoying to see the Christmas decorations for sale along with the Halloween goodies, but in the crafting world at least, you have to work ahead.  That's why this week's Heart2Heart challenge is "Christmas Is Coming Early" in an effort to help you get a jump start on your holiday joy.

These two cards were half of the Facebook Live card class I taught recently.  They both use the Comfort & Joy cardmaking workshop stamps and paper with New England Ivy ink.  I am loving the red Liquid Pearls!   Here are close ups of both cards.
I think that I may add a red bow to the wreath.  I like the substitution of black shimmer trim for black cardstock.
Thanks to my friend Joy for the suggestion to adding them to the tree!  You can't tell as well now that I added them but I used a cool technique on the tree.  After inking it up, I used a crumpled tissue to blog and remove some of the ink.  It is really pretty in real life.

Be sure to visit the H2H blog to see the incredible DT inspiration and to join us yourself!

Sunday, October 18, 2020

Core Catalog 20-21 Idea Book Blog Hop

In my 20 years as a CTMH consultant/maker, I think that CTMH has released one of its best core Idea Books in my history with this amazing company!  I am so excited about the new products and all of the things that I am going to learn (and get to teach) this year.  This blog hop is focusing on Makers' favorites from the core Idea Book.  (If you're already hopping, then you've probably arrived from Brenda's blog.  From here, you'll visit Alyson's blog next.)  I focused on the Party Time paper/sticker collection plus the yellow acrylic star embellishments for my projects.  All three of my layouts are made with materials and instructions from the Core Idea Book launch (for Makers only).
Here are my pictures from my birthday in late March of this year.  Because I had already used the "Party Time" stickers on my daughter's birthday layout, I tried the negative space/outline and am pretty pleased with how it turned out.
I totally changed this layout up from the suggested layout (blues and greens) by using Glacier cardstock for my base and turning the patterned paper over to the more feminine side.


For my daughter's birthday in April, we had a "drive by" due to COVID-19 concerns and sheltering in place.
I love the versatility of this collection!  My baby girl has always loved the color blue, so I could personalize her birthday layout with her favorite color.
Because I had so many pictures, I am using a flip flap to add an interactive element (and more photos).

My third layout is of our older daughter's June birthday.  She has always been pretty in pink, and I could again customize my layout to her favorite color.
Here are the Party Time stickers as they are "supposed" to be used.


I will be using the leftovers from my paper pack, cardstock pack, and stickers to commemorate my husband's July birthday.  (I didn't get all of my pictures printed yet, but they will be coming soon.)

Here's a card I made with the Wishing You Everything stamps & thin cuts, plus I still have enough scraps leftover for a few more projects.

Thank you for letting me share the fun Party Time collection from the 2020-21 CTMH Core Idea Book with you!  I would love a comment before you continue the hop by visiting the incredibly talented Alyson & her blog next.


Saturday, October 17, 2020

Wishing You Everything Cards

Here are three fun cards that I made at my virtual card class (via Facebook Live) using the Wishing You Everything stamp set and Thin Cuts (available in the Core Catalog through 8/2021).  I wanted to challenge myself to use these beyond the obvious birthday wishes.

The first card uses the Party Time collection from the Core Catalog with Sapphire and Lagoon inks.  Do you see the yellow acrylic star embellishment?
My last two use the Bloom with Grace collection (available through 10/31) and some of our new markers (with Desert Rose ink and gold thread on the top card and Espresso, Canary, and Desert Rose on the last card).

Thanks for letting me share some cheery cards with you today!

Thursday, October 1, 2020

October Stamp of the Month Blog Hop: With All My Love

 Welcome to the October stamp of the month blog hop featuring the beautiful With All My Love stamp set.  (If you're already hopping, then you've probably arrived from Krista's blog.  From here, you'll visit Becca's blog next.)  As soon as I saw this set, I knew I wanted to use it to scrapbook our 25th anniversary.  (I know, can you believe we've hit 25 years?!?)

I used the Lovely paper collection because its softness really makes my photos pop.  (This is the right page of a two-page layout.  Hopefully I'll get the left page ready and posted soon.)
I'll be using a flip flap so that I could include these sweet pictures.  (Props to our daughter for the photo shoot!)
Since it was our silver anniversary, I stamped/heat embossed the heart and all of the floral images with silver embossing powder.  I then used a water brush to paint them with Ballerina, Sage, Evergreen, and NEW color of the year Blue Belle inks.  I stamped the happy anniversary banner twice and cut out using one half on each side.  The silver 25 was cut with my CTMH/Cricut Artbooking collection.  I used silver sequins and glitter gems for embellishments.
I think I'm going to add my journaling with a metallic silver pen.


Thanks for letting me share some of my memories of our special anniversary.  I'd love a comment before you hop on over to Becca's blog to continue the With All My Love stamp of the month hop.  You won't want to miss what she has to share!
{Click HERE for all the hop participants and their blogs.}


Monday, September 28, 2020

H2H Challenges: Fall Fun

While this card might not scream Fall Fun, I made it for a girlfriend's September birthday.


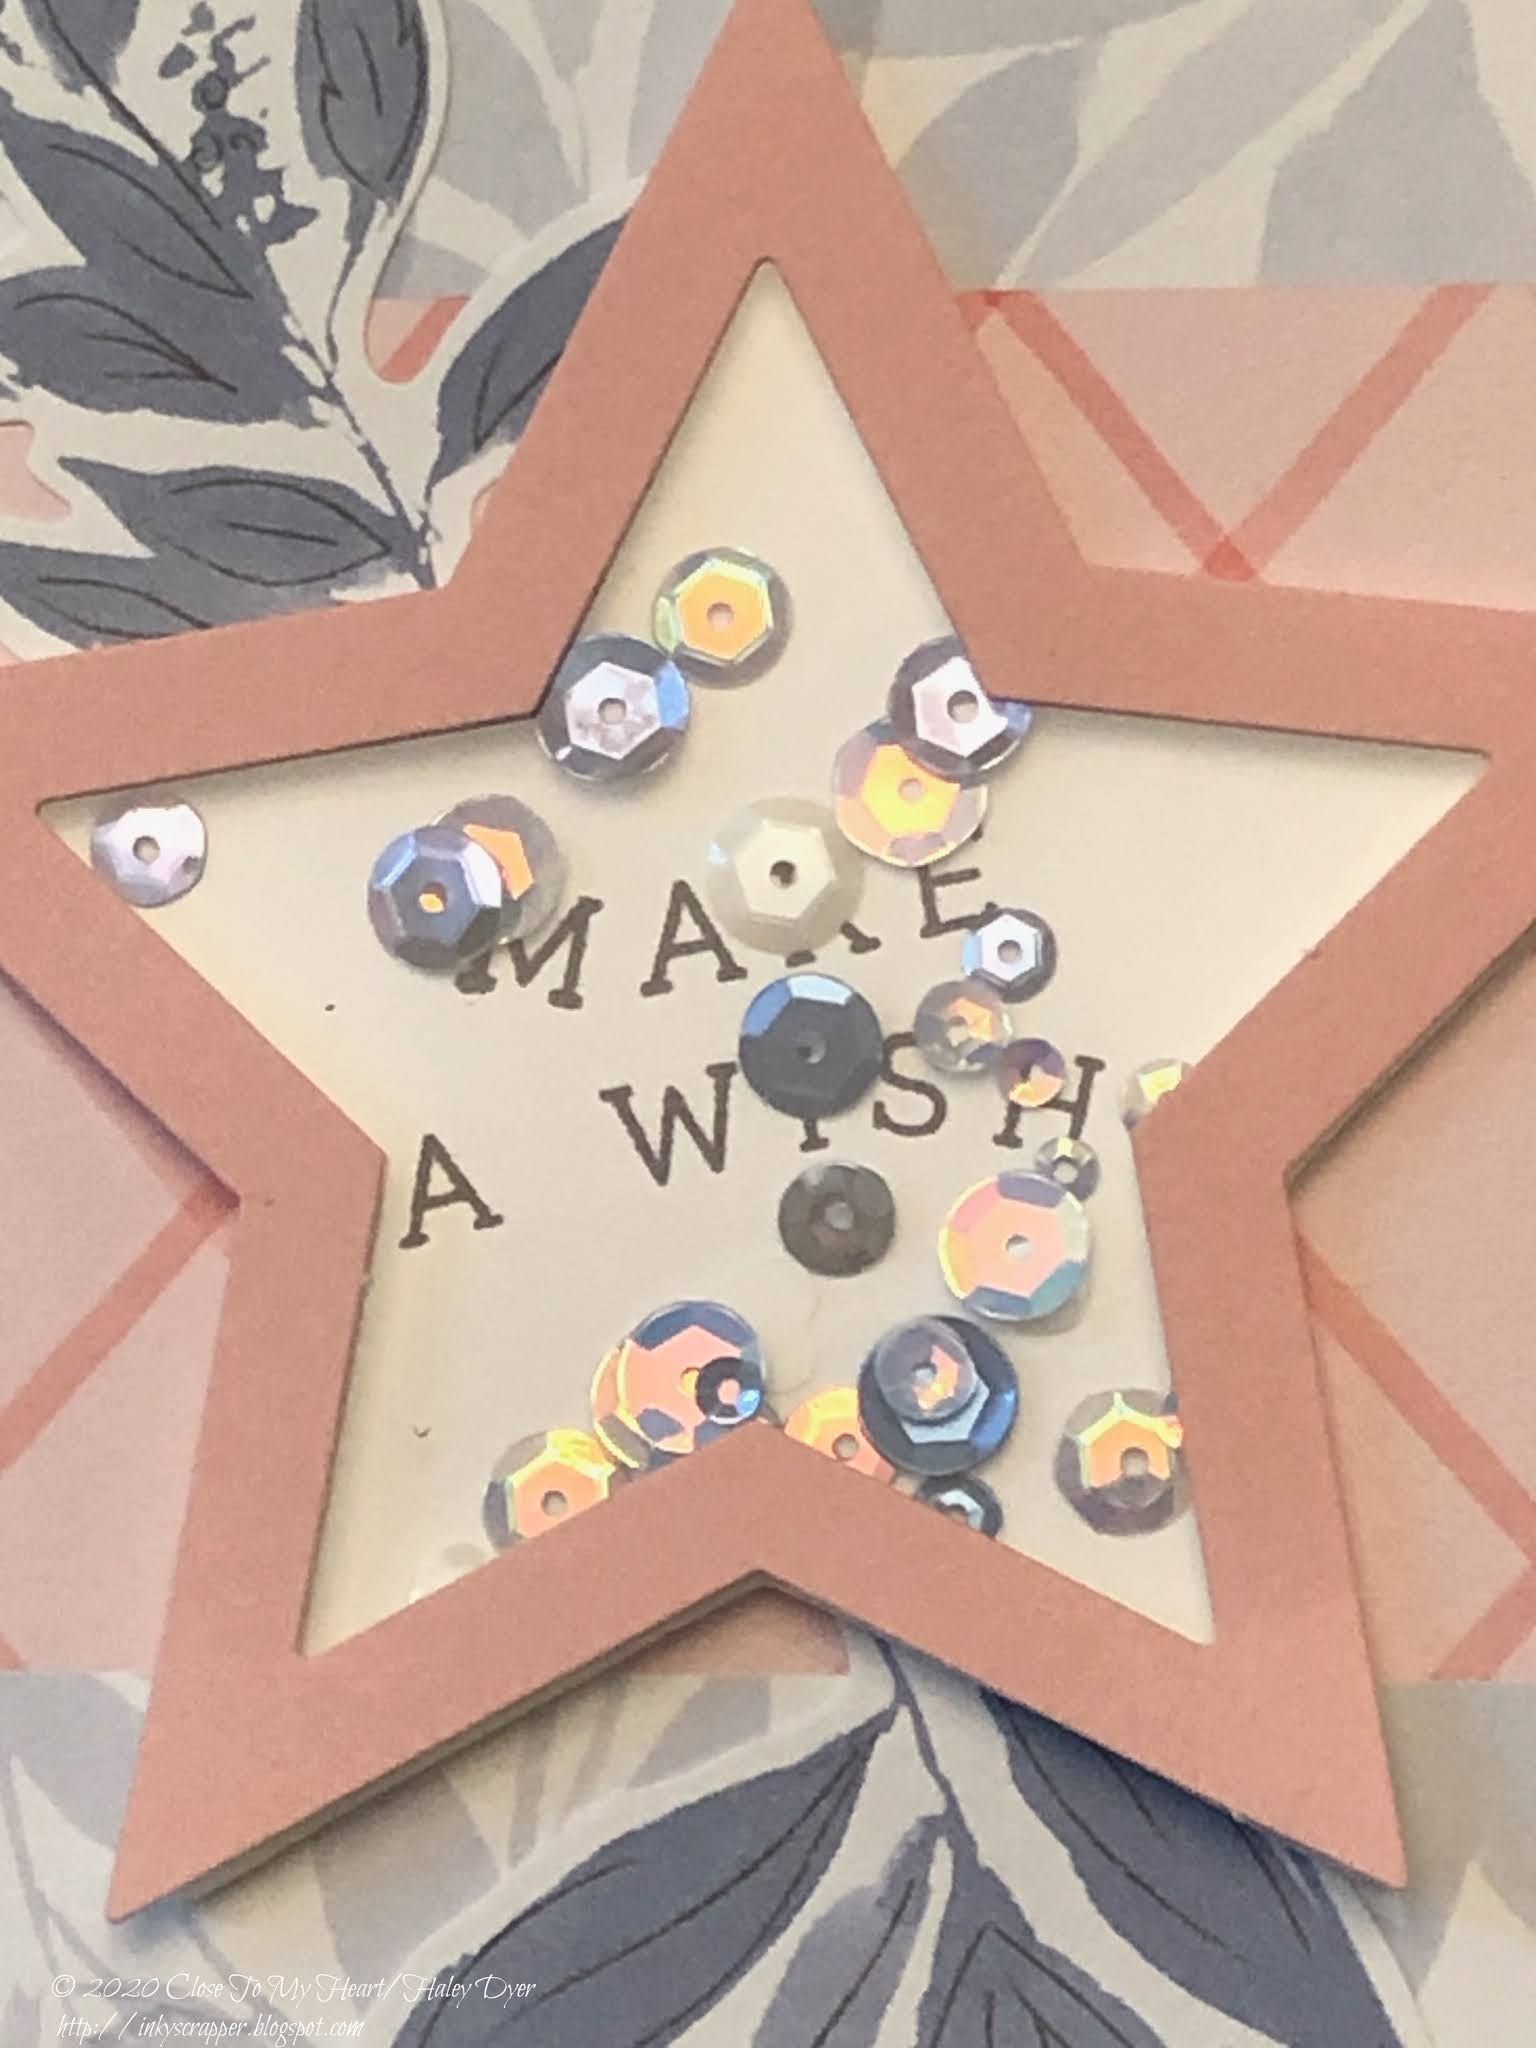
My new Craft with Heart card subscription box arrived recently, and I was itching to play with it!  I decided to make card #2 as a birthday card instead of a thank you card.  I stamped the "Make" and "a Wish" from the same banner stamp by inking up parts at a time instead of all at once so it would fit in the NEW star shaker window.  I have to say, the star window is way easier to use than the circle windows because it holds its shape so much easier!


Here's a close up of the star shaker window and the gorgeous NEW Blue Belle loose sequins.

This card went to a special friend who recently had a birthday.  If you haven't checked out the scrapbooking and cardmaking Craft with Heart subscriptions before, head to your consultant's website to see how cool (and quick & easy) they are!  I made this card in under 15 minutes, and it packs a lot of punch (if I do say so myself).  (If you don't have a consultant, you can learn more HERE.)

Heart2Heart Challenges has FIVE challenges for the month of September, so join us before they expire on the 30th!  We always love to see your creations.


Thursday, September 10, 2020

September/October 2020 Idea Book New Product Blog Hop

Every two months, Close To My Heart releases a special, seasonal Idea Book supplement to our core line, and I think the September/October edition is going to blow you away!  Hop along to see lots of new product and amazing projects.  (If you're already hopping, then you've probably arrived from Gina's blog.  From here, you'll visit Lauren's blog next.)
Don't you love the NEW Bloom with Grace collection?  I paired it with the Operation Smile Every Bit of Wonderful stamp set (which will be available all year and not exclusive to Sept.-Oct.).  I stamped the sentiment on the French Vanilla panel with NEW Desert Rose ink (which also matches the card stock base).  I stamped the flower in Desert Rose on Canary card stock and then fussy cut it out.  I also stamped the foliage in Fern.  I added gold glitter gems and a heart from the Bloom with Grace wooden cutouts.  This card will be heading to my daughter at UGA soon...  
My second card came together quickly using a Make It From Your Heart sketch.  I used the same materials as the first card plus added in gold shimmer trim.  I'm sending this one to a special teacher bestie who is such an inspiration and friend to me.  (I am finishing up week 4 of both face-to-face and simultaneous online teaching, with Fridays being online days for everyone, so I am especially grateful for my tribe right now!)

Thank you for visiting!  If you like my quick & easy cards, feel free to copy them.  Please leave a comment before hopping to Lauren's blog next!
{Click HERE for all the hop participants and their blogs.}

Saturday, September 5, 2020

First Day of School 2020 Layout

 This year has certainly been a year like no other, and the start back to school was no exception!  My school system had two weeks of pre-planning and started back on August 17.  Families had the option of starting online for the first nine weeks or starting back face-to-face.


My layout uses the July/August Mix-In papers in Smoothie, Peach, Glacier, and Sapphire.  I used three different stamp sets that are now retired.

I'm using a flip flap on each page to be able to add more photos.

I colored the stack of books with markers, and the hand sanitizer is two stamps.

The pink hearts are from the previous catalog's Mix-In collection.
If you look really closely, you'll see that I embellished with silver glitter gems and silver star confetti.  (Squeeze a little liquid glass onto scrap paper.  Use a toothpick to transfer glue to the stars and then place).


My adorable assistant doesn't always know when to behaave!

LinkWithin

Related Posts with Thumbnails