Friday, February 28, 2014

March Stamp of the Month Blog Hop: Happy Place

It's time for the March stamp of the month blog hop!  Be sure to click through the entire hop to see some fabulous ideas with the March stamp of the month, Happy Place.  (If you're already hopping, then you've probably arrived here from Judy Faye's blog.  You'll visit my fellow Heart 2 Heart Challenges design team member, Jen Patrick, next.)
As soon as I saw this stamp set, I thought of my Grandmother!  She definitely inspired my love of nesting dolls.  I gathered up some old photos that had all been taken at her house to create this layout.  (Too bad I couldn't find any photos of her nesting dolls, but I can still tell my story without them.)
 Using two sketches from Reflections and the Ariana paper pack, I was able to create this layout pretty quickly.  I embellished it with the Ariana Assortment and our blue & green epoxy bubbles.
 These photos are really old (1974, 1979, and mid-80s), so they aren't photographing well (but they look good in real life).
Here's a close up of those pretty nesting dolls.  I am liking our alcohol markers more and more!  They are making it easier to color these girls!
Can you tell which kid is me?

{Hint: I'm sitting beside my grandmother.}

Thanks for hopping by.  Go check out Jen's creation now!

Monday, February 24, 2014

H2H Challenges: Shabby Chic

The "shabby chic" look has been popular in home decor for quite some time, and Heart 2 Heart Challenges is asking you to take this style to your paper crafting projects.
Hopefully my card fits the bill!  It's an 8"x3.5" White Daisy card stock base with layers of the gorgeous Ariana paper pack (following a sketch from Wishes).  I don't know how well you can see the little bird, but is and the sentiment are from the Love This stamp set.  You probably can't tell at all that I paper pieced the bird, but its little epoxy eye jumps out, doesn't it?

If you need a little inspiration, be sure to check out all of the H2H Design Team's creations this week.  (BTW, this week is the last February challenge, and then the voting will begin for YOUR favorite creations!)  Show off your shabby chic style and link up by Friday!

Saturday, February 22, 2014

5"x7" Side Stair Card/Tutorial

Today is my Dad's birthday, and here is the cool card (if I do say so myself) that I made him.
It is a 5"x7" side step stair card, complete with a tutorial below.  (You can see a few other A2 side stair examples here and here.)  I really wanted to try the slightly larger size, and I LOVE the results.  It is even easier to cut and to decorate.  Begin with a 10"x7" card stock base.  If you want to stamp your base, do this before cutting and scoring.
Place a short side against the measuring edge of your paper trimmer (so that you will be making a long cut, as shown above) and set the left corner at 3".  On the cutting arm, move your blade to 2.5".  You will cut from 2.5" down to 9".  Next, turn your card 90 degrees so that the long edge is against the measuring edge of your trimmer.  USE YOUR SCORING BLADE and score from the cut to the edge of the base at 1".  (You are scoring the longer 4" section not the shorter 3" section.)  Move the base to 2" and score again.  Score again at 3.5".  At 5", score all the way across the entire card stock base.  The final score at 7.5" should be at the other edge of your cut.
Once you have finished cutting and scoring, first fold the card in half along the 5" complete score.  Leave the 3" side as a mountain fold, but push the other (4") side down to make a valley fold.  You will then have to fold the remaining edges to create your side stair card base.  Then you're ready to decorate!
Since my Dad's a pilot, I had to use my Lifting Spirits stamp set (even though he doesn't fly bi-wings).  I also used two retired stamp sets for the sentiments.  The Timberline paper pack is a great match on many levels: first the Ponderosa Pine color and then because he loves to go in his motorhome!  (It has a camping theme.)  I did a lot of fussy cutting for this card, but some of the clouds are from the CTMH/Cricut Artiste cartridge.
Here's a side shot so you can see how the elements and layers work together.  To finish the card, I embellished it with Gold polka dot and Lagoon houndstooth washi tape and Durables studs.  The inside has a white panel that finishes the sentiment with "growing up is optional!"

Thanks for helping me wish my Dad a very happy birthday!  I hope you're having fun celebrating in the sun.

All supplies from Close To My Heart: Lifting Spirits stamp set; Timberline paper pack; White Daisy card stock; Ponderosa Pine, Slate, Twilight, Goldrush, and Lagoon inks; Ponderosa Pine, Goldrush, and Twilight markers; Gold polka dot washi tape; Lagoon houndstooth washi tape; Durables studs; CTMH/Cricut Artiste cartridge

Friday, February 21, 2014

February Birthdays

Several family and friends celebrate their birthdays this month!  I forgot to take a picture of my sister's card, but here's the side-step card (tutorial HERE) that I made for my friend Traci using the Ariana paper pack and the CTMH/Cricute Artiste birthday stamp set and cartridge.
I used Pear, Buttercup, Blush, Hollyhock, Crystal Blue, and Outdoor Denim inks on this card.  I embellished the cupcakes with pink glitter gems and tied the balloons together with a little seam binding ribbon.
My Dad's birthday is tomorrow, so you've got to come back to see what I made him!

Thursday, February 20, 2014

Another Lollydoodle WOTG Card

This card isn't one of the sketches in the Lollydoodle Workshop on the Go (click HERE to see those "stamples"), but I did use the stamp set and the Lollydoodle paper pack to make it.  (I've used up almost every scrap from the actual Lollydoodle Cardmaking WOTG, but I had already purchased an "extra" paper pack because I knew that I would be using this one a lot this spring.)  This particular sketch if from the Make It From Your Heart, Vol. 2 how-to guide.
You may also remember that my girls' Valentine's Day cards were made with this kit.  I just love it!

Wednesday, February 19, 2014

Lollydoodle Cardmaking Workshop on the Go

If you're not familiar with Close To My Heart's Workshops on the Go (WOTG), then you are missing out on a real treat!  These kits include an exclusive stamp set, paper, and embellishments to create the projects featured in the WOTG.  All you need to add are your inks and basic tool kit. Here are the three card designs from this kit.  (You have materials to make a minimum of 15 cards, including the envelopes; 5 of each design.)


Which one do you love best?

Check back soon to see what my customers made using this set (and an additional Lollydoodle paper pack) at my recent open house.

Monday, February 17, 2014

Confirmation

Yesterday, our youngest daughter was confirmed into our church.  It was a really special ceremony with the bishop of the Diocese of Atlanta presiding.  Can you believe how big the girls are getting?!?

Here is the card that I made to commemorate her special day.
I knew that I wanted to use the soft colors of the Balloon Ride paper pack (with Crystal Blue for my blue gal).  I had planned to make the cross with the sparkles but decided that the Bronze shimmer trim would work better.  I love how it turned out!  The card sketch is one of the Make It From Your Heart, Vol. 2 patterns.  The CTMH/Cricut frame was leftover from another project, but I think it's from the Artiste cartridge.  The sentiment is from the retired Card Chatter- Sympathy stamp set.  (The ribbon and sparkles are also retired.)

Thanks for letting me share this milestone with you!  We are back to school today after four days off last week ("Snowchi" anyone?).  Work is really going to cut into my Olympic watching, but we will manage.  I've missed my students, but this will be a long week.  I also want to give a shout out to my sister and brother-in-law for their 13th anniversary and to my Danish cousin on his birthday!

Saturday, February 15, 2014

CTMH Technique Blog Hop: Washi Tape

Welcome to the wonderful world of washi tape!  (I couldn't resist some awesome- or annoying?- alliteration!)  Join me on this technique blog hop to explore the versatility of washi tape.  (If you've already started the technique blog hop, you should be arriving from Michelle Loncar's blog.  You'll go to Michelle Battitori's blog next.)
Washi tape makes decorating glass soooo easy!  I used our Ruby chevrons and silver washi tape to decorate this glass jar full of chocolate kisses.  (The top is a Ruby rose that I cut with my CTMH/Cricut Artiste cartridge.)  You could easily use washi tape to personalize glasses at a party or decorate vases to fit any theme!  The washi tape will pull off easily for clean up if you don't want to permanently decorate your glassware.
The matching card uses the (retired) Sparkle & Shine paper pack and the CTMH/Cricut Artiste cartridge again.  I covered the inside of the heart with the matching washi tape and then adhered the central panel with  the silver washi.
Here's a storage tip for you:
 I am really lucky to be able to use our basement kitchen as my crafty studio.  I have filled the pantry with my card stock.  To label each section, I cut out our color palettes from an old catalog and used my Lagoon washi tape to adhere each piece to the appropriate section of the pantry.
 I also have an entire page of our colors with my inventory checked off on it to let me know what I have and what I still need.  Again, the washi tape makes it easy to remove/update.

Thanks so much for stopping by!  Now go see what the marvelous Michelle B. has in store for you next!


Thursday, February 13, 2014

Happy Valentine's Day!

We have been hit pretty hard by snow (Snowchi, anyone?) but are headed back to school today with a two-hour delay.  Being off Tues.-Thurs. has given me plenty of crafting time (Yippee!), so here are my girls' Valentines to share with you:
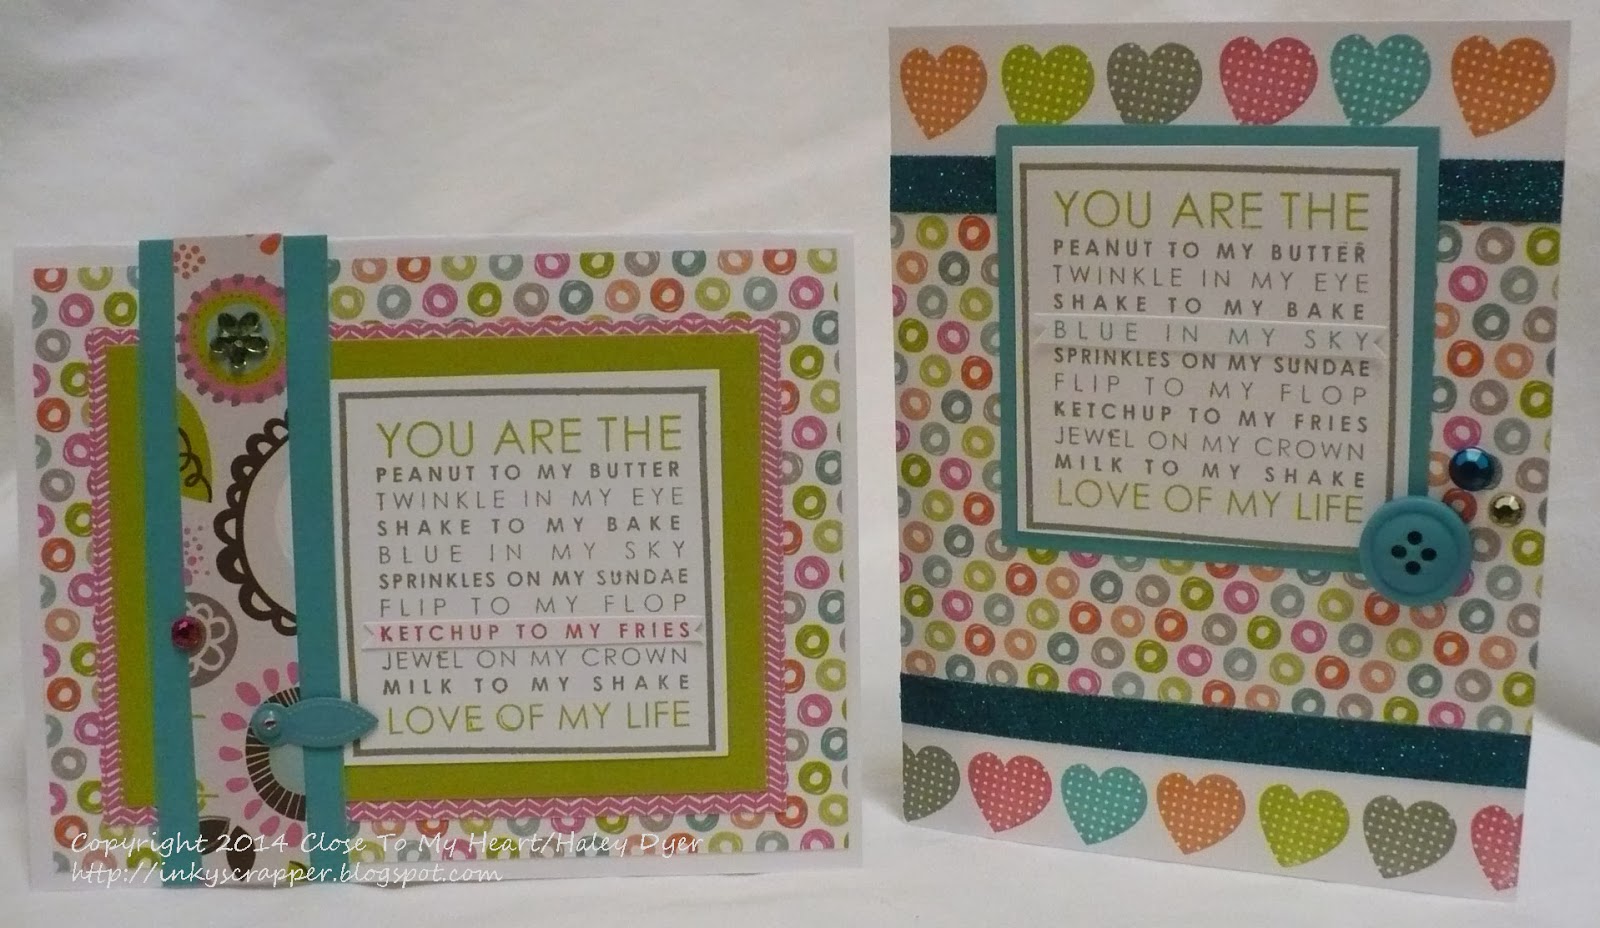
{Scroll down if you'd like to see Hubby's card!}  The girls' cards were made with the Lollydoodle Workshop on the Go stamp set paired with the Lollydoodle paper pack.  Both follow a sketch from Make It From Your Heart, Vol. 2, which makes it soooo easy to create an adorable card.  I used the Lollydoodle paper pack with Slate, Pear, Hollyhock, and Lagoon inks.
My "pink" girl LOVE ketchup, so I had to highlight the "ketchup to my fries" part of the sentiment by stamping it in Hollyhock on scrap paper and then cutting and adhering to make a banner.  Both cards use the (retired) Lagoon mini medley accents and some of our retired sparkles.
My "blue" girl is definitely the blue in my sky, stamped here in Lagoon.  This card is embellished with the new Teal shimmer trim.  So yummy!  I used Sunset, Pear, Slate, Hollyhock, and Lagoon inks to make this card.

I hope that you have a very happy Valentine's day!  Much love from me to you!  I have to link up my cards to the H2H Hearts and Love challenges!  I love being on the DT over there.

Tuesday, February 11, 2014

H2H Challenges: Hearts

Heart 2 Heart Challenges would be remiss not to host a HEART challenge this time of year!  My contribution hopefully takes a little more masculine twist on the Ivy Lane paper pack and this challenge.  (I'm planning to give this card to my DH on Friday.)
Purple & green have long been a favorite color combo for me, and I love how fresh and interesting it is in Ivy Lane.  I used Smokey Plum ink and 2nd generation Pear to coordinate with this paper pack as I stamped the sentiment from my Holiday Tags stamp set.
If you couldn't tell, my heart is 3-dimensional yet will lay flat for mailing.  Making this type of 3-D design element is easy!  I began with my CTMH/Cricut Artiste cartridge, which has the scalloped heart and plain heart together on p. 71.  They're sized to fit together, so I set my dial at 2.5" and cut the base, then cut three identical plain hearts.  I chose one for the top and folded it in half with the purple side "up."  For the other two, I folded them so that you would see the green side inside the fold.  Then I glued them all together like you see in the photo able.

Since this card is for my Valentine, I kept my embellishments simple: bronze shimmer trim and (retired) Smokey Plum Sassy Strands.  (Who remembers them?!?  It's my 14th CTMH anniversary this month so I certainly do.)

Thanks for checking out my card!  Be sure to check out all of our H2H Team Cocoa designers' HEARTfelt creations!  I'm also linking up my card to Freshly Made Sketches #122 , the Papertake Weekly Challenge "with a heart," the Fantabulous Cricut Challenge #197 I Heart You, and the Cards in Envy "Love Is in the Air" challenge.  (Cards in Envy requires that your cards be easily mailed AKA not so "lumpy bumpy.")

Friday, February 7, 2014

CTMH Spring/Summer 2014 Idea Book Blog Hop

I am super excited about the unveiling of the Close To My Heart 2014 Spring/Summer Idea Book!  You're going to love seeing how our fabulous blog hop consultant group has put these great new products to use in this fun blog hop.  (If you're already hopping, then you've already been wowed by the wonderful Wendy Coffman. You will hop on over to the talented Terry Ann Diack's blog next.  If you get lost anywhere along the way, feel free to come back here for the complete list of hoppers.)

My contribution to this hop is a card known as a side stair step or stair step card (tutorial HERE):

To make this card, I used the NEW Balloon Ride paper pack and color palette to stamp one of the two hot air balloon images from the NEW Give a Lift stamp set with Cashmere ink onto Champagne card stock.  Then, I cut and scored my card to make the side stair step card.  If you'd like a brief tutorial on how to make this card, click HERE.  (I decided to try to keep my blog hop post short for your hopping pleasure!)  Then I stamped and cut the various elements that you see here.
To color in this gorgeous balloon image, I created several masks, sponged with the "quick coloring" technique (see my tutorial for more on how to do this), and also colored with Sorbet and Creme Brulee markers, plus Cashmere and Saddle inks with a blending pen.
The cheery "Wishing you happiness and sunshine" image was stamped onto a piece I cut with the CTMH/Cricut Artbooking cartridge.  The base was stamped with Creme Brulee ink, then I inked up and stamped the sentiment in Sorbet and Saddle.  The scalloped portion was cut with the CTMH/Cricut Art Philosphy cartridge.  The "best wishes" banner (Saddle and Crystal Blue inks) was hand cut and adhered to the very front panel.
To embellish my card, I used a resin medallion/button piece from the NEW Balloon Ride assortment and some Bronze shimmer trim.  I so love all of our shimmer trims!  (We've added Teal and Pink!)  Can you see the faux brads I made from the shimmer trim?  Just use a hole punch!  Finally, here's another fun perspective of the side stair step fancy fold card design.

If you don't already have your own Spring/Summer Idea Book, you can view it HERE.  (And if you don't have a consultant already, just let me know, and I'll be happy to get in your hands!)

Before you hop on over to the talented Terry Ann Diack's blog, I'd love to know what you think of this card, the Give A Lift stamp set, and the Balloon Ride paper pack.  Thanks for visiting!

Side Stair Step Card Tutorial


This style of card is called both a side step card and a side stair step card, but the instructions seem to be basically the same no matter what you call it.  You will begin with an 8.5"x4.25" card stock card base.  Using your paper trimmer with the short side flush to the top (perpendicular to the cutting edge) make a cut at 2-1/4" wide and from 2-1/8" at the top down to 7-1/2" at the bottom.
Next, turn your card 90 degrees so that the long edge is flush to the top and you're cutting down perpendicular to the short edge.  Use your scoring blade to score the card base as follows:
From the cut to the edge, score at 1", at 2", at 3-1/8", then all the away cross at 4-1/4" (half of the card).  Make one last score from the cut edge to the outside edge at 6-3/8".
You may be able to see the scoring better in the following picutre.
You can find basic instructions at Splitcoast Stampers or here's a PDF by Julie Davidson.

Before you head off, I wanted to show how I used the Quick Coloring technique.  I began by stamping the balloon with Saddle pigment ink and then let it dry completely.  I created two different masks: first of the outline of the balloon so that I could sponge then blue background.  Then I stamped the image again on copy paper.  I cut out the hot air balloon portion, and then sponged Creme Brulee in those two openings.  Finally,I stamped the balloon onto some of the Sorbet and Crystal Blue B&T, cut them out, and paper pieced them onto the balloon.  (It sounds a lot harder than it actually was!)


Give this card a try!  I think you'll love the results.

Thursday, February 6, 2014

New Idea Book Open House Countdown 2

You're invited to my New Idea Book/14th Anniversary Open House this Saturday!  Drop in from 2:00 to 5:00, or visit my website if you're long distance. We have an all-new product line that is sure to wow!

Picture My Life is Close To My Heart's take on "pocket scrapbooking" (AKA Project Life).  Your kit includes preprinted cards and the page protectors to hold them and your photos.  It truly couldn't be any faster, simpler, easier!  We unveiled 8 PML kits, so you're sure to find something you like.  (You should also see our two gorgeous new albums, available both in post-bound and D-ring format.)


I'm also really excited about the expansion of our Base & Bling jewelry line.  We have gorgeous charms that you can customize to your heart's desire.

See them both this Saturday!


Wednesday, February 5, 2014

New Idea Book Open House Countdown

You're invited to my New Idea Book/14th Anniversary Open House this Saturday!  Drop in from 2:00 to 5:00, or visit my website if you're long distance.  Here's a look at our gorgeous new paper packs (all artwork courtesy of the CTMH Art Studio).

Ivy Lane:

Skylark:

Ariana:

Balloon Ride:

Lollydoodle:

Timberline:

Jubilee:

Which one do you want to play with first?

LinkWithin

Related Posts with Thumbnails