
Thursday, December 24, 2015
Merry Christmas!
My family and I would like to wish you and yours a very merry, blessed, and peaceful Christmas!
 We are spending time offline with extended family to celebrate the holiday together. May you be surrounded with love and peace today and always! Thank you for being a part of my life!
Monday, December 21, 2015
Happy Birthday, Mom!
Today we are celebrating my Mom's momentous birthday in style! (More on that later with pictures too!) The festivities began with our 2nd annual birthday spa day over a week ago for my mom with my sister, sister-in-law, and me. (Hey, we celebrate birthday SEASON!)
 Today I'll be giving her this 5"x7" card, made with the Kaleidoscope Workshop on the Go stamp and the Kaleidoscope paper pack. (I thought she needed a big card for a big birthday!) To create the focal image, I worked from the bottom up, stamping the cake plate in Whisper, then the cake layers in Pear, Canary, and Pixie with Gypsy and Canary candles on top. (I used Slate for the sentiments so they would stand out a little more. My embellishments include green and pink shimmer trim, green enamel and glitter triangles, and a faceted circle gem from the Kaleidoscope Assortment.
 Happy birthday to the best mom I could ever ask for! May today be as special as you are!


Thursday, December 17, 2015
A Few More Base & Bling Necklaces
Here are a few more of the Base and Bling necklaces that my daughter and I made to give to her besties.
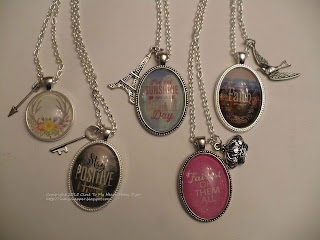
We hope that they like them. They are so fun and easy to make!

We hope that they like them. They are so fun and easy to make!
Monday, December 14, 2015
H2H Challenges: Gifts from the Heart
We all know it's better to give than to receive, so the final Heart2Heart challenge of 2015 is "gifts from the heart." We'd love to see what you're making for gifts. (All of our December challenges run through the end of the month, so you can wait until after the holidays so that you don't "spill the beans.")
 This evening my older daughter and I made pendants for several of her girlfriends. When they are thoroughly dry (tomorrow), then we will add charms (snowflakes, jingle bells, and charms) before sending them to their special someone. Here they are modeling two of the jingle pendants.

 (For some reason the girls wouldn't let me show their faces.) I would like to wish each of you a very blessed Christmas! Be sure to check out what all of the H2H Designers have to share with you this week.


Sunday, December 6, 2015
CTMH Blog Hop: Stamping Techniques
This month, my group of blog hoppers decided to share some stamping techniques with you! (If you're already hopping along, then you should have found me from Michelle B.'s blog. You'll visit Terrie's blog next.) I wanted to give you some easy gift ideas. You can take one stamp set and paper pack to create a lovely card set to give as gifts. For the first cards, I random stamped the flowers from the Sangria Workshop on the Go stamp set on my card bases. The first cards use the Sangria paper pack (Poppy, Pomegranate, and Eggplant inks) and the second uses the Nevermore paper pack (Eggplant, Slate, and Whisper inks). When you random stamp, start with the largest image first and work in triangles of 3 images.


For the next cards, I used the vine stamp in a very definite pattern. There wasn't anything random about the stamping on these cards! Again, the first picture is the Sangria collection and the second is Nevermore.


Don't you love how changing your color palette/paper pack totally changes the feel and look of your cards? Though I did use my Cricut for some of the card sentiments, you could fussy cut the pieces also. I am a huge fan of our shimmer trim since it easily adds lots of sparkle without any bulk. I used Coral on the Sangria cards and Silver on the Nevermore set. I also used Poppy thick twine, metallic bakers twine, and silver sequins for some holiday sparkle.
I hope these cards have given you some ideas for some quick and easy stamping techniques and holiday gifts. Now go see the terrific project TERRIE has to share with us!
 |
| Click HERE for all the hop participants and their blogs. |
Tuesday, December 1, 2015
December Stamp of the Month: Candlelight Garden
Welcome to the December stamp of the month blog hop featuring the Candlelight Garden. (If you're already hopping, then you should have arrived from here from Terrie's blog. You'll visit Michelle B.'s blog from here.) I have two very different cards to share with you today. Both of them use our watercolor paints.
 When I saw this stamp set, I knew that I wanted to watercolor the flowers in the mason jar. I used the Kaleidoscope paper pack and its pretty pastel palette as my inspiration. To keep my stamped images from smearing with the watercolors, I stamped them in Slate pigment ink. Doesn't the B&T paper look like flower petals? In case you can't tell, I stamped the string of lights across the top of the Pear card base and then colored the lights with yellow watercolor paint. I like how the paint holds its color on a colored base.

The second card features the White Pines paper pack. You can read more about it HERE if you'd like. All of the yellow on the card is watercolored. I used Chocolate pigment ink to keep the images from smearing and paper pieced the votive candle.

Thanks for visiting! I hope that my Candlelight Garden cards have inspired you to start creating. Be sure to check out Michelle B.'s blog next to continue the hop for even more great ideas!
 |
| Click HERE for all the hop participants and their blogs. |
Monday, November 30, 2015
CTMH Cyberweek Sale!

CTMH is offering a fabulous Cyberweek Sale on 39 different crafty items, just in time to get your holiday craft projects ready for the gift-giving season. The CTMH/Cricut Artfully Sent collection is included too! This sale will run while supplies last, Monday 11/30 (11 AM EST) through Friday 12/4 (6 PM EST). You can order directly on my website or contact me directly. Also, the planner bundle will be available 12/1.

Z3111 Base & Bling Snowflake Charm—Faux Gold
Z3112 Base & Bling Jingle Bell—Faux Gold
Z3135 Base & Bling Snowflake Charm—Faux Silver
Z3136 Base & Bling Jingle Bell—Faux Silver
Z3138 Base & Bling Red Bead Charm—Faux Gold
Z3139 Base & Bling Red Bead Charm—Faux Silver
Z3180 Picture My Life™ Going Places Scrapbooking Program
Z3147 Cut Above™ Dapper Giraffe Card Kit
Z2028 Designer Creations Short Stack Album
Z2036 Designer Creations Slate Paper Bags
Z2037 Designer Creations Lagoon Paper Bags
Z2038 Designer Creations Ruby Paper Bags
Z2039 Designer Creations Honey Paper Bags
Z2049 Designer Creations Cupcake Box
Z2050 Designer Creations Takeout Box
Z2053 Designer Creations Buttoned Bag
Z1838 5" x 7" Hinged Display Tray
Z1750 Designed Décor Display Tray
Z2006 Designed Décor Red Magnetic Chalkboard
Z2015 Designed Décor Black Shadow Box
Z2016 Designed Décor Colonial White Shadow Box
Z1833 My Creations™ Kraft Container
Z1871 My Creations™ Kraft 3-Ring Album
Z1953 My Creations™ Journaling Cards Box
Z1956 My Creations™ Hip Pics Album
Z3043 My Creations™ Black Mini Book
Z3044 My Creations™ Kraft Mini Book
Z3069 My Creations™ Mini Mix Album
Z3137 My Creations™ Pint-Sized Container
Z3168 Cricut® Artfully Sent Collection
Z1476 4 ¼" x 5 ½" White Daisy Envelopes
Z1477 5" x 7" White Daisy Envelopes
Z1478 6" x 6" White Daisy Envelopes
Z1756 3" x 3" Colonial White Envelopes
Z1757 4 ¼" x 5 ½" Colonial White Envelopes
Z1758 5" x 7" Colonial White Envelopes
Z1759 6" x 6" Colonial White Envelopes
Z1851 Scallop Border Punch
Z1997 Triangle Border Punch
H2H Challenges: 'Tis the Season
Our first December challenge from Heart 2 Heart is "'Tis the Season," Seasonal Expressions that is! We want you to share anything you've made with product(s) from the CTMH Seasonal Expressions supplement. Since the December stamp of the month, Candlelight Garden, and the White Pines paper pack are both featured exclusively in the Holiday Expressions supplement, I wanted to share a card I made with them both.
This card doesn't scream Christmas to me, but it does look lovely (in my humble opinion) for this time of year. I began with a sketch from Make It From Your Heart, Vol. 2. To stamp the main image and sentiment, I used my Chocolate pigment ink because I knew that I wanted to add watercolors. (The lights at the top are stamped with Champagne ink.) I paper pieced the candle itself with a Glacier piece of B&T (from White Pines). I watercolored the lights, the candle flame, the candle "halo," and the "halo" around the LIGHT sentiment too. I used a little red shimmer trim and a red enamel gem to finish off the card. (My older daughter fell in love with this card, so I image that she will be giving it to one of her friends soon.)
Now go see how our Design Team can inspire you on the H2H blog!
Now go see how our Design Team can inspire you on the H2H blog!
Sunday, November 29, 2015
Cheers 2016 Card
You only have one day left to get the adorable and versatile November stamp of the month, Cheers!
 The card uses the La Vie en Rose paper pack, Cheers stamp set, and CTMH/Cricut Artistry cartridge to ring in the new year. Can you see the liquid glass and sparkles on the wine glass? Very fun! I embellished the card with some silver shimmer trim, a Slate twist tie, and a bow tie from the La Vie en Rose assortment.
2016 will be here before we know it, so make the best of 2015! Get your November stamp of the month before it is gone by clicking HERE.

2016 will be here before we know it, so make the best of 2015! Get your November stamp of the month before it is gone by clicking HERE.
Friday, November 27, 2015
Christmas Tree Card
It is time to get the Christmas season started! At my recent card class, we created this Christmas Tree card with scraps from the Simply Fundamentals workshop, using pieces of the Fundamentals Enchantment New England Ivy and Fern card stock paired with the White Pines paper pack and the CTMH/Cricut Art Philosophy cartridge and stamp set.
 To stamp the large tree, we inked up the stamp first in Fern and then New England Ivy for the bottom half. The card is embellished with the White Pines assortment, red enamel gems, and red shimmer trim.
Wishing you a season of peace and hope!

Wishing you a season of peace and hope!
Tuesday, November 24, 2015
Fundamentals Frame
My daughter wanted to make something for her boyfriend for their four-month anniversary, so we decided to frame their recent Fall Ball picture. (Do NOT even comment on how she could be old enough to have a boyfriend, go to Fall Ball, etc.! I can't handle it!!!) Here is what we made together.
 The background is a 5"x7" piece of Sapphire Fundamentals card stock. We added (retired) Cashmere and Chocolate pieces along with gold shimmer trim. We cut the photo itself with the CTMH/Cricut Art Philosophy cartridge. The flowers and brad on the outside of the frame are some that I had in my stash. She made a frame for herself and one for him too (though his flower was a little less feminine). Here's a couple of close ups of their adorable selves. How did my baby get to be a freshman and so grown up?!?


Monday, November 23, 2015
H2H Challenges: Grateful for... Simply Fundamentals #2
For the final November Heart2Heart Challenge, gratitude, I started the second layout from the Simply Fundamentals workshop. (I will finish the layout after I get more family photos this Thanksgiving week.)
 My mother-in-law wanted an updated family photo, so I had my mom take this one after church. To customize the layout, I cut the "grateful for you" shield from Goldrush and Peacock card stock cut with the CTMH/Cricut Artistry cartridge. The leaves are leftovers from my watercolor card class, and they look lovely with the Poppy and Goldrush base colors of the layout. I embellished the layout with stamps from the CTMH/Cricut Artistry collection in Peacock and Goldrush. I added Poppy thick twine and Blue enamel dots to complete this page.
Thanks for stopping by! Be sure to check out all of the H2H DT's gratitude projects. Happy Thanksgiving week!

Thanks for stopping by! Be sure to check out all of the H2H DT's gratitude projects. Happy Thanksgiving week!
Wednesday, November 18, 2015
H2H Challenges: Watercolors
At my card class Sunday, we played with our new watercolors a little bit, which was just in time for the Heart2Heart watercolor challenge. I knew that I wanted to use watercolor paint to create fall leaves. (BTW, I told my class participants that I am in no way a watercolor expert! In fact, my first attempt looked like something a kindergartner would have made- or maybe not even that good.) Here is my card:

To create the leaves, I began with a watercolor wash on a sheet of 12"x12" watercolor paper. Be sure to wet the paper (in small areas) with water before adding the paint. That will help the colors run and blend to make unique patterns. After it dried, I splattered the eggplant and cocoa paint colors on the piece. Finally, I cut out leaves with the CTMH/Cricut Artistry cartridge.
 Here's a close up of the card panel. I splattered the sentiment panel with watercolors and outlined the leaf cut with my journaling pen to give it more definition.
 I can't wait to try this with other colors and die cut pieces. I hope you'll join the H2H watercolor challenge this month!

To create the leaves, I began with a watercolor wash on a sheet of 12"x12" watercolor paper. Be sure to wet the paper (in small areas) with water before adding the paint. That will help the colors run and blend to make unique patterns. After it dried, I splattered the eggplant and cocoa paint colors on the piece. Finally, I cut out leaves with the CTMH/Cricut Artistry cartridge.


Sunday, November 15, 2015
Get Back to the Fundamentals: Technique Blog Hop
With the great Close To My Heart Simply Fundamentals special this month, the Technique Blog Hop is featuring this awesome paper for some amazing projects. (If you're already hopping, then you should have arrived here from Tonya's blog. You will visit Shirley next.) Did you know that the paper is two-sided card stock: one side features a clear embossed pattern and the other side has the same pattern but in white. For my project, I decide to show how I customized one of the layouts from the workshop guide. (Ask your consultant to share it with you, or contact me if you don't already have a CTMH consultant.)

I decided that I wanted to use layout #4 for our recent Band Senior Night photos. Since our school colors are purple and gold, I switched out the original Ruby background for the Eggplant card stock in the Enchantment Fundamentals paper pack.

Also, instead of using the Sapphire accents, I grabbed some Black card stock instead (which leaves the Sapphire for another project). I also decided not to use both sheets of Eggplant as the 12"x12" background but rather used White Daisy from my stash instead. That gives me more of the Eggplant Fundamentals to use in another project.

Don't be afraid to customize the workshop to fit your photos! Be sure to check out all of the Technique Blog Hop Fundamentals creations. You will continue by going to SHIRLEY next!
 |
| Click HERE for the complete hop list. |
Tuesday, November 10, 2015
November Stamp of the Month Meets Retrosketches
When I saw the Retrosketches Challenge #189, I knew that I wanted to play along, so I grabbed my Close To My Heart November stamp of the month, Cheers, and the White Pines paper pack.
 To make this New Year's card even more festive, I used both gold and silver shimmer trim for the center band. I stamped the stars in Glacier on the Glacier card stock card base and then the pennant, 2016, and the focal sentiment in Cranberry. I used a few sequins from my stash to add a little more bling.

 Happy 2016 (a few months early)! In the crafting world, it's never too early to work ahead. Thanks for visiting. Cheers to you today and always!


To make the clock pop (literally), I took a skinny piece of scrap B&T and accordion folded it so that the clock will bounce around a bit.

Monday, November 9, 2015
H2H Challenges: Trending Right Now
Today's Heart to Heart Challenge is "trending right now." My card became something totally different than what I thought I would make, and that is fine with me!
 First I wanted to pair the White Pines (Christmas) pack with Sangria (Fall) as suggested on the Make It From Your Heart blog. I also wanted to use the trendy chevron pattern from Sangria. As I flipped through my CTMH/Cricut Artistry cartridge booklet, I found the trendy deer heads that seem to be all the rage now, and a card was born. I also cut the trendy sentiment feather from the same cartridge (but it is stamped with the Artfully Sent sentiments set).
 At this angle, the bronze shimmer trim and (retired) Fundamentals Basic paper really shines. The NEW Fundamentals paper has different embossed patterns that you'll love. I finished off the card by tying some Neutral Metallics baker's twine around the card front.
Be sure to check out all that's trending on the H2H blog, and join us this month!


Be sure to check out all that's trending on the H2H blog, and join us this month!
Friday, November 6, 2015
Simply Fundamental Blog Hop
Have you heard about the Simply Fundamental Scrapbooking bundle this month? Close To My Heart is offering an album of your choice, the Enchantment Paper Fundamentals paper pack, the Enchantment Fundamentals stickers, a Peacock Fundamentals assortment, three sheets of White Daisy card stock, AND free page protectors! The Fundamentals line is so cool because one side features a clear embossed design and the other side features the same design in white. Two looks for one paper! My blog hop consultant group was so excited that we're featuring the Paper Fundamentals to show how amazing these papers and this offer are! (If you're already hopping then you've arrived here from Gina B.'s blog. From here, you'll click to go to Jennifer D.'s blog next.)

When the bundle was announced last month, I fortunately had a pack of the Enchantment Paper Fundamentals already, so I printed off the five-page workshop guide and got to work. I had tons of fun one Saturday morning cutting and creating my layouts! Here's what my floor looked like: I placed the base pages in order for layouts 1-5 and then as I cut the various pieces, I placed them in the correct layout pile. Easy peasy!

Don't be afraid to customize the layout guide to fit your photos. Because I had already selected this layout for my chorus concert photos, instead of using the four small squares on the right side layout that the guide suggests, I did not cut those piece of Peacock Fundamentals (which means more scraps for other projects- COMING SOON!).
 Because I don't have the Fundamentals assortment that come in the bundle (yet), I used my School Years and Geek Is Chic stamp sets along with my Cricut alphabet stamp set to embellishment my layout. Some blue enamel gems and gold sequins added a little sparkle.

Two of the five already have pictures on them, and I have big plans for the scraps. I'll be sharing more this month, so come back often. Before you hop off to the next stop, I'd love for you to leave a comment. Thanks! Go check out Jennifer's project next!

When the bundle was announced last month, I fortunately had a pack of the Enchantment Paper Fundamentals already, so I printed off the five-page workshop guide and got to work. I had tons of fun one Saturday morning cutting and creating my layouts! Here's what my floor looked like: I placed the base pages in order for layouts 1-5 and then as I cut the various pieces, I placed them in the correct layout pile. Easy peasy!

Don't be afraid to customize the layout guide to fit your photos. Because I had already selected this layout for my chorus concert photos, instead of using the four small squares on the right side layout that the guide suggests, I did not cut those piece of Peacock Fundamentals (which means more scraps for other projects- COMING SOON!).


Two of the five already have pictures on them, and I have big plans for the scraps. I'll be sharing more this month, so come back often. Before you hop off to the next stop, I'd love for you to leave a comment. Thanks! Go check out Jennifer's project next!
 |
| Click HERE for all the hop participants and their blogs. |
Wednesday, November 4, 2015
Cheers Graduation Card
As soon as I saw the November stamp of the month, Cheers, I couldn't help but think of graduation! Maybe we have "senior-itis" here with our oldest graduating in 2016, but I can see the versatility of this set. Here is part of my inspiration:

For this card, I paired it with the edgy Urban paper pack.
 This sketch is from Make It From Your Heart, Vol. 2. For the left panel, I stamped images from the Cheers set in Saffron, Peacock, Sapphire, and Slate. It was easy to use two colors (Saffron and Sapphire) on the focal image. You may not be able to tell, but I used a faux leather technique on the Saffron band across the card: I stamped the stars in Saffron and Saddle, then crumpled and wadded up the piece. I inked the "wad" of card stock in Saffron ink to have color on some of the creases. The natural tearing and breaking down of the paper just adds to the cool effect. I finally finished off the card with a strip of bronze shimmer trim and a blue enamel dot.
Cheers to 2016!

For this card, I paired it with the edgy Urban paper pack.

Cheers to 2016!
Sunday, November 1, 2015
November Stamp of the Month Blog Hop: Cheers!
Cheers to the November stamp of the month! It's time for our monthly stamp of the month blog hop, and this time we have over 30 talented consultants sharing their projects with you. (If you're already hopping then you've probably arrived from Melissa's blog. To see all the other great ideas, continue on to Paige's blog next.)

When I saw this set, I immediately thought of GRADUATION! That is probably because our older daughter is a senior this year. I made this single page layout as the title page/opener to her senior year scrapbook. I used a sketch that I found on Pinterest. (Unfortunately the blog itself seems defunct at this point.)

I grabbed pieces and scraps of La Vie en Rose and even a piece of Urban, my Cricut Art Philosphy cartridge, Pixie card stock, pink and black shimmer trim and various embellishments and got to work.

In addition to the November stamp of the month, Cheers, I added the "senior" stamp to the bottom right from the School Years stamp set. I used Pomegranate, Pixie, Hollyhock, Slate, and Black inks.

Please let me know if you have questions about anything. I will be sharing projects with the November stamp of the month throughout the month, so come back often. Thanks!
 Here's our girl, up close and personal. (How is she already a high school senior?!?) Cheers to you and yours! Now go see Paige's fabulous project!


I grabbed pieces and scraps of La Vie en Rose and even a piece of Urban, my Cricut Art Philosphy cartridge, Pixie card stock, pink and black shimmer trim and various embellishments and got to work.

In addition to the November stamp of the month, Cheers, I added the "senior" stamp to the bottom right from the School Years stamp set. I used Pomegranate, Pixie, Hollyhock, Slate, and Black inks.

Please let me know if you have questions about anything. I will be sharing projects with the November stamp of the month throughout the month, so come back often. Thanks!

 |
| Click HERE for all the hop participants and their blogs. |
Subscribe to:
Posts (Atom)