Enjoy this slide show of fabulous artwork with all new CTMH stamp sets!
Please let me know if you have any questions about any of the artwork. If I don't know the answer, I'll find it for you!
Enjoy this slide show of fabulous artwork with all new CTMH stamp sets!
Please let me know if you have any questions about any of the artwork. If I don't know the answer, I'll find it for you!
 products! This month I've joined a group of about a dozen select CTMH consultants to show off our Dimensional Elements. They are white chipboard shapes that are so much fun to decorate! Of course they'd be cute left white too. ;)
 have preprinted clear designs (polka dots on the alphabet, for example). It's like they've been clear emboss
.jpg) ed before coming to you. Then you can sponge color onto the Irresistibles and the white base shows through. How cute is that?
ed before coming to you. Then you can sponge color onto the Irresistibles and the white base shows through. How cute is that?.jpg)
.jpg) "recycle" some pieces you may have seen before since I've been under the weather with a nasty cold.)
"recycle" some pieces you may have seen before since I've been under the weather with a nasty cold.) These washer pendant necklaces were also part of the new catalog swap that I recently participated in. Yes, that meant that I made 40 new necklaces!

 It's a good thing these necklaces are fun to make, but I have to take a break from them (for now at least)!


 We used the Cherry-O paper pack and Workshop on the Go stamp set (no longer available).

 This card was so much fun to make that I decided to make 40 of them! What was I thinking? Well, it was time for the new catalog swap I like to participate in, so I made these little lovelies and necklaces for all the swappers.

 upposed to be pearls for June. (Next time, I will just use a large Opaque Pearl in place of the large white brad. It doesn't look as nice as I thought it would.)
 Pear ink and sparkles make a lovely peridot card?
 Here's Cranberry to celebrate a garnet birthday.
 My final card uses Pacifica for sapphires. I ended up using my light blue sparkles on other projects, so I didn't make myself an aquamarine card. Don't worry, though, there are plenty more sparkles where those come from!
 Finally, here are all forty cards lined up ready to get mailed out.
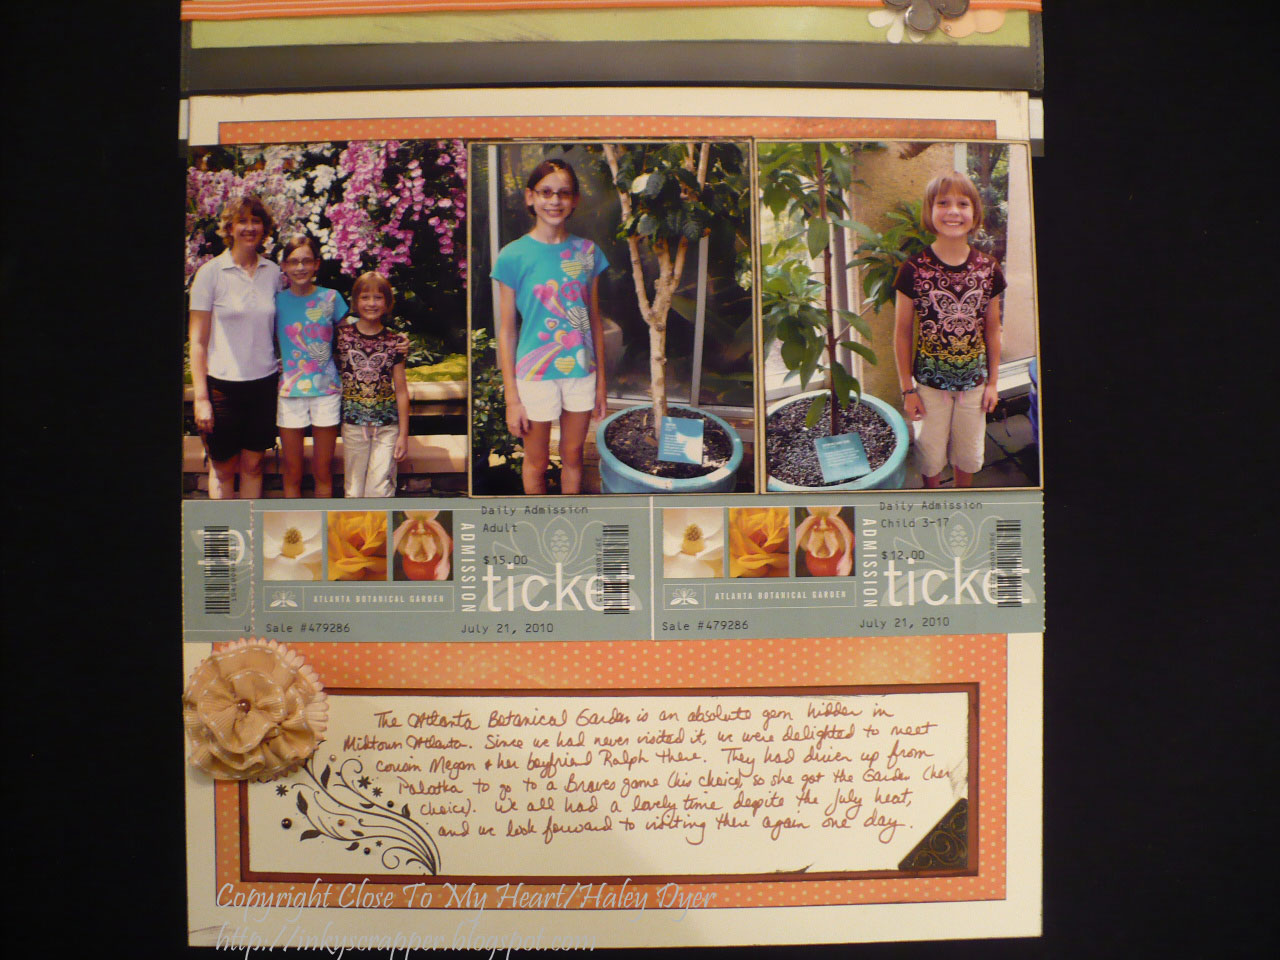
 is my absolute new current favorite (even if it didn't even place in a recent Close To My Heart consultant contest)! It chronicles our visit to the Atlanta Botanical Gardens this summer. I was able to fit sixteen photos onto a two-page 12"x12" spread. The main focal image in the left is 5"x7", and all the others were photo 4"x6" though of course some were cropped down a bit. It uses my current favorite new paper pack, Olivia, and the beautiful stamp set The Present. I based my layout on the Magic sketch, "Backstage," but made it interactive with the addition of the new 12" flip flaps.


 We spend Labor Day weekend camping near Pigeon Forge, TN, with my brother and his friends (in our camper and in their borrowed camper). This was our first trip with the kitten, who did fine after he got sick (in his crate) after going over a mountain.


 lines moved quickly. The girls rode Blazing Fury three times, and then believe it or not we tackled Daredevil Falls. Ansley (!) rode that one four times (Daddy once, Macey twice, and me three times). You probably can't tell, but
  she is in the front of the ride (on the left in the dark blue shirt). Who's the daredevil now?!?
 itters were fine.
 Here is some gorgeous artwork from the Close To My Heart Corporate Art Studio featuring the new My Reflections paper packs. Did you know that each My Reflections Level 2 paper pack includes 22 sheets of 12"x12" paper for only $12.95? You get six gorgeous B&T Duos (two-sided designer patterned paper), three sheets of colored card stock, and two neutral card stock sheets TIMES TWO!
 Christmas, but take away either the red or the green and throw in the Cocoa from this collection and you have a gorgeous, masculine combo that isn't Christmas-y at all!
 eme, but you will find uses for this paper collection year round.
 . In addition to our clear Sparkles, we now offer a set with reds, pinks, and purples and a set of blues and greens.


