Today's Heart to Heart Challenge is "trending right now." My card became something totally different than what I thought I would make, and that is fine with me!
First I wanted to pair the White Pines (Christmas) pack with Sangria (Fall) as suggested on the Make It From Your Heart blog. I also wanted to use the trendy chevron pattern from Sangria. As I flipped through my CTMH/Cricut Artistry cartridge booklet, I found the trendy deer heads that seem to be all the rage now, and a card was born. I also cut the trendy sentiment feather from the same cartridge (but it is stamped with the Artfully Sent sentiments set).
At this angle, the bronze shimmer trim and (retired) Fundamentals Basic paper really shines. The NEW Fundamentals paper has different embossed patterns that you'll love. I finished off the card by tying some Neutral Metallics baker's twine around the card front.
Be sure to check out all that's trending on the H2H blog, and join us this month!
Stamping, scrapping, and paper crafting: create, craft, and connect at my classes and online!
Monday, November 9, 2015
Friday, November 6, 2015
Simply Fundamental Blog Hop
Have you heard about the Simply Fundamental Scrapbooking bundle this month? Close To My Heart is offering an album of your choice, the Enchantment Paper Fundamentals paper pack, the Enchantment Fundamentals stickers, a Peacock Fundamentals assortment, three sheets of White Daisy card stock, AND free page protectors! The Fundamentals line is so cool because one side features a clear embossed design and the other side features the same design in white. Two looks for one paper! My blog hop consultant group was so excited that we're featuring the Paper Fundamentals to show how amazing these papers and this offer are! (If you're already hopping then you've arrived here from Gina B.'s blog. From here, you'll click to go to Jennifer D.'s blog next.)
When the bundle was announced last month, I fortunately had a pack of the Enchantment Paper Fundamentals already, so I printed off the five-page workshop guide and got to work. I had tons of fun one Saturday morning cutting and creating my layouts! Here's what my floor looked like: I placed the base pages in order for layouts 1-5 and then as I cut the various pieces, I placed them in the correct layout pile. Easy peasy!
Don't be afraid to customize the layout guide to fit your photos. Because I had already selected this layout for my chorus concert photos, instead of using the four small squares on the right side layout that the guide suggests, I did not cut those piece of Peacock Fundamentals (which means more scraps for other projects- COMING SOON!).
Because I don't have the Fundamentals assortment that come in the bundle (yet), I used my School Years and Geek Is Chic stamp sets along with my Cricut alphabet stamp set to embellishment my layout. Some blue enamel gems and gold sequins added a little sparkle.
Two of the five already have pictures on them, and I have big plans for the scraps. I'll be sharing more this month, so come back often. Before you hop off to the next stop, I'd love for you to leave a comment. Thanks! Go check out Jennifer's project next!
When the bundle was announced last month, I fortunately had a pack of the Enchantment Paper Fundamentals already, so I printed off the five-page workshop guide and got to work. I had tons of fun one Saturday morning cutting and creating my layouts! Here's what my floor looked like: I placed the base pages in order for layouts 1-5 and then as I cut the various pieces, I placed them in the correct layout pile. Easy peasy!
Don't be afraid to customize the layout guide to fit your photos. Because I had already selected this layout for my chorus concert photos, instead of using the four small squares on the right side layout that the guide suggests, I did not cut those piece of Peacock Fundamentals (which means more scraps for other projects- COMING SOON!).
Because I don't have the Fundamentals assortment that come in the bundle (yet), I used my School Years and Geek Is Chic stamp sets along with my Cricut alphabet stamp set to embellishment my layout. Some blue enamel gems and gold sequins added a little sparkle.
Two of the five already have pictures on them, and I have big plans for the scraps. I'll be sharing more this month, so come back often. Before you hop off to the next stop, I'd love for you to leave a comment. Thanks! Go check out Jennifer's project next!
![]() |
| Click HERE for all the hop participants and their blogs. |
Labels:
blog hop,
CTMH,
scrapbooking,
sketch,
special offer,
stamping,
workshop
Wednesday, November 4, 2015
Cheers Graduation Card
As soon as I saw the November stamp of the month, Cheers, I couldn't help but think of graduation! Maybe we have "senior-itis" here with our oldest graduating in 2016, but I can see the versatility of this set. Here is part of my inspiration:
For this card, I paired it with the edgy Urban paper pack.
This sketch is from Make It From Your Heart, Vol. 2. For the left panel, I stamped images from the Cheers set in Saffron, Peacock, Sapphire, and Slate. It was easy to use two colors (Saffron and Sapphire) on the focal image. You may not be able to tell, but I used a faux leather technique on the Saffron band across the card: I stamped the stars in Saffron and Saddle, then crumpled and wadded up the piece. I inked the "wad" of card stock in Saffron ink to have color on some of the creases. The natural tearing and breaking down of the paper just adds to the cool effect. I finally finished off the card with a strip of bronze shimmer trim and a blue enamel dot.
Cheers to 2016!
For this card, I paired it with the edgy Urban paper pack.
This sketch is from Make It From Your Heart, Vol. 2. For the left panel, I stamped images from the Cheers set in Saffron, Peacock, Sapphire, and Slate. It was easy to use two colors (Saffron and Sapphire) on the focal image. You may not be able to tell, but I used a faux leather technique on the Saffron band across the card: I stamped the stars in Saffron and Saddle, then crumpled and wadded up the piece. I inked the "wad" of card stock in Saffron ink to have color on some of the creases. The natural tearing and breaking down of the paper just adds to the cool effect. I finally finished off the card with a strip of bronze shimmer trim and a blue enamel dot.
Cheers to 2016!
Sunday, November 1, 2015
November Stamp of the Month Blog Hop: Cheers!
Cheers to the November stamp of the month! It's time for our monthly stamp of the month blog hop, and this time we have over 30 talented consultants sharing their projects with you. (If you're already hopping then you've probably arrived from Melissa's blog. To see all the other great ideas, continue on to Paige's blog next.)
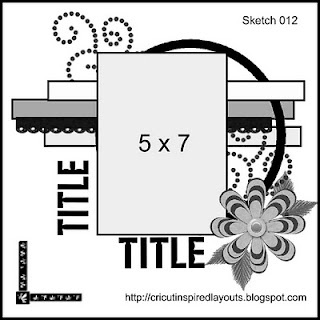
When I saw this set, I immediately thought of GRADUATION! That is probably because our older daughter is a senior this year. I made this single page layout as the title page/opener to her senior year scrapbook. I used a sketch that I found on Pinterest. (Unfortunately the blog itself seems defunct at this point.)
I grabbed pieces and scraps of La Vie en Rose and even a piece of Urban, my Cricut Art Philosphy cartridge, Pixie card stock, pink and black shimmer trim and various embellishments and got to work.
In addition to the November stamp of the month, Cheers, I added the "senior" stamp to the bottom right from the School Years stamp set. I used Pomegranate, Pixie, Hollyhock, Slate, and Black inks.
Please let me know if you have questions about anything. I will be sharing projects with the November stamp of the month throughout the month, so come back often. Thanks!
Here's our girl, up close and personal. (How is she already a high school senior?!?) Cheers to you and yours! Now go see Paige's fabulous project!
When I saw this set, I immediately thought of GRADUATION! That is probably because our older daughter is a senior this year. I made this single page layout as the title page/opener to her senior year scrapbook. I used a sketch that I found on Pinterest. (Unfortunately the blog itself seems defunct at this point.)
I grabbed pieces and scraps of La Vie en Rose and even a piece of Urban, my Cricut Art Philosphy cartridge, Pixie card stock, pink and black shimmer trim and various embellishments and got to work.
In addition to the November stamp of the month, Cheers, I added the "senior" stamp to the bottom right from the School Years stamp set. I used Pomegranate, Pixie, Hollyhock, Slate, and Black inks.
Please let me know if you have questions about anything. I will be sharing projects with the November stamp of the month throughout the month, so come back often. Thanks!
Here's our girl, up close and personal. (How is she already a high school senior?!?) Cheers to you and yours! Now go see Paige's fabulous project!
![]() |
| Click HERE for all the hop participants and their blogs. |
Labels:
blog hop,
Cricut,
CTMH,
scrapbooking,
sketch,
stamp of the month,
stamping
Saturday, October 31, 2015
Halloween Wall Hanging
My Steampunk Scoundrels stamp set arrived yesterday, so I carved out a little time this afternoon to make a Halloween wall hanging with it and the Nevermore paper pack.
The bases of the banner were cut with my CTMH/Cricut Artbooking cartridge. These cutouts are actually pages for a mini album (with the binding on the left). My older daughter thought that when they are turned with the binding up, like for the banner,that they look like cauldrons. "Boil, boil, toil and trouble..."
The simple, plain circles were cut with the CTMH/Cricut Art Philosophy cartridge. Everything else was cut with Artbooking.
...quoth the raven, nevermore.
I am linking this project up to the H2H BOO challenge. Happy Halloween!
The bases of the banner were cut with my CTMH/Cricut Artbooking cartridge. These cutouts are actually pages for a mini album (with the binding on the left). My older daughter thought that when they are turned with the binding up, like for the banner,that they look like cauldrons. "Boil, boil, toil and trouble..."
...quoth the raven, nevermore.
I am linking this project up to the H2H BOO challenge. Happy Halloween!
Wednesday, October 28, 2015
Sangria Workshop on the Go Layout #2
For my recent scrapbooking class, we made the featured layout in the beautiful Sangria Workshop on the Go kit. (I will post mine when I add pictures.) I then went on to make the second, additional layout following the kit instructions (but changed up the photo mats to fit my pictures).
This is one of those layouts that doesn't commemorate a milestone but rather captures a little moment in time. My sister was taking her boys out for Chinese in the next town over, so she invited us to join them. It was one of the few Friday nights that the girls had "off" from marching band (although they had gotten soaked at after school practice), so we jumped on the chance for good food with family.
I also included a photo of the girls teaching their cousin to play Monopoly. It wasn't from the same night but was close enough in time and subject to be included.
Don't forget to scrapbook the "small stuff" in life too!
This is one of those layouts that doesn't commemorate a milestone but rather captures a little moment in time. My sister was taking her boys out for Chinese in the next town over, so she invited us to join them. It was one of the few Friday nights that the girls had "off" from marching band (although they had gotten soaked at after school practice), so we jumped on the chance for good food with family.
I also included a photo of the girls teaching their cousin to play Monopoly. It wasn't from the same night but was close enough in time and subject to be included.
Don't forget to scrapbook the "small stuff" in life too!
Friday, October 23, 2015
Cricut Capers & a Chorus Concert
One of the October Heart 2 Heart challenges is Cricut Capers, and I put my Cricut to work to help me create this layout of our daughters' fall chorus concert.
Our older daughter, a senior, opened the show with an introductory speech, and then the curtains rose for the 135-student chorus to begin singing hits from a famous American icon and franchise.
To match her Tinkerbell costume, I chose to use Pear with pieces from the Zoe and La Vie en Rose paper packs.
The Vogue alphabet (retired) was a great choice for stamping the title on this big Cricut banner.
To make her "wings," I cut the butterfly base on vellum and then the pretty scroll overlay with White Daisy card stock. (By the way, I love that the girls decided to coordinate their costumes and performed as Tinkerbell and Wendy Darling!)
The entire layout is embellished with white shimmer trim, white sparkles, and green glitter triangles.
If you'd like to play along with any of the H2H October challenges, you have until the end of the month!
Our older daughter, a senior, opened the show with an introductory speech, and then the curtains rose for the 135-student chorus to begin singing hits from a famous American icon and franchise.
To match her Tinkerbell costume, I chose to use Pear with pieces from the Zoe and La Vie en Rose paper packs.
The Vogue alphabet (retired) was a great choice for stamping the title on this big Cricut banner.
To make her "wings," I cut the butterfly base on vellum and then the pretty scroll overlay with White Daisy card stock. (By the way, I love that the girls decided to coordinate their costumes and performed as Tinkerbell and Wendy Darling!)
The entire layout is embellished with white shimmer trim, white sparkles, and green glitter triangles.
If you'd like to play along with any of the H2H October challenges, you have until the end of the month!
Saturday, October 10, 2015
Sangria Workshop on the Go Meets Nevermore
What do you do with leftover card pieces? Make some more, with a twist! I had pieces of my Nevermore/September stamp of the month card leftover from my open house, and I had my Sangria Workshop on the Go stamp set out, so I decided to create with them together.
All the cards use the same basic ingredients, but they are each different. I used the Nevermore paper pack with Whisper, Slate, Black, and Eggplant inks plus silver shimmer trim, silver sequins, and/or grey enamel gems.
I think this last one is my favorite. I love how the leaf stamp can become a vine!
So now why don't you give it a try? See how many alternatives you can make with the same basic ingredients.
All the cards use the same basic ingredients, but they are each different. I used the Nevermore paper pack with Whisper, Slate, Black, and Eggplant inks plus silver shimmer trim, silver sequins, and/or grey enamel gems.
I think this last one is my favorite. I love how the leaf stamp can become a vine!
So now why don't you give it a try? See how many alternatives you can make with the same basic ingredients.
Thursday, October 8, 2015
Open House Recap
Last month I held my Close To My Heart Annual Inspirations open house. I was lucky to participate in several rounds of a great new catalog swap with other CTMH consultants, so what you're seeing here is a collective effort. Talk a "walk" through my open house...
| Sangria |
| Urban |
| Georgie |
| Kaleidoscope |
| Artistry Cricut Cartridge |
| Zoe |
| Zoe |
| watercolor paints |
| new colors |
| new Base & Bling |
| La Vie en Rose |
| Nevermore |
Tuesday, October 6, 2015
Holiday Expressions Blog Hop
Welcome to the Holiday Expressions blog hop! Holiday Expressions is the Close To My Heart catalog supplement featuring tons of fab holiday products. (If you're already hopping then you've probably arrived from Krista's blog. You'll check out Gina's festive Holiday Expressions project next.)
My card is actually a gift card holder. I tried to keep it simple, quick, and easy! I began with the October stamp of the month, Twinkle, and the White Pines paper pack. I grabbed a sheet of Glacier card stock and my Artiste CTMH/Cricut cartridge to cut out the gift card holder. I also used Artiste to cut out the sentiment panel and mat. I used two different pieces of White Pines B&T, red shimmer, trim, Glacier thick twine, and red enamel gems. Can you see the star-stamped border?
Thanks for hopping by! I hope you're inspired along the hop to begin your holiday crafting. Go see GINA next!
My card is actually a gift card holder. I tried to keep it simple, quick, and easy! I began with the October stamp of the month, Twinkle, and the White Pines paper pack. I grabbed a sheet of Glacier card stock and my Artiste CTMH/Cricut cartridge to cut out the gift card holder. I also used Artiste to cut out the sentiment panel and mat. I used two different pieces of White Pines B&T, red shimmer, trim, Glacier thick twine, and red enamel gems. Can you see the star-stamped border?
Thanks for hopping by! I hope you're inspired along the hop to begin your holiday crafting. Go see GINA next!
![]() |
| Click HERE for all the hop participants and their blogs. |
Thursday, October 1, 2015
October Stamp of the Month Blog Hop: Twinkle
It's time to Twinkle with the October Close To My Heart stamp of the month! If you're already hopping along the Stamp of the Month Blog hop, then you're probably here from Carol's blog. From here, you'll visit Priscilla next.
While this stamp set is perfect for Christmas, I wanted to try to use it in a different way. For my flower card, above, I turned the light bulb stamp into a flower. All of the pieces are cut with the Cricut Artiste cartridge. I had to use the new Sapphire blue plus Honey and Eggplant. I paired this flower with pieces of the Sangria paper pack, and added a New England Ivy Cricut-cut leaf.
Of course I had to use it in a bit more traditional way but the Sangria paper pack is a nice twist.
Thanks for hopping on by. Go to Priscilla's blog next!
While this stamp set is perfect for Christmas, I wanted to try to use it in a different way. For my flower card, above, I turned the light bulb stamp into a flower. All of the pieces are cut with the Cricut Artiste cartridge. I had to use the new Sapphire blue plus Honey and Eggplant. I paired this flower with pieces of the Sangria paper pack, and added a New England Ivy Cricut-cut leaf.
Of course I had to use it in a bit more traditional way but the Sangria paper pack is a nice twist.
Thanks for hopping on by. Go to Priscilla's blog next!
![]() |
| Click HERE for all the hop participants and their blogs. |
Wednesday, September 30, 2015
Last Chance for September Specials!
Last chance today for the Close To My Heart September stamp of the month, Paper Garden, and the Hello Life stamps!
Subscribe to:
Posts (Atom)