Thursday, February 20, 2020

Stamptacular Stamps + Thin Cuts Blog Hop

CTMH has a really fun Stamptacular special running right now on select stamps, stamp sets, and stamp sets/Thin Cuts bundles!  If you haven't seen it, be sure to check it all out HERE or on your consultant's website.  (If you're already hopping then you've probably arrived from Brandi's blog.  From here you'll visit Michelle's blog next.)  The projects I'm sharing all use the Spruced Up Cardmaking stamps and Thin Cuts.
This card is a CASE (copy and steal exactly- or almost exactly) of the card featured on p. 5 of the Jan.-Feb. Idea Book.  You can see how I layered the pine bough and bird onto the scalloped circle Thin Cut.
If you look closely you can see that I inked up the pine bough in Espresso and New England Ivy.

My second project is a layout of photos from a day hike we took last year on the Appalachian Trail.  (You can see more about this layout HERE if you're interested.)

My final project is on the Atlantic Hearts Sketch Challenge #356, but rather than continue with the Spruced Up collection, I tried pairing it with the Celebrate Today collection.
At first I was going to make a bluebird, but after using the Bluebird cardstock I decided to make a yellow bird (possibly a goldfinch?) instead.  I used my Citrus triblend marker and attempted some shading.

Thank you for letting me share some of my favorite projects with the Spruced Up cardmaking stamp set and Thin Cuts!  I really love this set!  Please leave a comment before you hop on over to Michelle Loncar's blog next.
{Click HERE for all the hop participants and their blogs.}


M-Fold Card

In the fantastic blogosphere, I stumbled upon a cute card fold, the M-fold, that I had to try.  (Sorry that I can't remember who to give credit to!)  I think the ladies at my recent anniversary card extravaganza liked the card too.

Start with a 5.5"x11" piece of card stock for your card base, and score it at 1.25", 4", and 6.75".  Decorate each panel as you like.  (As you can see in my photo, above, it is hard to get the card to lay flat for a photo, but it will fit easily into an envelope.)
I cut my medallion with my scalloped circle Thin Cut and then cut a Thin Cut White Daisy circle for the center.  I stamped the sentiment from the February stamp of the month, Cherishing Her, in black.
I liked piecing the zipstrip heart piece all the way across each section of the card.  You will need more than one zipstrip to do this!

Since I used the the Celebrate Today collection, I'm entering this card in the Color Dare #380 challenge.  Give this fun "fancy" card fold a try!  It wasn't hard to make at all.

Saturday, February 15, 2020

February CTMH Technique Blog Hop: Color Your World

Welcome to the Color Your World blog hop!  (If you're already hopping then you've probably arrived from the magnificent Michelle Loncar's blog.  From here, you'll visit creative Cat's blog next.)  While there are so many beautiful ways to color our world, I wanted to focus on our Spectrum Noir Tri-Blend markers.  (I needed some incentive to try to learn to use these beauties!)
 I used the February stamp of the month, Cherishing Her, with its beautiful flower bouquet and lovely sentiments, paired with the beautiful Julep ombre paper from the Mix-In collection.

Here's my marker palette:
(If you can't read it, I used Pale Pink, Hydrangea, Lavender, Light Yellow, and Light Green blends.)  If I remake this card, I will probably try the ombre marker technique behind my sentiment in Hydrangea instead of Light Green.  I think it might "pop" more that way.

I did stamp part of the center flower on scrap White Daisy card stock, color, fussy cut, and pop onto the card front with 3D foam tape to give the card some extra dimension.  I also used Black enamel dots for the flower centers to add more texture.  I might try a little Wisteria shimmer brush on top of my purple coloring next time and see what happens.

Thank you for hopping by!  Please leave a comment before hopping off to Cat's blog to continue the circle of gorgeous colors.

Friday, February 14, 2020

Happy Valentine's Day!

Happy Valentine's Day!  While my husband and I have never been huge fans of the day (Hello, 50% off on 2/15!), we do acknowledge and appreciate each other and especially our girls.  I used my current Craft with Heart card subscription to send my girls this card (the kit provides materials for two of each card):
 Both card styles are 3"x4" and include everything you need except adhesive.  Even the 3D foam tape from the shaker window is used on the first card.  I love how the heart on the card front hides the circle shape of the shaker!  (In this case, however, more silver star confetti is better than less!)  I did add the black enamel dot to the card from my stash; everything else was included (except adhesive) in my Craft with Heart Card subscription.
My second card went to my sweet niece, who is a freshman in college like our younger daughter.  (My brother and I are experiencing empty next syndrome together!)  I added Pink Taffeta Stickles glitter gel to the pretty little flowers, because I know that my niece expects/needs some bling in her life!

Here's hoping that these Valentine cards arrive on time, but even if they don't, they were made with love for three precious young women!

Happy Valentine's to you and yours!  May you have love in your heart, whether it is romantic or platonic, because as the Beatles say, "All you need is love!"

Thursday, February 13, 2020

Spruced Up Valentine Cards

When you think of the Spruced Up collection, you probably don't think Valentines, but I think that it worked well for a non-romantic/thinking of you type of card.
I used a card sketch from Make It From Your Heart, Vol. 4 and two retired stamp sets, Card Chatter - Love and For Every Occasion.

I hope that my recipients enjoyed them as much as I did making them!

Saturday, February 1, 2020

February Stamp of the Month Blog Hop: Cherishing Her

The February Close To My Heart stamp of the month, Cherishing Her, is a beautiful collection to, well, do just that.  Please hop along this monthly blog hop to get so many great ideas with this beautiful set.  (If you're already hopping then you've probably arrived from Alyson's blog.  From here, you'll visit Brenda's blog next.)
My card uses a quick sketch from Make It From Heart, Vol. 4 and the Celebrate Today paper collection.  The pretty pink heart paper was already "splattered," and I cut it from the CTMH/Cricut Artbooking cartridge.
Before assembling my card pieces, I grabbed my Mint shimmer brush and flicked it onto my card base.  It's hard to see in the picture, but it adds a pretty touch to this quick card.

The following beautiful cards were created by members of my CTMH team (including mine on the bottom right).  Don't you love the versatility of this stamp set and paper collection?

Here are a few more:
The card on the left features white embossing on vellum with marker coloring on the back.  So pretty!
The card in the middle also uses markers but check out our cool new holographic paper that changes color depending on the angle!

Finally, here's a close up of the card on the left.  Thanks again to my TEAM for these beautiful "stamples."

Thank you for hopping by!  Please leave a comment before hopping off to Brenda's blog to continue the circle of beautiful creations with the February stamp of the month.
{Click HERE for all the hop participants and their blogs.}

Wednesday, January 22, 2020

National Papercrafting Month: All Around Creativity

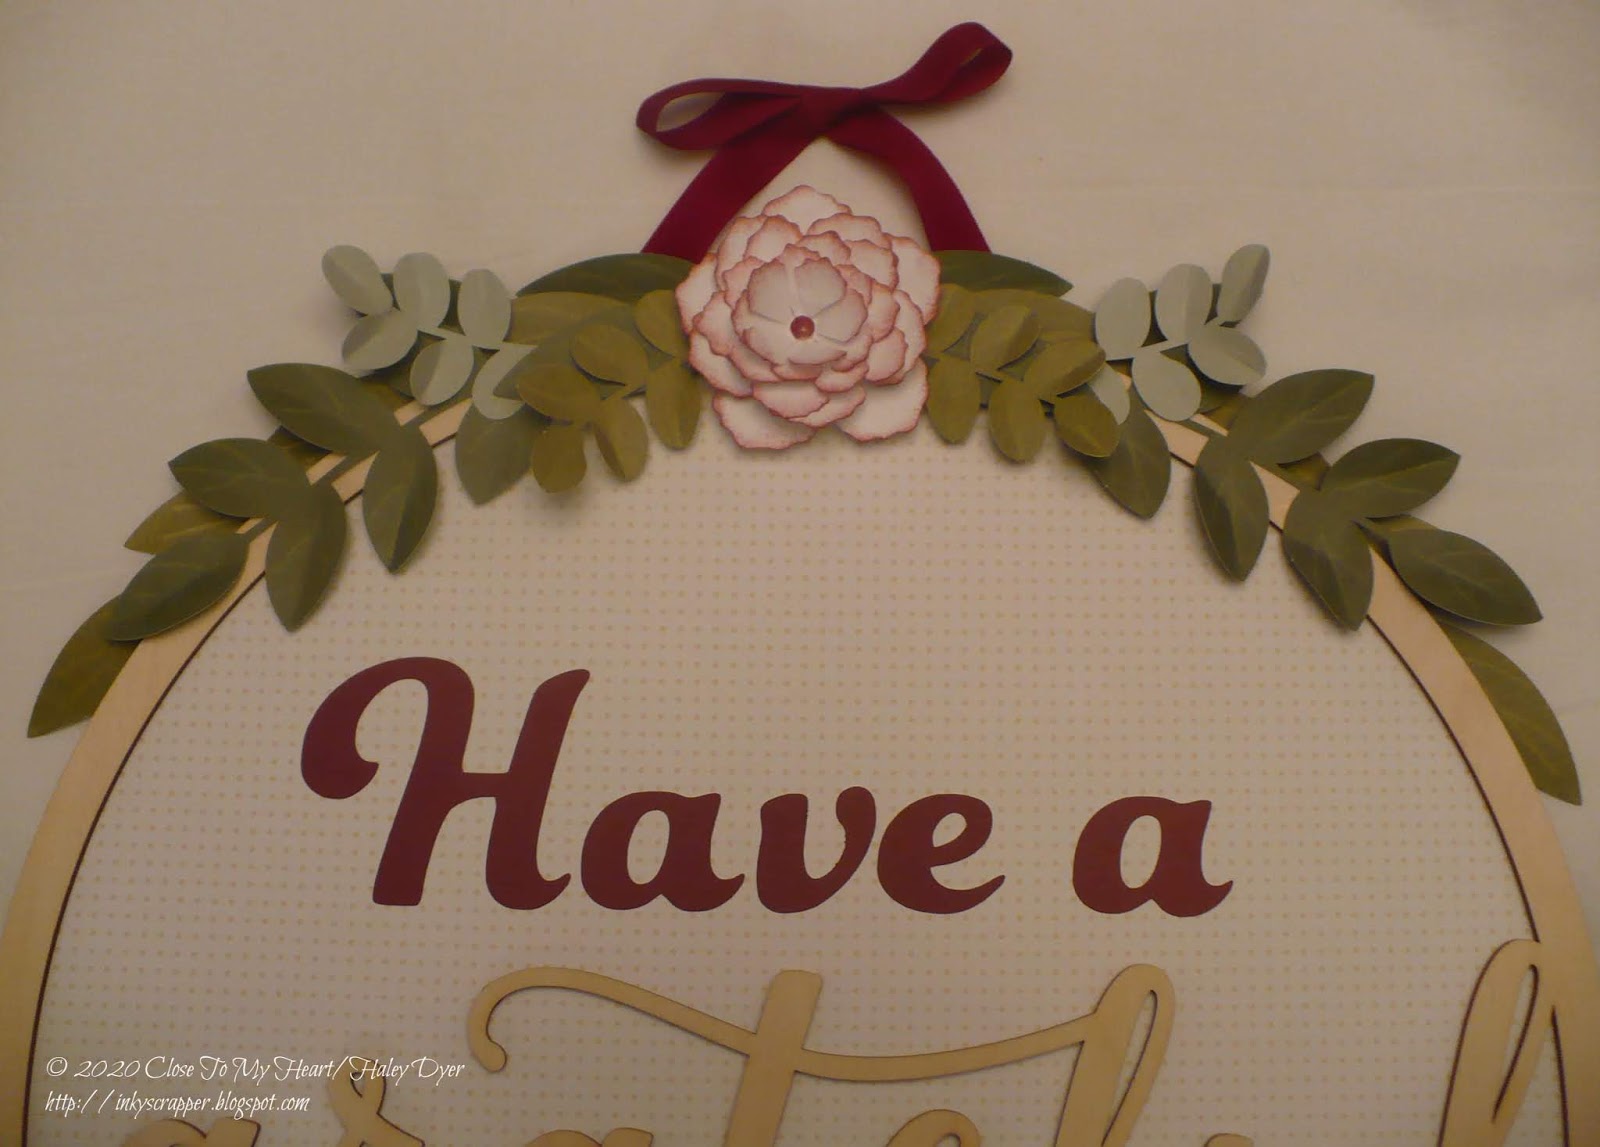
Close To My Heart is offering not 4 but FIVE versions (the 5th one just announced!) of a really pretty home decor project, All Around Creativity, through the end of February.  Here's my version:
I added the Sangria card stock, ribbon, ink, and adhesive, but everything else came right out of the kit.
I ended up only using one small flower (edges sponged with Sangria).  I added a Sangria hole punch circle to the center and then added Liquid Glass to give it some shine.  I did use every single piece of greenery.  (Some of the single leaves are attached to the back and just peek through.)
My letters are cut at 2-1/2" from the CTMH/Cricut Artbooking cartridge.  The heart is from Flower Market, and I've already forgotten what size it was.  (My first one was too big, but I'll use it for something else.)

If you'd like to see the other options or order a kit for yourself, please visit my website HERE (only available through the end of February). Thanks for letting me share my take on this project with you.  Mine is already hanging on our wall!  If you order one and need any help, just let me know!  I recommend Liquid Glass to adhere everything.

Tuesday, January 21, 2020

More Everyday Magic, January's Stamp of the Month

Here is a quick card that I made as a thank you using the January stamp of the month, Everyday Magic, paired with the Celebrate Today paper pack.
To ink the sentiment, I inked up the entire stamp with Mint, then the bottom 2/3 in Lagoon, and finally the bottom 1/3 in Bluebird.  (Looking at it now against the floral background, I think next time I'll try Lemonade, Lagoon, and Bluebird since there's so much yellow on the floral print.)  No matter what, I think it's a pretty cheerful card that will brighten the recipients' day.

The next set of cards were all made by my teammates.  Unfortunately, I can't give credit to the original artists because most are unsigned, but I wanted to share their fabulous ideas with you instead of keeping them to myself.

This lovely set of sentiments is only available until the end of the month!  Get yours before time's up!

Monday, January 20, 2020

H2H Challenges: Spruced Up

Not going to lie, Spruced Up is a big hit in my opinion!  It was super easy for me to participate in this week's Heart2Heart challenge!
Here are pictures of my daughter, husband, and I hiking a section of the Appalachian Trail early last yaer.
Here is the view from Neel's Gap/Mountain Crossing plus the Spruced Up Cardmaking stamp set and Thin Cuts.
The chickadee was stamped in Black, and the evergreen sprigs are stamped in Espresso and New England Ivy.
Because I had so many photos of the hike, I ended up creating a collage with three of them to maximize the space on my layout.

I also used flip flaps to incorporate all of my pictures.

Be sure to visit the H2H blog to see how our designers interpreted the Spruced up challenge and participate yourself!

Wednesday, January 15, 2020

New Product Blog Hop: January-February 2020

Is your new year off to a great start?  I'm really excited about all of the possibilities of 2020!  If you haven't yet browsed the CTMH January-February Idea Book, what are you waiting for?  Some of my consultant friends and I have joined together to showcase some of our favorites from this special edition.  (If you're already hopping then you've probably arrived from Darlys's blog.  From here, you'll visit Danielle next.)
The Spruced Up collection captured my heart immediately!  Here are our pictures from selecting our Christmas tree this year (2019).
The instructions make the layouts come together so quickly! 


 I used Liquid Glass to adhere all of the wooden pieces.

All of these gorgeous wooden pieces are included in the collection.

 Because I wanted to include 5 instead of 3 photos, I added pictures with flip flaps.

Thank you for hopping by!  Please leave a comment before hopping off to Danielle's blog to continue the circle of new products and fabulous creations.
{Click HERE for all the hop participants and their blogs.}

CTMH Technique Blog Hop: Terrific Treats

Even though the holidays are behind us, we always have events to celebrate, right?  Or how about just brightening a friend or co-worker's day?  Join me and fellow consultants on this "Terrific Treats" blog hop.  (If you're already hopping then you've probably arrived from Darlys's blog.  From here, you'll visit Cat's blog next.)
My first pocket had the floral on the outside, so you see more of the stripes.  (The black heart band is one of the zip strips, trimmed to fit.)  My second try used the stripes on the outside and shows more of the floral (with a pretty white ribbon bow).
This fun little pocket is made of a 6"x6" piece of patterned paper from the Celebrate Today collection.  To make, fold in half on the diagonal to make a triangle.  Then fold the left side over to the right (parallel to the bottom), and then the right wide over to the left (also parallel).  Then fold down the front top flap.
This pocket has a delicious Andes mints tucked into it.  You could easily add a little note too.
My third one uses a 9"x9" square of Spruced Up B&T and some Sangria ribbon.  (I forgot to take a picture before adding this delicious tea bag, but you can see what it looks like before, below.)
The left version started with a 9"x9" square and measures about 5"x6.5".  The second one started with a 6"x6" square and measures about 3.5"x4.25".

Thank you for hopping by!  Please leave a comment before hopping off to Cat's blog to continue the circle of new products and fabulous creations.

LinkWithin

Related Posts with Thumbnails