Showing posts with label Imagine how-to guide. Show all posts

Wednesday, August 6, 2014

CTMH New Product Blog Hop

Have you had a chance to look at the new CTMH Annual Inspirations Idea Book yet?  If so, what is your favorite new product?  If you don't have a favorite yet, I'll bet you'll fall in love along this new product blog hop!  (If you're already on the move and hopping through, then you should have arrived from Julie's blog.  You'll go to Michelle Stewart's blog next.)


Check out the beautiful new Seaside collection: paper pack, My Stickease, and metal assortment!  My layout is based on a sketch from Imagine.
If you look closely at the background, you'll see that I made a "beach" by tearing a piece of the beautiful new Glacier card stock to mimic a wave crashing on the shore and then glued it to a Colonial White card stock base.
To make my title stand out a bit, I inked the edges with Desert Sand ink.  Also notice the nautical knots that I made with our hemp baker's twine.  
Don't you think those metal charms would look fabulous on some base & bling jewelry?!?

Complete hop list HERE
Thanks for checking out my layout.  I have lots more new ideas to post, so be sure to come back often.  Now hop on over to Michelle's blog!

*I'd also like to link this up to the Heart 2 Heart Challenges Inspired by Nature scrapbook challenge.

Tuesday, July 29, 2014

The University of the South Layout Share

Back in April during Spring Break, we took our daughter to visit two colleges, the University of the South and Vanderbilt.  Vanderbilt was our main goal, but we were happy to stop at Sewanee to see what it might offer.  (Having been there, it is probably too isolated for our girl.)
We loved the beautiful campus, however!  It almost felt like we were visiting Hogwarts. ;)  Of course this momma had to take lots of pictures, but I only scrapbooked my few favorites.  The (retiring) Skylark paper pack, Complements, and Assortment were a beautiful match to my photos.
My title is a sneak peek of our new Shin-Han twin touch markers!  I just wrote it out myself in my best calligraphy.  If you look at my focal image, you'll notice that I used my scoring blade to create a frame on the Lagoon card stock mat and then sanded the raised lines to reveal the white core.
Adding Aqua Dots give the layout great texture and interest.  I love those sweet embellies!  

My layout is based on a sketch from Imagine.  It was easy to find one that used four photos.  

As always, thanks for stopping by and checking out my artwork.  I love sharing with you!  I'm linking this up to the current Lasting Memories "Anything Goes" challenge.

Monday, June 23, 2014

H2H Challenges: The Great Outdoors

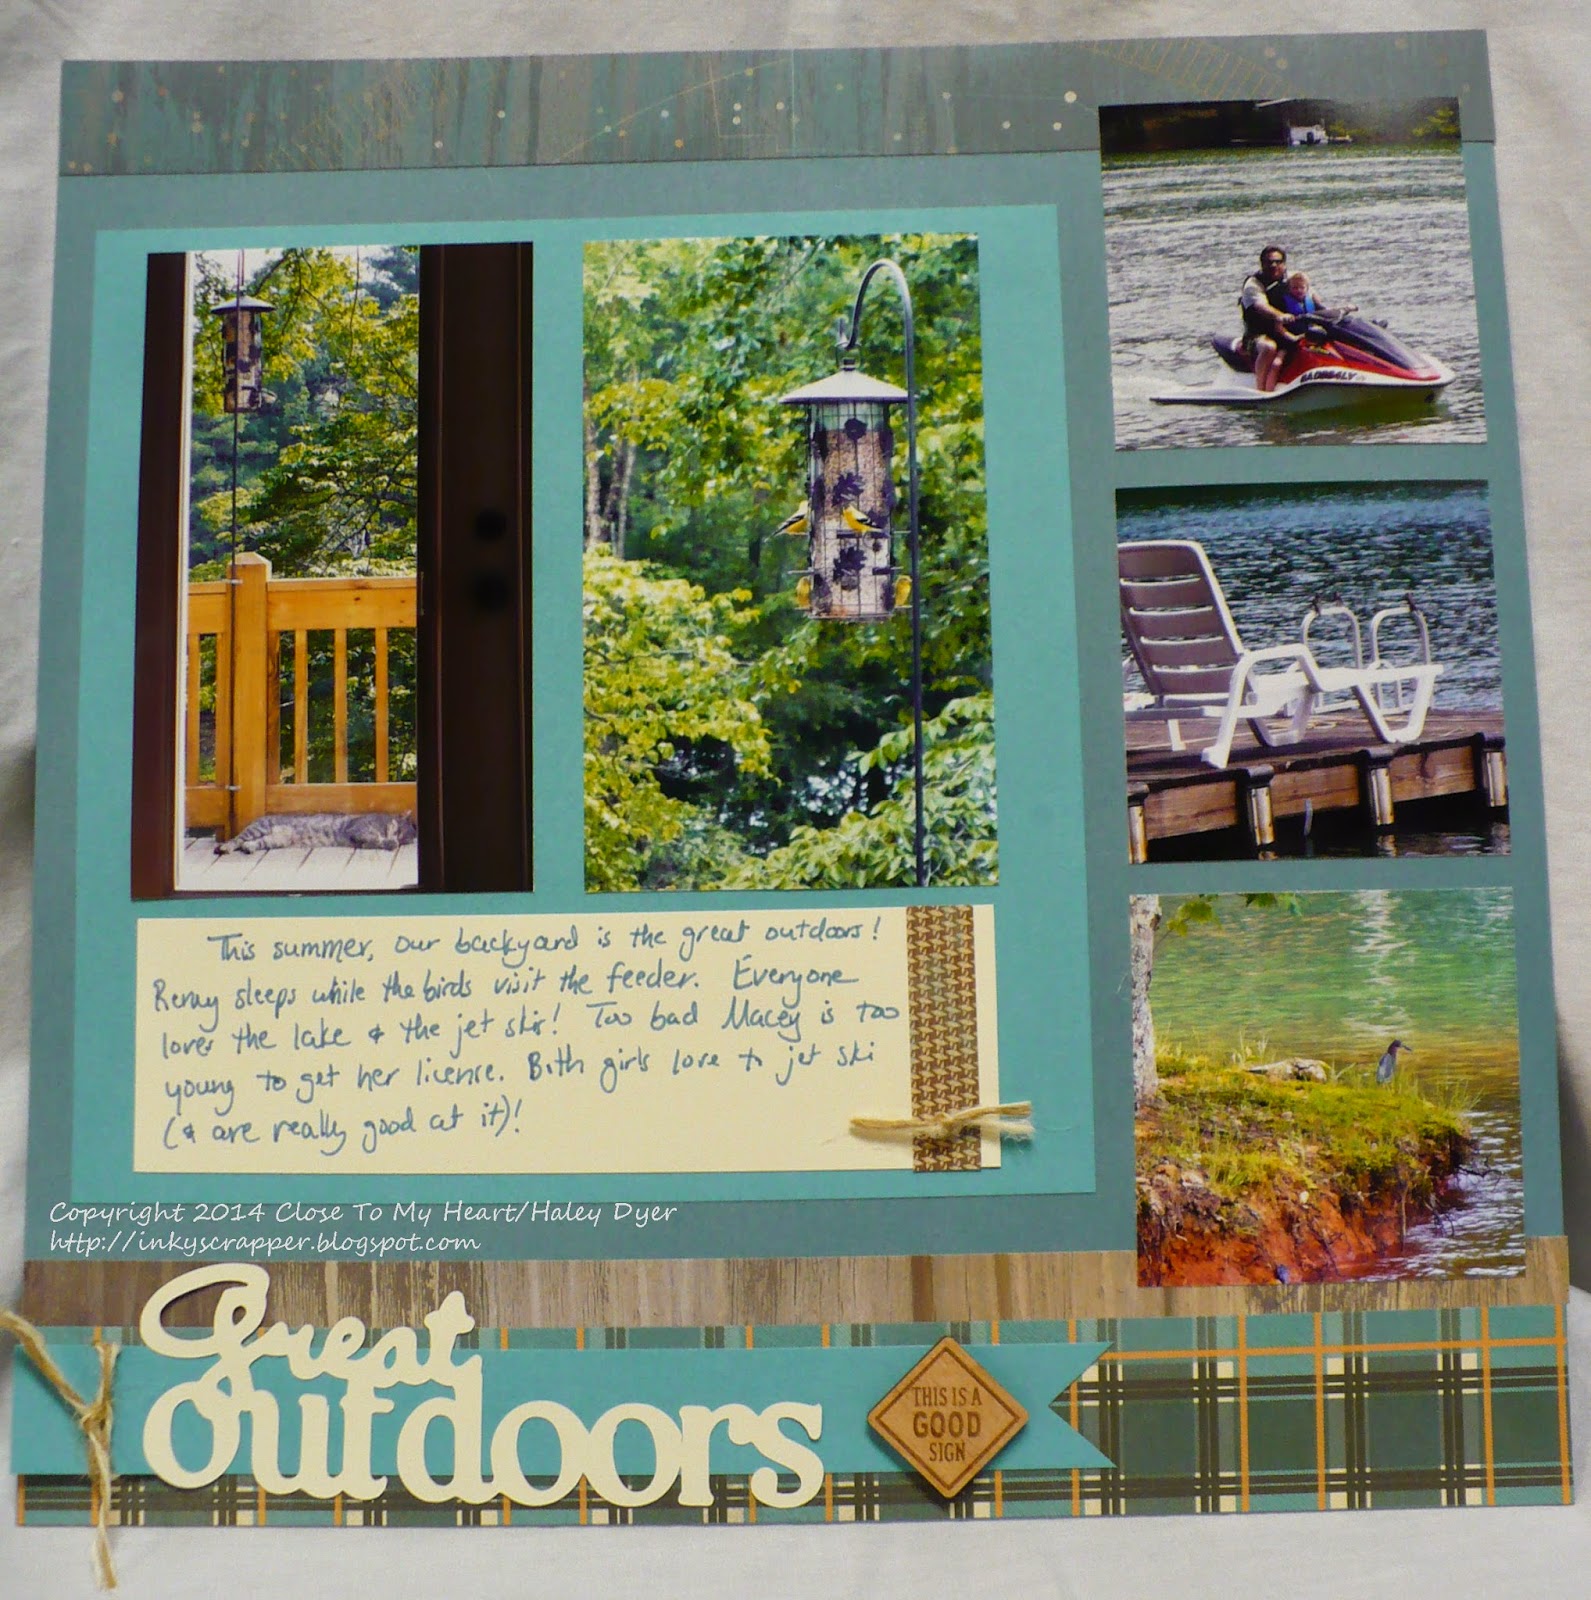
The final June Heart 2 Heart Challenge is the great outdoors.  That means a lot of things to a lot of people!  Right now, my version of the great outdoors is my back yard.
Because the lake is in my backyard, I knew I wanted the blues and greens of the Timberline paper pack.  I found a sketch from Imagine that I thought would work perfectly with my photos, cut the pieces according to the guide, and then assembled.  It doesn't get much easier than that!
I was planning to stamp my title, but I found exactly what I wanted in my CTMH/Cricut Artbooking cartridge.  I also cut the cute postage stamp square from it too.  I did stamp the Summer '14 with the July stamp of the month, Circus Alphabet.  I used a few pieces of the Timberline assortment and some hemp baker's twine to embellish my layout.

We'd love to see your version of the great outdoors, so head on over to H2H for inspiration and then to link up!

Wednesday, June 12, 2013

SOS June Challenge #1: All About Guys + Brads

The first June Scrap Our Stash challenge is all about guys!  Of course I had to make a layout for our favorite guy.  He says that I never take his picture and put him in our scrapbooks, although since I am usually holding the camera, I beg to differ.  He does often RUN though when he sees me coming with the camera!  There is one other requirement for this month's challenge: you have to use at least five brads too.
 

My husband grew a beard and mustache this winter to mixed reviews from family and friends! He just shaved it off with the onset of warmer weather, so I couldn't resist immortalizing the beard in this layout all about him.  On the left page, that is his brother in the photo with him.
All of my supplies are from Close To My Heart, and they're a mix of old and new. The layout sketch is from the Imagine how-to guide (retired). I used the new Surf's Up paper pack, but the brads, the metal embellishments, and the sassy strands are all retired. If you look closely, you can see that I distressed the edges of my photos and my Outdoor Denim card stock with a sanding block. I used Cashmere ink to distress the Colonial White card stock to give the layout more texture.
You have until 6/29 to dig into your stash and share a layout of your favorite guy(s), so link up at SOS!  You just might be this month's prize winner too.

Monday, July 9, 2012

Kraft 6"x6" Mini Album

My parents just celebrated their 44th anniversary, so I made a little something to commemorate this day and their life together so far: a mini album using Close To My Heart's 6"x6" kraft card and envelopes.  I paired the "album" bases with the Roxie paper pack and the Card Chatter- Love stamp set, adding in various embellishments that I had on hand.  (Here's the whole gang: my parents, my siblings and their families, my family, and my mom's sister.)

Before I began decorating, I used my 3-hole punch (you know, from the office supply store) to punch two holes in each card and each envelope.  Using the 3-hole punch allowed the holes to be uniformly punched on each "page."
Here is the front cover:

Pages 1 & 2:

The envelope flap opened with the pull-out tag:
The right page opened up to make another layout (sketch from Imagine):
Pages 3 & 4:

The right side, opened:
Pages 5 & 6:

Opening the right envelope flap:
See how the flap will tuck behind the photo mat?

Pages 7 & 8:
The slide-out tag from page 8 (the card was turned with the flap at the top and then I cut off about an inch off the right side):
Page 9 (with the same tag from the photo above showing):
Pages 9 & 10:

Somehow I missed a photo of page 10 opened up to show the inside of the envelope and its pull-out tag!  Finally, here is the back cover:
If you're still with me, I'll close with a picture of my hubby and me, because we also just celebrated our anniversary.  We're looking forward to 44 years together, but it will be a while!

Monday, December 5, 2011

H2H Challenges: Photo Inspiration

This week Heart 2 Heart Challenges is asking you to use this gorgeous holiday photo to inspire your creation! (You can check out all the Design Team's interpretations at the H2H blog.)

I decided to use the photo's colors, polka dots, and ribbon to inspire this layout of Christmas 2008. At first, I tried to place my photos in a circle like the wreath, but it just didn't work. When I'm stumped while scrapbooking, I always reach for one of my handy-dandy Close To My Heart how-to books, and Imagine had the perfect sketch for these nine photos. (This sketch is called "Rhapsody.")

I did rotate the left page to fit the orientation of my photos. To create the polk dots, I got out my 1-1/4" circle punch and my small circle punch to add white "polka dots" to the Cranberry and Pear cardstock pieces. Some ribbon, sparkles, and opaques later, I had completed my layout! (Oh, I also used red glitz gel to add a little sparkle to the holly border.) Can you see Rudolph's nose so bright? Love those red sparkles!

Now it's your turn! Create a project with some CTMH products based on this inspiration photo, and then upload it to the H2H Challenges blog. Happy crafting this holiday season!

{Layout 2011 #76}

Wednesday, August 10, 2011

Disney Layouts

We love Disney World! It truly is one of the happiest places on Earth! While there last summer, we were also able to visit family in the area (and then toodle up to St. Augustine to vist more family).

I made these layouts using highlight photos of our trip. Some are from the (retired) Workshop on the Go, some are from the (retired) Level 1 kit, and some are from the Imagine how-to guide.


You'll have to scroll down to see what I did with the other pictures from our trip (and a few previous ones to Disney).


Did we wear the girls out or what?


Here is what I did with the extra photos:


I think I found this photo cube at Hobby Lobby, but I'm not sure. I filled the outside with photos from various Disney trips. (Can you see our little one in the stroller?!?) One panel I used for a title. I couldn't add any layers or frou-frou because it was a really tight fit! That's okay though!

The inside has four mini albums. Three are filled with photos from our three trips with the girls. It is fun to be able to relieve some of the memories in our scrapbook or by pulling out the mini albums that now reside in our living room.


May you make magical memories and preserve them creatively!


{Layouts 2011 #58-62}

Saturday, July 30, 2011

Beautiful Ballerina Layout

Again, while I had my friend's Aspire dance set, I went to town creating dance layouts! Because I couldn't find a minty color that matched my older daughter's costume, I focused on the pink instead. I think that really makes her pictures pop!

This layout, celebrating her 5th year of dance, is based on the "Grand Finale" sketch from the Imagine how-to guide. The curve on the right page looks much more difficult to make than it really is! (I found a baking stone in my kitchen that gave me the perfect curve to trace and then cut out!)


You may notice the paper with the swirls and green stars from the retired Daydream collection. Even though the greens don't match, I think it is a sweet touch to these layouts!

Again, I made a 6"x6" layout for my little album of professional photos. I've enjoyed walking down memory lane this week!

{Layout 2011 #55 & 56}

Saturday, February 5, 2011

A Visit with the Easter Bunny

Here's a little taste of spring to remind you that it WILL come one day!


This layout is another walk down memory lane: my nephew's first visit to the Easter Bunny. I really appreciated my sister taking the girls along too!


Sketch: "Staccato" from Imagine

All supplies from Close To My Heart: Sweet Pea paper pack (retired); Old World Alphabet, Comments, and Eastertime stamp sets; Spring Iris, Lilac Mist, Baby Pink, Key Lime, Sunkiss Yellow, and Breeze (retired) inks; Baby Pink, Lilac Mist, and Heavenly Blue markers; Cottage edge anchors; Just Blooms White Daisy paper flowers; spring brads


{Layout 2011 #6}

Sunday, September 12, 2010

Making Pancakes Layout


First, thank you to everyone who came by yesterday for my open house! I hope you enjoy your project as much as I am enjoying mine. (Photos coming soon!)
Today's post is showing off my older daughter learning to make pancakces. (She did it for Girl Scouts, not for me!)

She is so much like me, and hopefully my journaling captured that. Here are some close ups of the details. This layout is based on the Imagine sketch, "Follow the Lead," and my scrapbook club ladies and I made this one last month.

We used the Cherry-O paper pack and Workshop on the Go stamp set (no longer available).


How do you like the apron I made?


There's no cooking for me today because my back-to-school cold has gotten the best of me. We hated having to cancel dinner with friends tonight! :( It is very weird for me to be lazing around in bed, but I figured that I had better listen to what my body was telling me. Thank goodness for a wonderful family! Hope you've had a great weekend!


{Layout 2010 #44}

LinkWithin

Related Posts with Thumbnails