We were so fortunate to be able to travel to Europe last summer to meet up with our older daughter at the end of her study abroad in Germany. We loved every leg of our trip, but visiting the D-Day beaches was especially meaningful. Reading about it in a book is much less powerful than being there!
I used the Seas the Day collection and the special Poppy Sentiments (which retire tonight!) to commemorate our visit and remember the fallen.
My layout sketches come from the retired Reflections how-to guide. I tried to keep my layout fairly simple to focus on my photos and memories.
I used Fern and New England Ivy for the "grass" and stalks. The poppies are a combination of stamp rolling in Peach, Smoothie, and Candy Apple. The great thing about using one of CTMH's paper collections is that they have developed a gorgeous color palette.
Be sure to experiment with your base pages. I tried White Daisy, Mink, and Mint, and the light side of the Mint, along with the Sapphire photo mats, really made my pictures pop. To create my title, I cut the letters with my CTMH/Cricut Artbooking cartridge and decided to use the negatives. I embellished my layout with the Seas the Day and White enamel dots, along with some wooden arrows.
Thank you for letting me share part of our trip with you! If you need any CTMH products, please let me know! If you haven't marked yourself as "going" to the Close To My Heart National Scrapbooking Day live event this Saturday, be sure to do so! You will be eligible for prizes, even if you're not online! Happy National Scrapbooking Day Saturday!
Stamping, scrapping, and paper crafting: create, craft, and connect at my classes and online!
Showing posts with label Reflections how-to guide. Show all posts
Thursday, April 30, 2020
Monday, April 27, 2020
Welcome to Amsterdam Layout
The Yesterday & Today collection is perfect for the pictures of our family's trip to Amsterdam last year on our Europe 2019 trip.
I added in Ruby cardstock and Mint from the Mix-In paper pack to highlight our first evening in Amsterdam.
The lock and clipboard clasp are from the Yesterday & Today foil die cuts, and the smaller clip is a sticker from the corresponding sticker sheet.
I love the versatility of the Story by Stacy Simply Said stamp set. I love the little heart accent!
I added in Ruby cardstock and Mint from the Mix-In paper pack to highlight our first evening in Amsterdam.
The lock and clipboard clasp are from the Yesterday & Today foil die cuts, and the smaller clip is a sticker from the corresponding sticker sheet.
I love the versatility of the Story by Stacy Simply Said stamp set. I love the little heart accent!
Sunday, April 28, 2019
MSC Orchestra and So Much Happy
On our epic European adventure, we took a second cruise of the Mediterranean Sea and had fun aboard the MSC Orchestra.
I used my Reflections how-to guide for my layout design.
I had fun with scraps to make the flags on the side bar. Do they look a bit nautical to you too?
While we don't have another cruise planned (yet!), we are working on another epic adventure for 2019. Come back for more of 2016!
I used my Reflections how-to guide for my layout design.
I had fun with scraps to make the flags on the side bar. Do they look a bit nautical to you too?
While we don't have another cruise planned (yet!), we are working on another epic adventure for 2019. Come back for more of 2016!
Monday, April 15, 2019
H2H Challenges: "Weather" or Not (AKA California Dreamin')
The most recent Heart2Heart Challenge is "Weather" or Not, and I couldn't help but think of our daughters' recent trip to California for Spring Break. Yes, this trip was the first time that they flew anywhere without us, their devoted, loving, (over?) protective parents (whether I liked it or not!). Fortunately, they had a great trip!
Here is the layout I created for our older daughter of her favorite photos. I ended up using a sketch from Reflections for the left page and kind of designed my own for the right page. I used the I Heart Us collection for this fun layout.
I used my CTMH/Cricut You Are Here to cut out the palm tree and "spring break" sunglasses. Perfect fit, right? I think the brown card stock is retired Desert Sand, but I'm not entirely sure. It worked well with both the palm tree cut and the Pacific Ocean photo mat. Don't you love how well neutrals can fit with this vibrant collection?
You'll notice that journaling is lacking. My daughter will have to write her own story for this layout.
Thanks for letting me share my "weather or not" twist with you! Be sure to visit the H2H blog, all of our talented designers, and most importantly our amazing participants!
Here is the layout I created for our older daughter of her favorite photos. I ended up using a sketch from Reflections for the left page and kind of designed my own for the right page. I used the I Heart Us collection for this fun layout.
I used my CTMH/Cricut You Are Here to cut out the palm tree and "spring break" sunglasses. Perfect fit, right? I think the brown card stock is retired Desert Sand, but I'm not entirely sure. It worked well with both the palm tree cut and the Pacific Ocean photo mat. Don't you love how well neutrals can fit with this vibrant collection?
You'll notice that journaling is lacking. My daughter will have to write her own story for this layout.
Thanks for letting me share my "weather or not" twist with you! Be sure to visit the H2H blog, all of our talented designers, and most importantly our amazing participants!
Labels:
challenge,
CTMH,
family,
H2H Design Team,
Reflections how-to guide,
scrapbooking,
sketch,
travel
Friday, March 29, 2019
Europe 2016: Day 11
Even though I am trying to work on our photos from our epic adventure in order, sometimes it is just more fun to scrapbook what I'm in the mood for! On Day 11, we visited Flaam, Norway.
Even though I had been using the So Much Happy collection for our other Norway photos, I decided to use some retired papers that better matched my pictures. Using the Love of Color guide, I chose the New England Ivy combo with Espresso, Pomegranate, and Goldrush. I chose layouts from Reflections to pull my photos together easily.
I used some retired Documented kraft cutouts and New England Ivy burlap ribbon to embellish my layout.
I am using a 4"x4" flip flap to add a close up of the beautiful boat houses that fascinated me in port, plus include more in-depth journaling about the day.
My second layout highlights some photos on board the MSC Opera, our home for the week. For this page, I used So Much Happy again and a sketch from Make It From Your Heart.
In addition to the So Much Happy complements, I used the coordinating puffy stickers and the March stamp of the month, This Happened.
I really love how easily everything coordinates together.
Thanks for letting me share another day of our amazing trip!
Even though I had been using the So Much Happy collection for our other Norway photos, I decided to use some retired papers that better matched my pictures. Using the Love of Color guide, I chose the New England Ivy combo with Espresso, Pomegranate, and Goldrush. I chose layouts from Reflections to pull my photos together easily.
I used some retired Documented kraft cutouts and New England Ivy burlap ribbon to embellish my layout.
I am using a 4"x4" flip flap to add a close up of the beautiful boat houses that fascinated me in port, plus include more in-depth journaling about the day.
My second layout highlights some photos on board the MSC Opera, our home for the week. For this page, I used So Much Happy again and a sketch from Make It From Your Heart.
In addition to the So Much Happy complements, I used the coordinating puffy stickers and the March stamp of the month, This Happened.
I really love how easily everything coordinates together.
Thanks for letting me share another day of our amazing trip!
Tuesday, October 16, 2018
Holiday Sparkle/Seasons of Joy Blog Hop
Close To My Heart is really getting into the festivities this year! Right now, you can purchase the Holiday Sparkle card kit and of course the Seasons of Joy Cricut collection which we are featuring on this blog hop. (If you're already hopping then you've probably arrived from Darlys's blog. From here, you'll visit Michelle Loncar's blog next.) Hopefully we will showcase the Christmas Blessings collection in a hop later this year.
Instead of creating a 5"x7" card, I cut my card front down to a 5" square to use the shaker portion on this simple layout, a sketch from Reflections. I used the striped piece, the bird, and the sequins from the kit. I added Tis the Season paper and silver shimmer trim. It will be so easy to add my holiday photos to this layout!
To further match the shaker to my layout, I sponged Clover ink on the frame.
Thanks for checking out my quick twist with the Holiday Sparkle kit! Be sure to continue along the hop to Michelle's blog after leaving me a comment. Thank you!
Instead of creating a 5"x7" card, I cut my card front down to a 5" square to use the shaker portion on this simple layout, a sketch from Reflections. I used the striped piece, the bird, and the sequins from the kit. I added Tis the Season paper and silver shimmer trim. It will be so easy to add my holiday photos to this layout!
To further match the shaker to my layout, I sponged Clover ink on the frame.
Thanks for checking out my quick twist with the Holiday Sparkle kit! Be sure to continue along the hop to Michelle's blog after leaving me a comment. Thank you!
![]() |
| {Click HERE for all the hop participants and their blogs.} |
Labels:
blog hop,
CTMH,
Reflections how-to guide,
scrapbooking,
sketch,
special offer,
workshop
Monday, October 1, 2018
October Stamp of the Month Blog Hop: Thanks & Giving
Welcome to the October stamp of the month blog hop highlight the heartwarming Thanks & Giving stamp set. (If you're already hopping then you've probably arrived from Kimberly's blog. From here, you'll visit Debi's blog next.) I was really excited to get my hands on this set!
My first project is a layout of our house blessing this summer. The Grateful Hearts collection was a great match to my two pictures! (We were having such a great, sacred time that no one took pictures!)
The left page uses a combination of stamped images from the Thanks & Giving stamp of the month and Picture My Life cards from the Grateful Heart paper pack.
For the right page, I made a pocket based on a "Bottom Border" sketch from Reflections. On the top of the page, I glued down two of our cards and then added the "Remember This" sentiment and arrow from the stamp of the month set.
I stamped the "Thankful" stamp with New England Ivy and then inked up ONLY the "To" of "Together" to make the phrase on the center panel. I stamped "gather" in Sapphire and "Together" and the heart with Pomegranate. The solid flowers are Saffron with the outlines in Goldrush.
How do you like those adorable cork shapes?
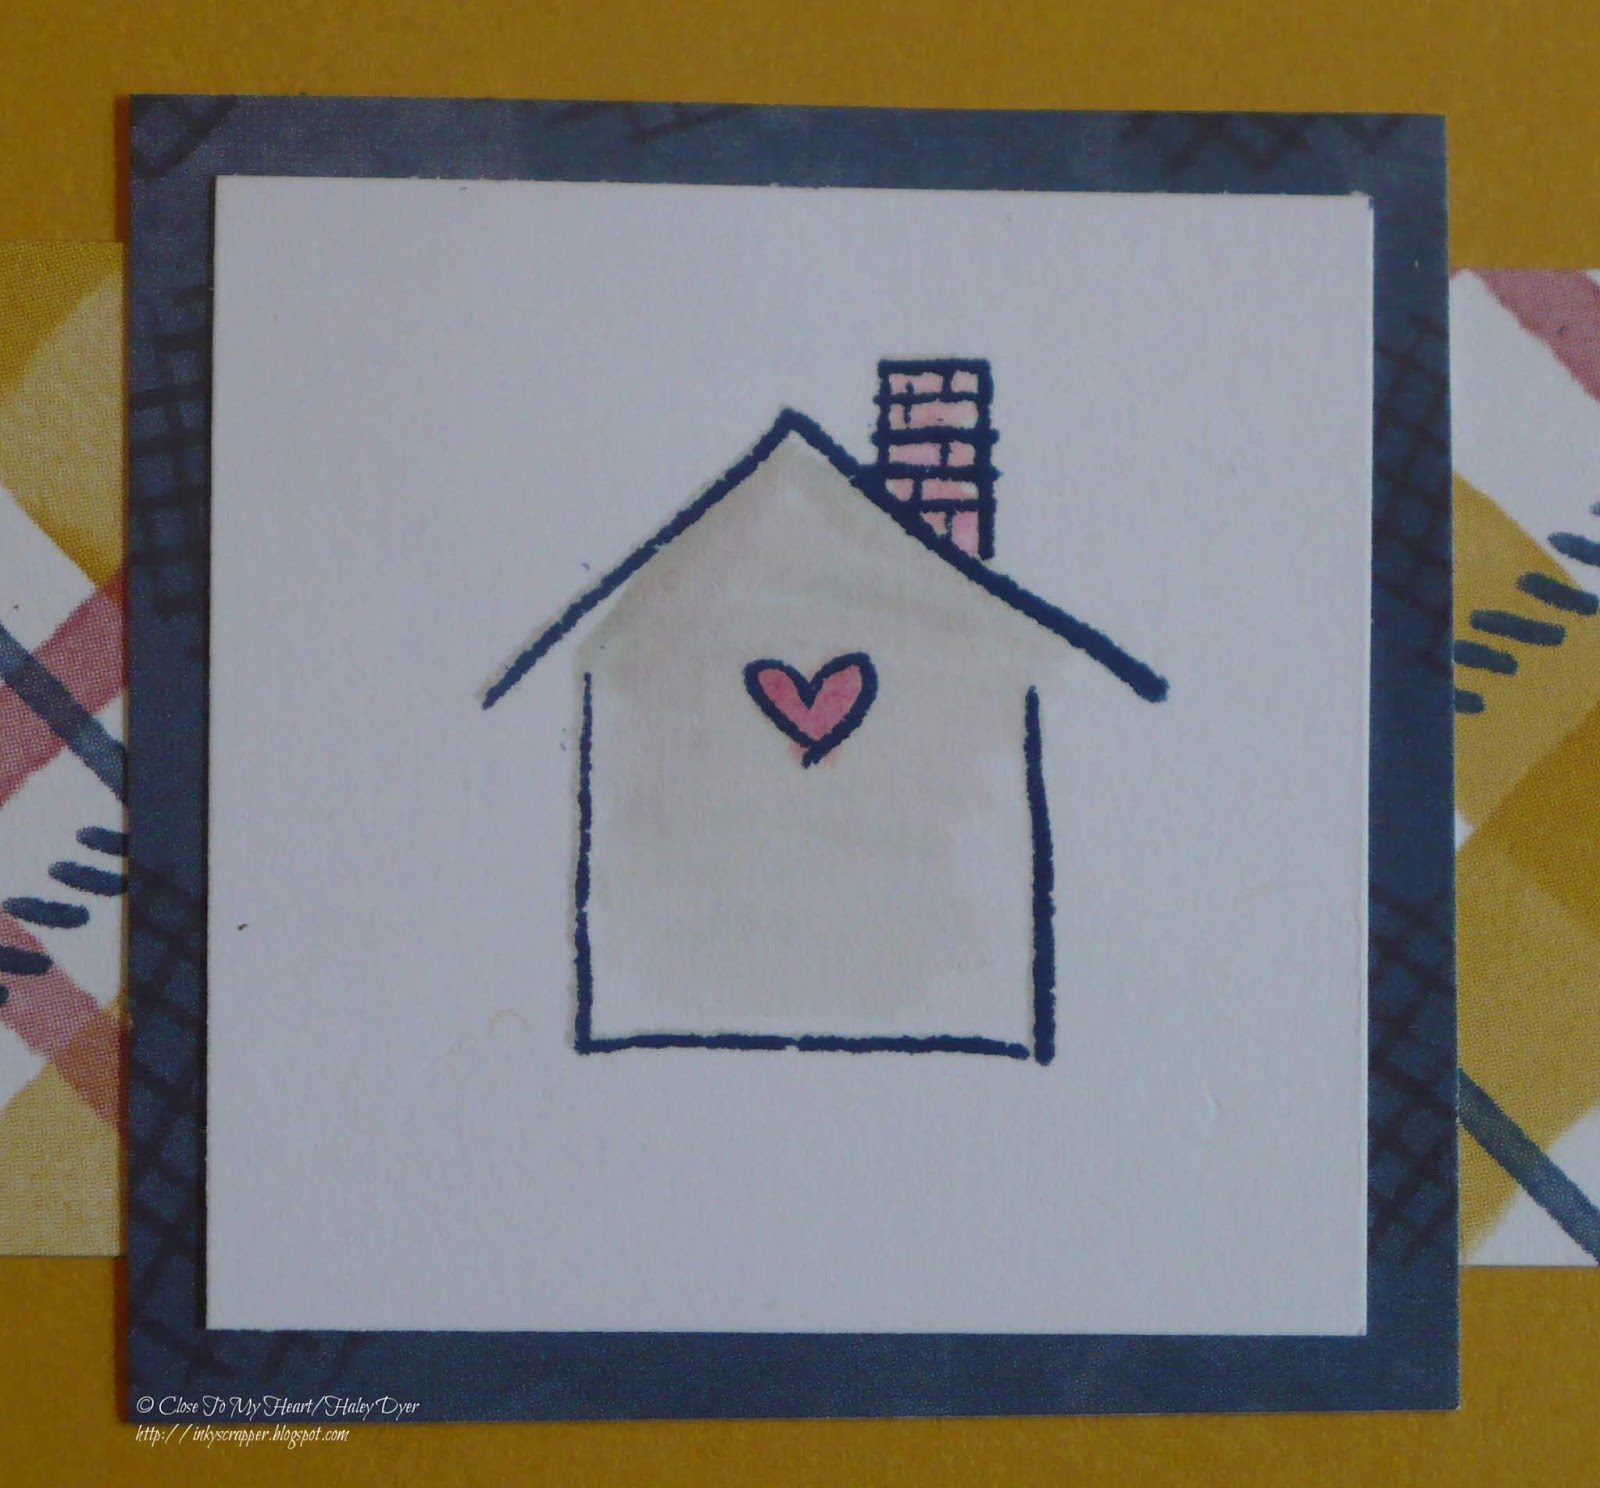
Since my home is gray, I decided to stamp the house image first in Mink and then color it with my waterbrush. The heart and chimney were watercolored with the waterbrush in Pomegranate. Once the image dried, I stamped it again in Sapphire. You HAVE to love our clear stamps for perfect realignment!
Before I introduce my next project, take a peek at all the images available in this timely stamp set.
Here is a quick simple card with the Boutique collection and a sketch from Make It From Your Heart, Vol. 1.
Both of my projects use the new Mink twine.
Thanks for taking the time to visit! Your comments mean a lot to me, so I hope you'll leave one before you hop on over to Debi's blog to continue to see some amazing Thanks & Giving projects!
My first project is a layout of our house blessing this summer. The Grateful Hearts collection was a great match to my two pictures! (We were having such a great, sacred time that no one took pictures!)
The left page uses a combination of stamped images from the Thanks & Giving stamp of the month and Picture My Life cards from the Grateful Heart paper pack.
For the right page, I made a pocket based on a "Bottom Border" sketch from Reflections. On the top of the page, I glued down two of our cards and then added the "Remember This" sentiment and arrow from the stamp of the month set.
I stamped the "Thankful" stamp with New England Ivy and then inked up ONLY the "To" of "Together" to make the phrase on the center panel. I stamped "gather" in Sapphire and "Together" and the heart with Pomegranate. The solid flowers are Saffron with the outlines in Goldrush.
How do you like those adorable cork shapes?
Since my home is gray, I decided to stamp the house image first in Mink and then color it with my waterbrush. The heart and chimney were watercolored with the waterbrush in Pomegranate. Once the image dried, I stamped it again in Sapphire. You HAVE to love our clear stamps for perfect realignment!
Before I introduce my next project, take a peek at all the images available in this timely stamp set.
Here is a quick simple card with the Boutique collection and a sketch from Make It From Your Heart, Vol. 1.
Both of my projects use the new Mink twine.
Thanks for taking the time to visit! Your comments mean a lot to me, so I hope you'll leave one before you hop on over to Debi's blog to continue to see some amazing Thanks & Giving projects!
![]() |
| {Click HERE for all the hop participants and their blogs.} |
Wednesday, August 15, 2018
Purposeful Plastic (CTMH Technique Blog Hop)
Hopefully this title has intrigued you! You're going to love seeing the Purposeful Plastic products and ideas along this month's technique blog hop! (If you're already hopping then you've probably arrived from Catherine's blog. From here you'll visit Darlys's blog next.)
I am using the Pocket Plus Memory Protectors Design 2 to include all of my photos from a lovely visit to Gibbs Gardens with some of the lovely ladies in my family! I made a two-page 12"x12" layout and added 3 photos with the Pocket Plus Memory Protectors. You can easily see the left page and the right Pocket Plus.
Now you can see the right page with the left Pocket Plus.
Both of my base pages are based on sketches from the Reflections how-to guides.
All of my papers and embellishments are from the Documented Workshop Your Way, with my base pages from the Basics Fundamentals paper.
Thanks for hopping by! I'd love a comment before you leave to see what Darlys has made. (Just click on her name to go to her blog and continue the hop.)
I am using the Pocket Plus Memory Protectors Design 2 to include all of my photos from a lovely visit to Gibbs Gardens with some of the lovely ladies in my family! I made a two-page 12"x12" layout and added 3 photos with the Pocket Plus Memory Protectors. You can easily see the left page and the right Pocket Plus.
Now you can see the right page with the left Pocket Plus.
Both of my base pages are based on sketches from the Reflections how-to guides.
All of my papers and embellishments are from the Documented Workshop Your Way, with my base pages from the Basics Fundamentals paper.
Thanks for hopping by! I'd love a comment before you leave to see what Darlys has made. (Just click on her name to go to her blog and continue the hop.)
Wednesday, May 16, 2018
Seasonal Expression 2 New Product Blog Hop
Have you browsed the 2018 Close To My Heart Seasonal Expressions 2 Idea Book? This supplement has four wonderful paper collections and many new stamp sets for your papercrafting needs! This blog hop will feature our consultants' favorites from this Idea Book. (If you're already hopping then you've probably arrived from Alyson's blog. From here, you'll visit Michelle's blog next.)
This layout uses the Beautiful Friendship collection to celebrate my younger daughter's 17th birthday last month! Don't you love this banner paper?
Macey said that the banners were "too flat," so I added Pearls and Gray Gems to spice them up. I also used a pretty Beautiful Friendship bow to accent the "Make a Wish" journaling card.
For the right page, I used another journaling card to document "birthday season."
Next up is a layout to commemorate my daughter's sweet graduation tea. (Thank you, Aunt Joy!!)
In addition to the Beautiful Friendship paper pack collection, my layout also includes the Beautiful Friendship Cardmaking & Thin Cuts set.
This layout uses the Beautiful Friendship collection to celebrate my younger daughter's 17th birthday last month! Don't you love this banner paper?
Macey said that the banners were "too flat," so I added Pearls and Gray Gems to spice them up. I also used a pretty Beautiful Friendship bow to accent the "Make a Wish" journaling card.
For the right page, I used another journaling card to document "birthday season."
Next up is a layout to commemorate my daughter's sweet graduation tea. (Thank you, Aunt Joy!!)
In addition to the Beautiful Friendship paper pack collection, my layout also includes the Beautiful Friendship Cardmaking & Thin Cuts set.
The Seasonal Expressions 2 has so many great collections, you are going to want to get one each month while they are available! Thanks for letting my share my Beautiful Friendship projects with you! Happy National Scrapbooking Month! I would love for you to leave a comment before you head on to Michelle's blog next to continue the hop!
{Click HERE for all the hop participants and their blogs.}
Labels:
blog hop,
CTMH,
Reflections how-to guide,
scrapbooking,
sketch,
stamping
Monday, July 24, 2017
Europe 2016: Christianborg Palace, Copenhagen/H2H Challenges: Fabulous Fonts
The next series of photos from our Europe trip are of our visit to the tallest tower in Copenhagen. (One really cool fact about Christianborg Palace is that it is the only place in the world where all three branches of government are housed together.)
Because I had so many photos, I ended up creating four pages (2 two-page layouts). The center two pages are a Picture My Life page where you just slip your photos and journaling boxes into the page protector following its design.
Here are page 1 and page 4 without the Picture My Life protector in the middle. This layout is a simple sketch from Reflections. It is very symmetrical and allowed me to use 8 photos plus add some journaling. My color scheme is White Daisy, Juniper, and Sorbet. The text patterns of our B&T may be a challenge to use on your projects, but I love how it adds interest and texture to my layout but still allows the focus to be on my photos. Because of all the text, I wrote my journaling by hand.
Here is p. 1 with p. 2, the PML page. You can see the coral shimmer trim that I used plus some retired stickers that matched. I made my own journaling boxes with Whimsy Fundamentals paper plus I also incorporated a few retired Surf's Up PML cards.
Page 1 and page 2 close ups
When you use the Picture My Life page protectors in your traditional scrapbook, you have to plan out both sides so that your scrapbook flows from layout to layout.
The PML cards uses a variety of fonts so again, I just wrote what I needed to say rather than stamped or typed my journaling on this layout.
The spire on the old stock exchange building is four dragon tails intertwined and was installed in 1625! So cool!
Thanks for allowing me to share our trip and a few scrapbooking tips with you! Don't be afraid to mix fonts and especially don't be afraid to include your own handwriting- as imperfect as it may be- in your scrapbooks.
WARNING: This post is long!
Because I had so many photos, I ended up creating four pages (2 two-page layouts). The center two pages are a Picture My Life page where you just slip your photos and journaling boxes into the page protector following its design.
Here are page 1 and page 4 without the Picture My Life protector in the middle. This layout is a simple sketch from Reflections. It is very symmetrical and allowed me to use 8 photos plus add some journaling. My color scheme is White Daisy, Juniper, and Sorbet. The text patterns of our B&T may be a challenge to use on your projects, but I love how it adds interest and texture to my layout but still allows the focus to be on my photos. Because of all the text, I wrote my journaling by hand.
Here is p. 1 with p. 2, the PML page. You can see the coral shimmer trim that I used plus some retired stickers that matched. I made my own journaling boxes with Whimsy Fundamentals paper plus I also incorporated a few retired Surf's Up PML cards.
Page 1 and page 2 close ups
When you use the Picture My Life page protectors in your traditional scrapbook, you have to plan out both sides so that your scrapbook flows from layout to layout.
The PML cards uses a variety of fonts so again, I just wrote what I needed to say rather than stamped or typed my journaling on this layout.
The spire on the old stock exchange building is four dragon tails intertwined and was installed in 1625! So cool!
Thanks for allowing me to share our trip and a few scrapbooking tips with you! Don't be afraid to mix fonts and especially don't be afraid to include your own handwriting- as imperfect as it may be- in your scrapbooks.
Subscribe to:
Posts (Atom)