Saturday, January 27, 2018

National Papercrafting Month Layout Challenge: Bella

Close To My Heart is celebrating National Papercrafting Month in grand style with the Love Letters campaign, and I've joined a Facebook group with lots of fun challenges this weekend in honor of National Papercrafting Month.  The first challenge is a layout challenge based on this sketch: http://bit.ly/npmvclayout2018
These photos of when we "adopted" our 3rd beagle, Bella, fit this sketch challenge well!  I used the Basics Fundamentals paper pack plus Basics card stock.  The gold letters and dots are from last year's National Papercrafting Month wreath special!
The dog tag and puppy were cut from the CTMH/Cricut Artistry cartridge.
The puppy paws were stamped in Toffee from the retired Love My Dog stamp set.  Can you see the red shimmer trim I used for the heart underlay on that sweet puppy?  Speaking of sweet puppies, we are really glad that Bella came into our lives last year!

Monday, January 22, 2018

H2H Challenges: Tool Time

This week's Heart 2 Heart Challenge is a tool challenge: the shimmer brush!  I have had lots of fun with the new Chelsea Gardens collection and my shimmer brushes.
This card uses the Chelsea Gardens Scrapbooking stamp set with a new sketch from the new Make It From Your Heart, Vol. 4.  Photographing the shimmer brush is difficult, but hopefully you can see the pretty sparkles in the close ups.
The following cards use the Chelsea Gardens Cardmaking stamp set.

 I loved the addition of the gold shimmer brush on the Happy letters!
 I used both shimmer brushes on the butterfly.


Thanks for taking the time to enjoy these cards.  Grab your shimmer brush and get creating!  You have all month to play long with the H2H blog.

Saturday, January 20, 2018

Featured Paper Blog Hop: Chelsea Gardens

Welcome to the gorgeous Chelsea Gardens featured paper blog hop!  You are going to fall in love with this beautiful collection if you haven't already!  (If you're already hopping then you've probably arrived from RaNae's blog.  From here you'll visit Kathleen's blog next.)
My baby card shows a little different side to Chelsea Gardens!  My first cousin's daughter (my flower girl!) just had her first baby, so I made this card for them.  For the card background, I cut the Glacier striped piece to 4-1/4"x5" with the zip strip still on the paper so that it would make a base.
This adorable elephant is on the CTMH/Cricut Flower Market cartridge, and I cut the base from Glacier card stock at 2-1/4" and then the top from the pretty patterned paper.  I adhered him with thin 3D foam strips.  Notice how I didn't glue his ear down and folded it out just a little.
The "Welcome Baby" banner was cut at 1-1/2" (base from Glacier card stock and "string" from Pebble card stock).
The pretty gems are also from Chelsea Gardens, and I added the Whimsy Glacier ribbon.

Now here is the card for my first cousin, the first-time grandparents.  It is based on Pattern 5 from the new Make It From You Heart, Vol. 4 card sketch how-to guide.
I used the same patterned paper base (minus the zip strip) and then cut down one of the cards from the collection from 3"x4" to 3"x3" to make the gray frame.  The elephant is obviously the same cut, but at 2-3/4" with the Chelsea Gardens "linen" paper for the elephant.  The sentiment is from the (retired) CTMH/Cricut Artfully Sent collection, stamped in Charcoal.
Thanks for letting me share this twist on Chelsea Gardens.  Here are a few other cards I've made with Chelsea Gardens:
 {You can read more about them HERE.}


I'd love a comment before you go see Kathleen's Chelsea Gardens project!  I'm linking these cards up to the Fantabulous Cricut Challenge #317 Something New for this new Cricut cut I've never used and to the Heart2Heart Challenge Something New.  Thanks for hopping by!


Thursday, January 18, 2018

January Stamp of the Month: Bloom & Grow Good Thymes Card

When I saw these tulips for sale, I had to get them for my dear sister (in part because she used tulips like these in her wedding, and her anniversary is next month).  Of course I had to make a little card to go with it, and the January stamp of the month, Bloom & Grow, had the perfect sentiment.
I grabbed a little 3"x3" card base, Eggplant and Fern inks, and Enchanted Fundamentals scraps, and my Originals how-to guide for the sketch pattern.  I stamped the "Thymes" in Fern on scrap and then cut out.  I stamped the entire sentiment in Eggplant onto the 1-3/4" square which I then matted onto 2" Fern card stock. A little foam tape pops the "Thymes" portion of the sentiment.
I decided to add the little heart after second generation stamping it with Eggplant ink.  Isn't the Eggplant and gold ribbon (Enchantment collection) a lovely touch?

I hope the flowers and card brightens her days!  Remember, the January stamp of the month is only available until the end of this month.

Tuesday, January 16, 2018

Seasonal Expressions 1 Blog Hop

The new Seasonal Expressions 1 is my absolute favorite that I've seen from Close To My Heart in a long time!  I am hoping that you will love it as much as I do!  You'll see so many fabulous projects (and new product) along this Seasonal Expressions blog hop.  (If you're already hopping then you've probably arrived from Jean McNulty's Stampin Maui blog.  From here, you'll visit Krista's blog next.)
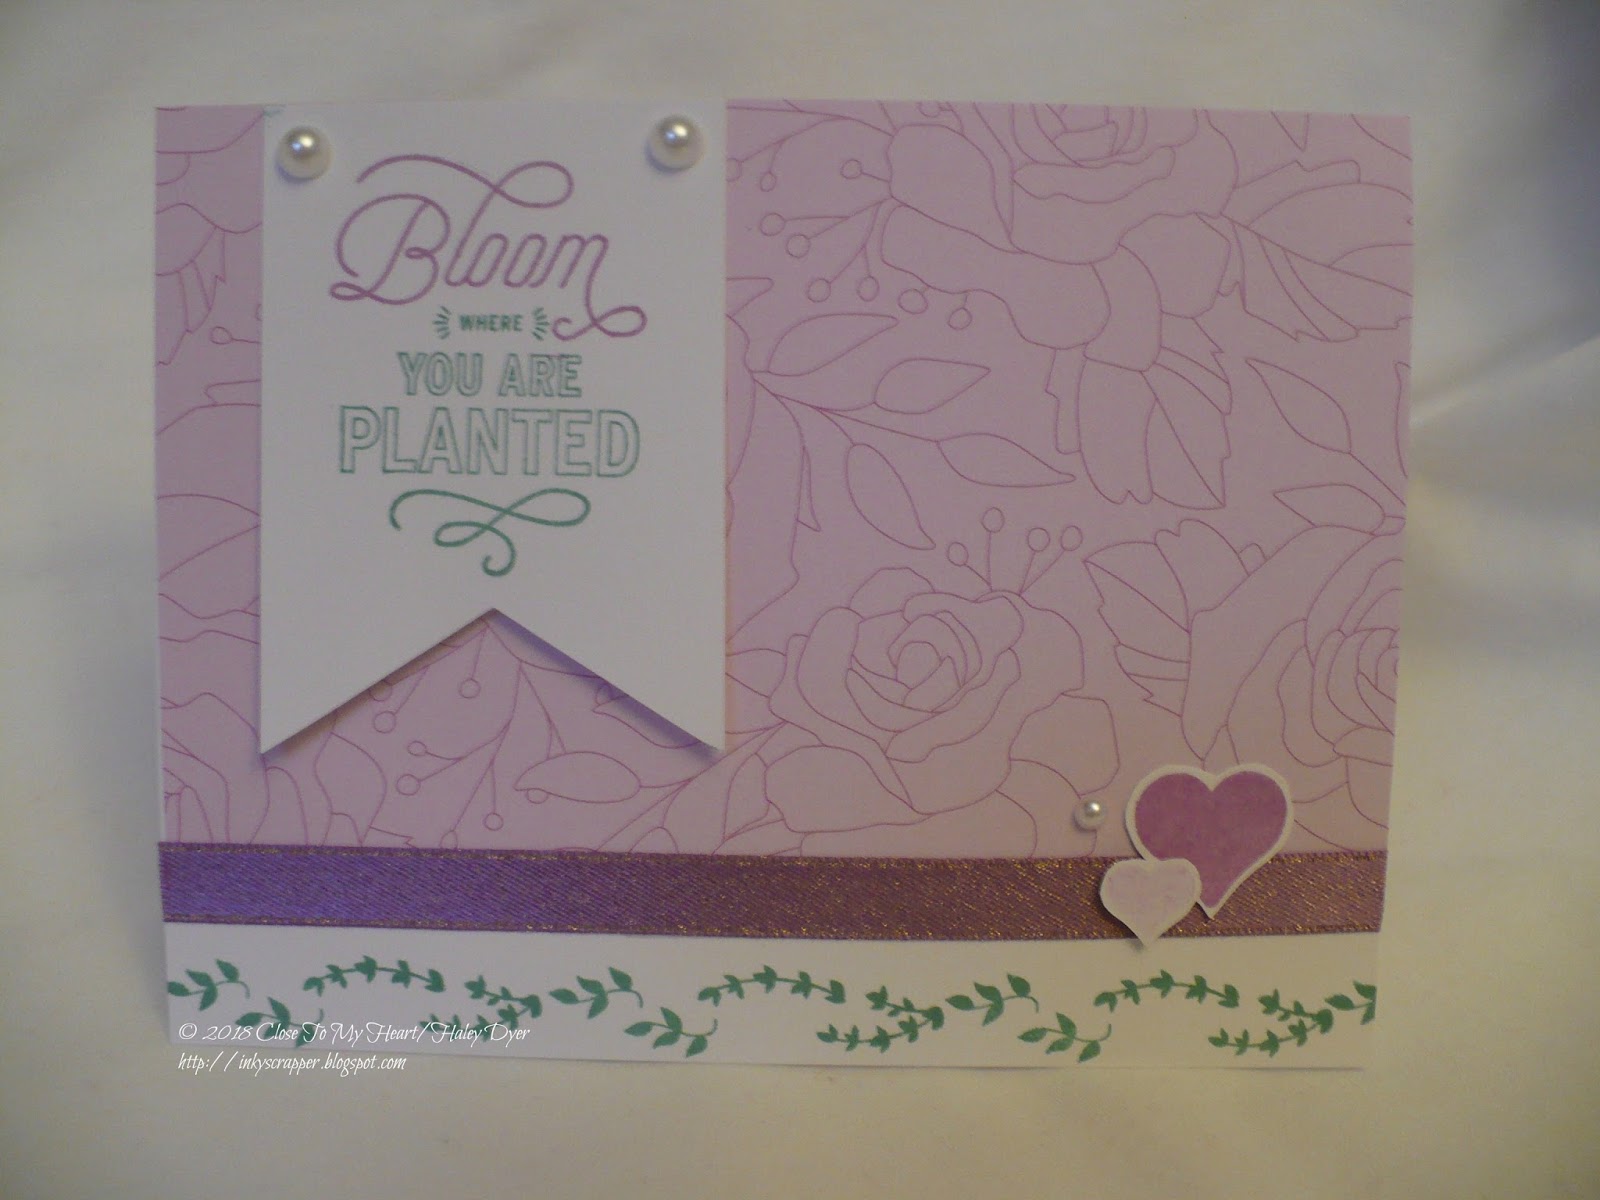
I fell in love with the Chelsea Gardens collection as soon as I saw it!  Today I am featuring four cards I made with this paper pack, dots & gems, ribbon, the Scrapbooking stamp set, and the NEW Make It From Your Heart, Vol. 4 card sketch how-to guide.  (Yes, I used the scrapbooking set for cards!  Also, you're not crazy- I typed four but you only see three.  Hang on until the end!  I really made four cards!)  For this card set, I stuck with the colors from the Chelsea Gardens collection: Glacier, Juniper, Sweet Leaf, Fern, and Charcoal.
This first card is Pattern 1 from the new Make It From Your Heart, Vol. 4 card sketch how-to guide. 
Here's a tip to be successful with this card: Use a post it note or two to mark the imaginary line at 3" from the top.  Also, you can see how I stamped the leaves directly on the card base, inking them up first in Sweet Leaf and then rolling the edges in Fern.  I stamped the flower in Glacier with the edge rolled in Juniper on scrap paper (the center is Charcoal) and then fussy cut it out to adhere to the card front.  What you can't see is the gorgeous shimmer brush sparkles on the flower itself.
My second card is Pattern 23 from MIFYH 4.  The base mat is actually one of the Picture My Life cards from the paper collection cut down to size following the sketch instructions.  The Fern leaves on the right were stamped directly on that beautiful patterned paper.  The one on the left was stamped on scrap and cut out, as was the flower using the same techniques as the first card.
This close up helps show off the shimmer brush.  If you look even closer, you can tell that the black enamel gem has a bit of sparkle to it too.
My third card uses the MIFYH 4 Pattern 12.  What do you do when you need a piece that is just a little too small for your word?  Stamp it first on a larger piece, then use your trimmer to trim it down, stopping at the letter(s) that hang below the line.  Then use your scissors to trim around that letter!

I stamped the pretty scroll banner in Glacier and then the "Perfect" sentiment in Juniper to match "Together."  It was super easy to cut out and attach with foam tape.

My fourth and final card also uses the Chelsea Gardens collection and MIFYH 4 exclusively but looks nothing like the first three!
I used the beautiful gray papers from this collection to a make this card based on Pattern 20.  The dotted bottom border is a stamp from the Chelsea Gardens Scrapbooking set.  I used one of the flower centers to randomly stamp some of the polka dots in Charcoal.  I decided to combine two of the sentiments on the Sweet Leaf banner, so it's a little longer than the sketch.  I used a few of the Chelsea Garden dots to complete this card.  Don't you love those neutral patterned papers and how well grays and Sweet Leaf go together?

Finally, here's a peek at another Chelsea Gardens project I'll be featuring later this week.  Be sure to come back often!

Thanks so much for taking the time to scroll through my entire post!  I hope I've inspired you to check out the beautiful Chelsea Gardens collection.  You're going to fall in love with the Seasonal Expressions 1 2018.  Now go see what KRISTA has created!
{Click HERE for all the hop participants and their blogs.}

Monday, January 15, 2018

CTMH Technique Blog Hop: Blushing Backgrounds

This month's technique blog hop is focusing on stamping your own backgrounds.  You can use any of our background stamps or get creative with more traditional stamps.  (If you're already hopping then you've probably arrived from Danielle's blog.  From here, you'll visit Priscilla's blog next.)
For my card, I wanted to use the background stamps from the CTMH/Cricut Flower Market collection, but I didn't want to use any of the cuts from that cartridge.  Instead, I cut this circle border from the CTMH/Cricut Artbooking cartridge, set at real dial size 2".  To fill in the circles, I used a 1" circle punch and cut circles from Pewter, Bashful, and White Daisy card stock, plus one circle from Bashful glitter paper.
I used Charcoal and Pewter inks to stamp the various backgrounds on my circles.  I used both sides of our new two-toned card stock to add more variety and color variations.  (The Bashful on Bashful is very faint.)  I also used my new Chelsea Gardens Cardmaking stamp set for the sentiment and the flower.  I strip of silver shimmer trim behind the circles filled in the diamonds nicely and two Bashful pearls helped to highlight the sentiment.

I'm linking this card up to the following challenges:
The Card Concept 84
Challenge #333

Thank you for visiting!  I would love a comment before you continue the Blushing Backgrounds technique hop by visiting PRISCILLA'S PAPERIE next!


Monday, January 1, 2018

January Stamp of the Month Blog Hop: Bloom & Grow

Happy New Year! Close To My Heart has a fantastic start to the year with the launch of the Seasonal Expressions 1 Idea Book and the January stamp of the month, Bloom & Grow.  You are going to see so many beautiful projects along this month's blog hop.  (If you're already hopping then you've probably arrived from Jean McNulty's blog.  From here, you'll visit Krista's blog next.)
For my first card, I wanted to try a technique featured in the new Make It From You Heart, Vol. 4, a card lover's sketch book how-to guide!  In addition to 24 brand new card patterns, each sketch also features two artwork techniques.  For this "Be Patient" card, I used the technique on p. 25: stamping part of your sentiment on a separate piece of paper, cutting it out, and then attaching with 3-D foam tape.  To make this card, I stamped the frame first with Juniper ink.  Then I centered the sentiment in the frame, stamping with Canary ink.  On scrap paper, I stamped the sentiment again in Pixie, Glacier, and Thistle.  I then cut out the parts that I wanted to pop and stuck them to the card front.  "Patient" is popped with foam tape after I colored it in with my Peony Purple Shin-Han marker..  I used Whimsy Fundamentals paper and the pretty Thistle ribbon from the Whimsy ribbon collection to finish this card.  (Next time, I think I will only use Canary and the pop of Thistle.)
My second card uses the MIFYH 4 card pattern 8.  To create the stamped sentiment, I covered the "Bloom" portion with washi tape, inked up the stamp in Juniper, removed the washi tape, and then stamped the sentiment.  I repeated the process to ink up only the "Bloom" portion in Thistle.  The pretty vine border was stamped with the four foliage stamps in the Bloom & Grow set.  I fussy cut two of the hearts stamped in 1st and 2nd generation Thistle.  A few pearls added a sweet, elegant finish.
All of the supplies that I used can be found on my website or on your consultant's.  Before you hop to the next stop, I'd love for you to leave me a comment.  I'm linking my cards up to the Heart 2 Heart Challenges Something New for the new card pattern book new techniques, and new stamp of the month.  Thank you for visiting!  Happy 2018!  Now go visit Krista's blog next.
{Click HERE for all the hop participants and their blogs.}

H2H Challenges: Something New

Happy 2018!  This new year is bringing a new Heart 2 Heart Challenge: Something New!  For my "something new," I put together a new A Cut Above: The Story Begins Baby Boy scrapbook kit for my cousin and her NEW baby boy!  This kit was super easy to put together!  I can't wait to get it in the mail to her.  All she will have to do is add her photos and her journaling.
The only thing that I really needed to put this kit together was my scissors and adhesive, though I did add silver glitter trim to the title page.


 This layout includes month tags to add after she adds her pictures for each month.
Now it's your turn to try something NEW!  You have all month to enter this first, NEW H2H Challenge!

LinkWithin

Related Posts with Thumbnails