Showing posts with label Make It From Your Heart how-to guide. Show all posts

Sunday, November 30, 2025

Oh Christmas Tree Layout

Usually I don’t make layouts before I have my photos, but I know that I will take several portrait (vertical) photos of our Christmas tree this year. I enjoyed making this layout at my November open studio crop with the Branching Out dies, Elegant Pines Snowflake DSP, and two retired stamp sets.


I love all the shades of green in this DSP (Designer Series Paper).  It’s really nice to be “ahead” with this layout (while I ignore all the other projects I am behind on).

Saturday, November 23, 2024

Mackinac Island Layouts

It's gotten cold here, so I'm enjoying remember some summer fun!  My husband and I took a lovely day trip to Mackinac Island this summer, and I used the Close To My Heart/Stampin' Up! Enjoy the Ride collection to preserve these memories.


The first layout was based loosely on a CTMH sketch,  but the second layout was completely my own design.  When I have a lot of photos, I tend to use a grid design to fit them all in.

The third layout followed the scrapbooking workshop directions pretty closely.


The fourth and final layout was also based on a sketch.

I love how these turned out!  Thanks for letting me share them with you!
{Layout 52-55/52}

Monday, October 21, 2024

GACIS Conference Layout

With fall in the air and the Changing Leaves bundle on my work table, I decided that it was time to scrapbook photos from a conference I attended last fall.  (I had to attend this year's conference virtually thanks to Hurricane Helene.)


I began with White Willow card stock and Wildly Flowering DSP.  I decided on a sketch from (retired) Close To My Heart's Make It From Your Heart (not sure which volume) that I modified to fit my photos.

I stamped my title with Crumb Cake using a retired CTMH alphabet stamp set.  I had a lot of fun mixing and matching the Crumb Cake & White Willow die cuts to create the embellishment clusters.


Be sure to label the people in your photos because over time you may not remember who everyone is!  (TRUST ME on this one!)

I really love how the Changing Leaves bundle accented the beautiful DSP and helped move your eyes across my layout.  Try to work in odd clusters like the there that I used here.

{Layout 46/52}

Monday, July 15, 2024

Senior Sunday Layout

For my first Stampin' Up! scrapbooking class, we used the pretty Perennial Lavender DSP with the Painted Lavender stamp set and dies and a sketch from Close To My Heart's Make It From Your Heart sketchbook.


I love how this collection matches our daughter's outfit!  I am really loving how the Stampin' Up! dies coordinate with the stamp sets but also add extra elements!  The pretty paper butterfly is a wonderful accent.

It's fun to catch up on some older photos that were printed but not scrapbooked until now.

{Layout 34/52}

Saturday, May 18, 2024

A New Adventure Layout

Here is my first Stampin’ Up! layout!  The sketch (from the last Make It From Your Heart) is one that I have wanted to use since I first saw it, and I was finally able to do just that!  It was originally a one page layout, so I just flipped the sketch to make it a two page layout using many 2“ x 2“ squares in the NEW 2024-26 In Colors & the Unbounded Beauty suite. 


I laid out my paper squares to try to create a rainbow and used Pretty in Pink, Peach Pie, Shy Shamrock, Summer Splash, and Petunia Pop.  I love how I was able to mix in the Unbounded Beauty papers to "bridge" colors.

Here's a close up of some of the details of the Sentimental Park stamp set and coordinating dies.  (I absolutely love the frames in the dies set!)

I stamped my title directly on the right page with a Close To My Heart (retired) alphabet stamp set.  (I'm looking forward to SU!'s future expanded scapbooking line!)

For my flower cluster, I die cut the blossoms and stamped the outline stamp in black.  (I stamped one on the Petunia Pop DSP to add some dimension and used 3D foam tape to pop that center one up on the page.)
Thanks for letting me share my first SU! layout and this new adventure with you!  I hope you'll continue to follow along!

{Layout 26/52}


Sunday, March 24, 2024

Honey Bunny Happy Easter Layout

Honey Bunny has been so fun to create with this month!  Here is the layout I've made from our Easter 2022 photos (the only Easter I was missing).


I had fun using a pattern from Make It From Your Heart, Vol. 5, paired with the Honey Bunny paper pack, Scrapbooking stamp set & Thin Cuts, and the March stamp of the month, Just Chicken In.  I used a few Honey Bunny dots as embellishments also.

Currently the Honey Bunny paper pack, paper pack with sticker sheet, and coordinating cardstock are in stock (available).  My fingers are crossed that we will receive more shipments of the rest of the Honey Bunny collection, so keep stalking your email and the CTMH Official Facebook page!


{Layouts 12/52}

Tuesday, March 5, 2024

Goodbye 2023, Hello 2024 Layout

It's been really fun scrapbooking and stash-busting lately!  I'm pretty sure everything used on this layout is retired, but I think it’s a fun way to document the end of 2023.  This layout uses the retired Four Seasons- Winter collection with my own design.


I also wanted to show how fun it is to mix and match to create something new. Here is the 1st/title page of our 2024 scrapbook.


I decided Sapphire was the best color to use with our photos, and then, when I found the Sapphire paper with the gray and white polkadots, I knew I had the start to a color scheme. The background is actually silver foil, but the light makes the top part look gold, which is actually a very cool effect!

This layout sketch is from Make It from Your Heart, Vol. 6, pattern 2. I love the Sapphire glitter paper and silver shimmer trim/gems and puffy stickers as embellishments.

{Layouts 7 & 8/52}


Wednesday, February 28, 2024

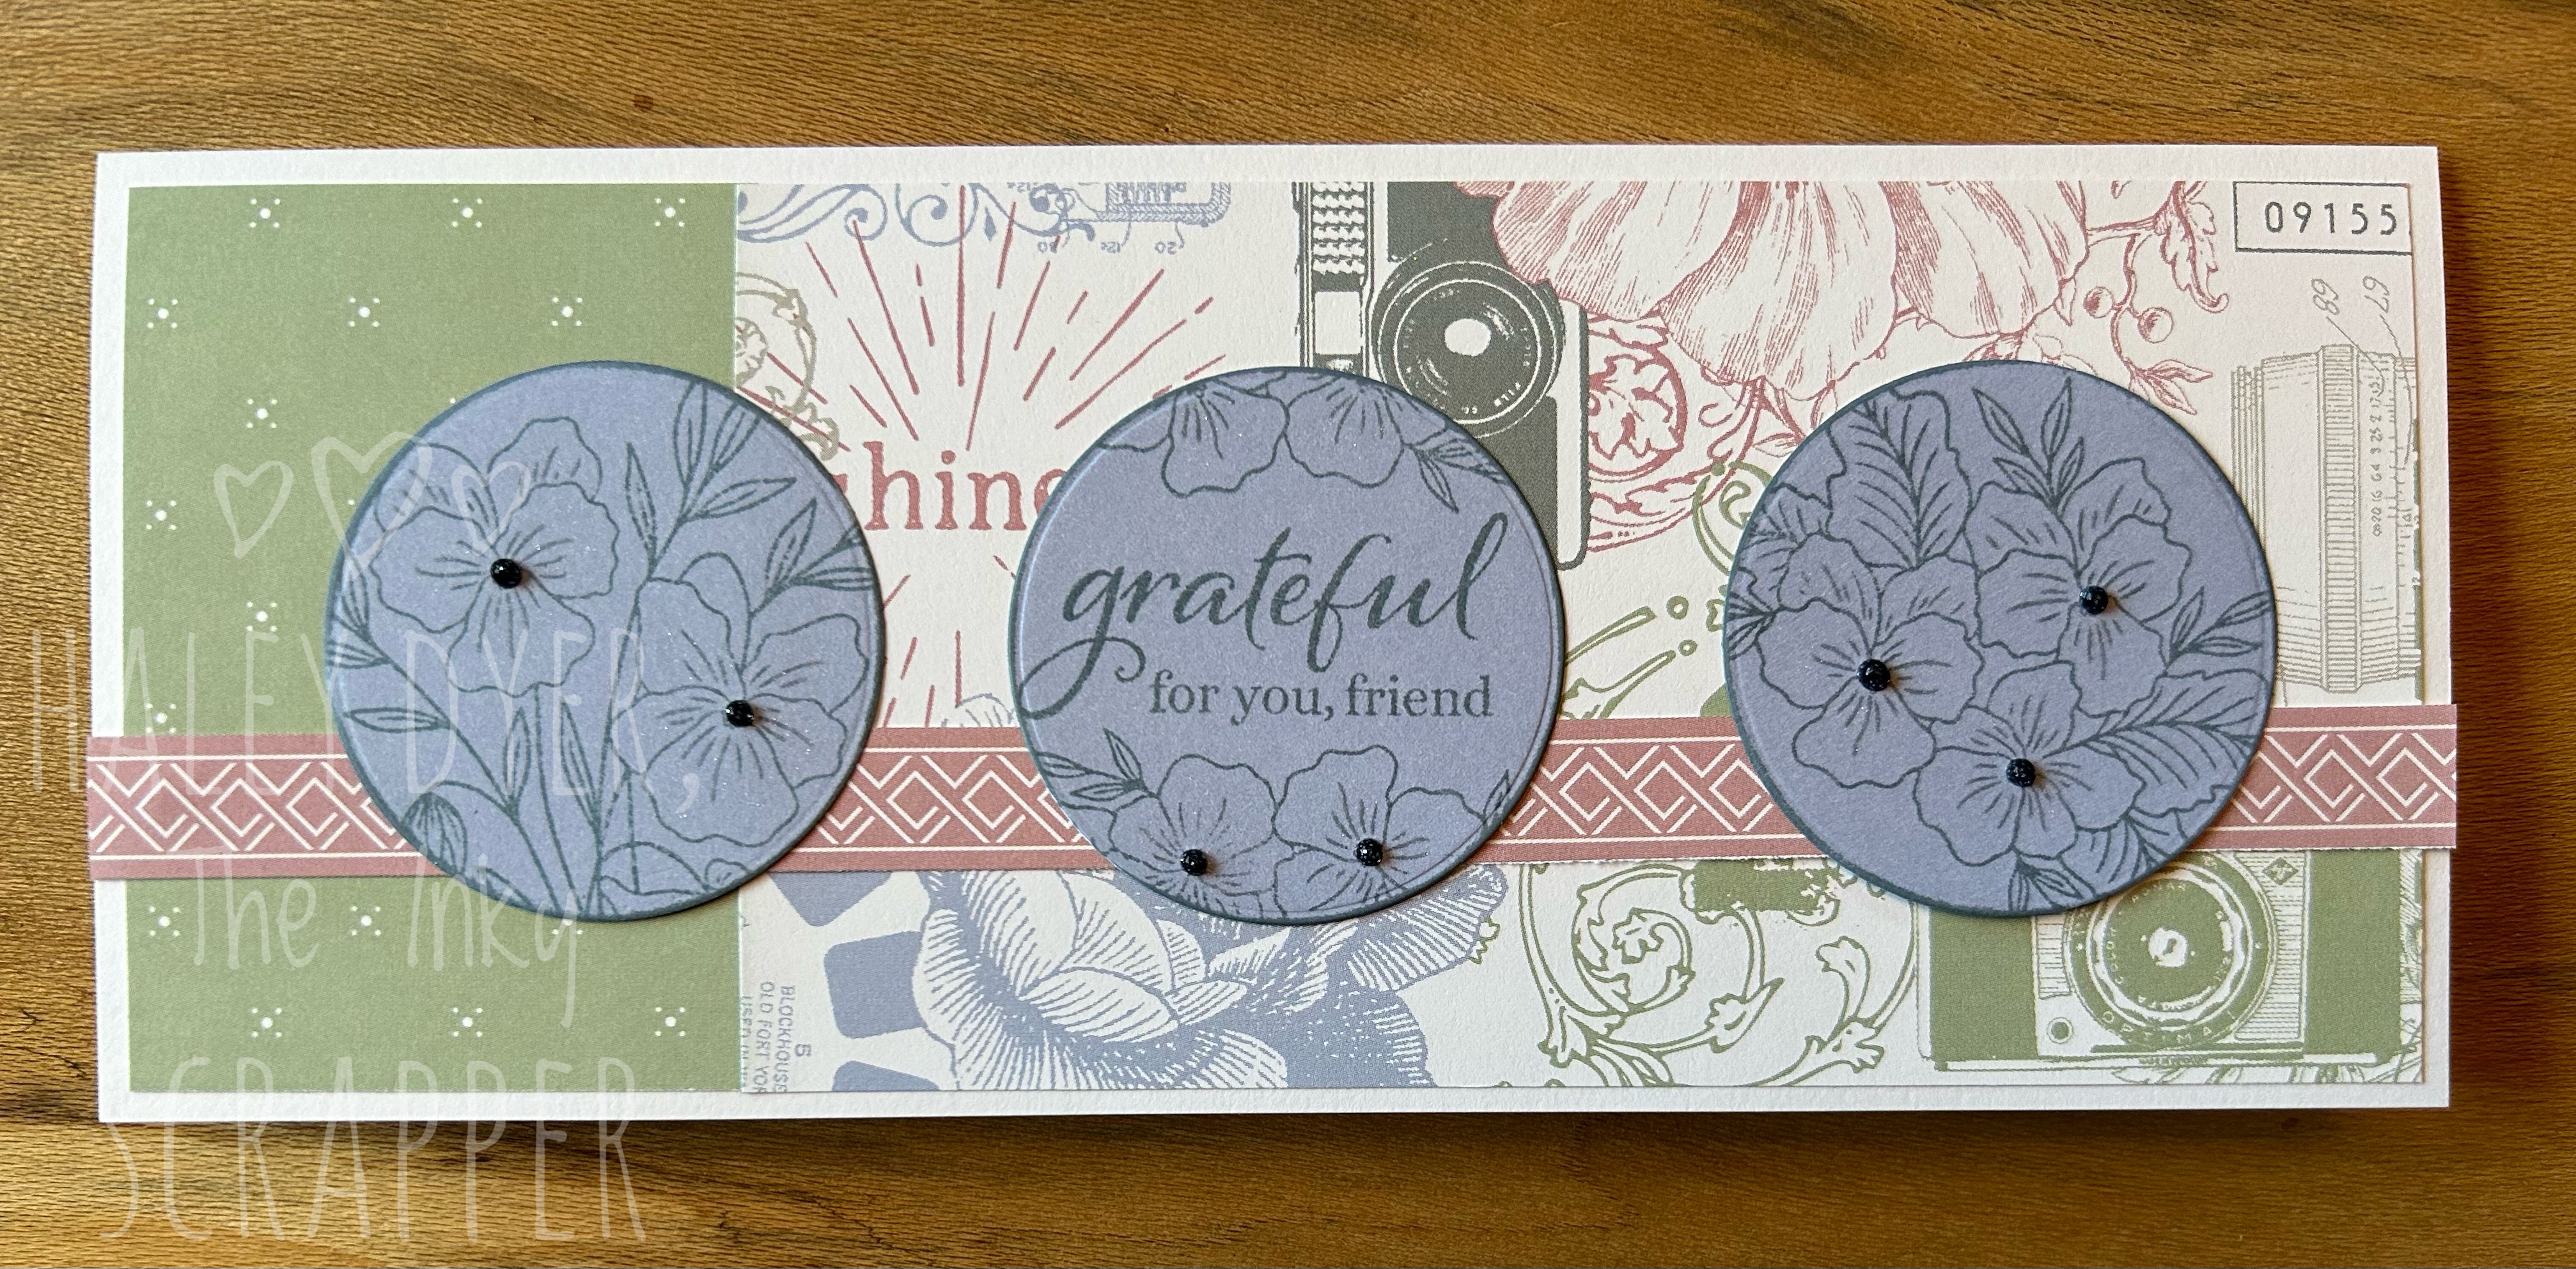
Say It with Flowers & Sweet Memories Cards

Before the month ends, here is another pair of cards that we made at my recent card class. This set uses the Sweet Memories collection with the February stamp of the month, Say It with Flowers.  Both cards use sketches from Make It From Your Heart, Vol. 6.


This slimline card uses Mist ink on the Periwinkle circles.  I added a few Stickles dots to the flower centers.


For the second card, I used the "hello" sentiment from another (retired) set.  I used markers to lightly color the flowers and leaves and then used (retired) Sugar Plum shimmer brush for flower center accents.  (Sugar Plum and Mulberry are definitely in the same color family.)


Be sure to get your February stamp of the month- with or without Thin Cuts- before the month's end!


Friday, February 23, 2024

Birthday Layout with Say It with Flowers & Sweet Memories

Since yesterday was my Dad's birthday, I thought I would share my birthday layout from last year (that just got made recently). 

I used the Sweet Memories collection and a sketch from Make It From the Heart, Vol. 5.  I love starting my projects with a sketch!

If you look closely, you can see how I used the bricks from Stencil Pack 1 and blended both Mulberry and a little Mist to make some bricks on the background.

I enjoyed embellishing the layout with the February stamp of the month, Say It with Flowers, hearts that I Thin Cut, and the Sweet Memories die cut embellishments.  I also used strips of Mulberry glitter paper.


It's hard to believe I'll have another birthday in about a month's time!

{Layout 3/52}

Friday, December 1, 2023

Thankful for My Girls

Well, I thought that I had posted this card set already!  November's stamp of the Month with Evergreen with Desert Rose, Mink, and Pine.


Saturday, November 18, 2023

Thanksgiving 2022 Layout

 It’s only been almost a year, but I just got last year’s Thanksgiving photos printed and scrapbooked!


Using a sketch from Make It From Your Heart, I used the November stamp of the month, Thanks a Bunch, and the retired Harvest Wishes stamp set, along with the Daisy Alphabet stamp set.  I colored the cornucopia with colored pencils.  Evergreen was the focus of my color palette (Pine & Acorn) with the addition of Desert Rose. 

Don’t be afraid to mix and match colors & patterns!

Sunday, November 5, 2023

Then & Now Layout

The newest Close To My Heart Idea Book, the November-December 2023 version, is perfect for the holidays, BUT these beautiful products are not limited to the holiday season!  I used Silver Bells, but not for Christmas, but to highlight my girls in 2007 and 2018 at the Biltmore Estate. 

When I saw this paper, I knew that I had found what I needed to preserve these sweet photos and memories of our girls.  I decided that Make It From Your Heart, Volume 6, Pattern 11, was the perfect sketch for my photos.
I used a favorite retired alphabet stamp set for my title and cut some Thin Cut hearts, circles, and foliage to accent this layout.  The pretty gold foliage on both pages are stickers from the Silver Bells collection.  I used the very pretty Silver Bells dots as embellishments across both pages.
On the right page, I decided to journal on White Daisy that I cut to fit.  I used a flip flap so that I could add two photos of the girls.  (I debated have the rear-facing photos on both pages but decided not to.)

Here is the page with the flip flap open to reveal the third photo.


Did you notice how I added thin strips of gold glitter paper and gold and silver metallic marker accents?

Don't be afraid to stretch your stash beyond their obvious uses!  Also, be sure to make connections between then and now as you tell your family's and friends' stories!

Monday, October 30, 2023

Christmas 2022 Layout

 Our Home for Christmas collection is so pretty!  Since I never seem to get my Christmas pictures in my albums in a timely manner (and I'm okay with that!), I had plenty of photos to choose from.   I chose a sketch from Make It From Your Heart, Vol  3 (Pattern 22) to create this layout.


I wanted to show you a close up of the right page to show how I fussy cut images from the patterned paper in this collection to accent my layout.  (The other embellishments are from one of last year's retired collections that were left over and coordinated very nicely.)


Be sure to shop the Home for Christmas collection before it's gone after tomorrow!

Saturday, October 28, 2023

Merry Little Christmas Cards

On p. 40 of the September-October Idea Book, Close To My Heart offers four adorable seasonal small stamp sets, two for fall and two for winter.  I used the Merry Little Christmas set with and Home for Christmas to create these two Christmas cards.


Both cards use sketches from Make It From Your Heart, Vol. 6, and some simple colored pencil coloring.   The first card has few gold glitter gems, and the second one uses some red Stickles for accents.


Be sure to browse our collection of holiday stamps to get ready for the upcoming season!


Friday, October 20, 2023

October’s From Owl of Us Halloween Card #2

Here's another card using October’s stamp of the month, From Owl of Us, paired with the I Want Candy collection. 


This card uses the Make It From Your Heart, Vol. 6, Pattern 29.  I used colored pencils to color the adorable own and added some I Want Candy puffy stickers as embellishments.  (The sentiment is from a favorite retired holiday stamp set.)

Be sure to grab this stamp set and paper pack before the end of the month!  (You can find everything HERE if you don't already have a CTMH Maker.)

Thursday, October 19, 2023

Family Reunion Layout

We recently went to my Mom's family reunion, and I'm delighted to scrapbook these pictures and tell a few stories already!

I knew I wanted to use The Good Life collection (paired with my Autumn Blessings stamp set), and I picked Pattern 17 from Make It From Your Heart, Vol. 6.  Because I had so many photos, I used the free Live Collage app to add two photos to one 4x6 template so that they would print 3"x4" each.


I kept the left page fairly simple because of all of the details on the right page.  I used two 3"x4" photo flaps to add more photos and journaling about who everyone is in the pictures.


The flip flaps are not adhered yet, but when they are, the white strip will be gone.  (The white strip protects the adhesive until you're reading to stick them in place.  I stick my flip flaps on the outside of the page protector.)  I decided to add a "hidden" journaling tag to identify more of the relationships between the people pictured that pulls up from behind the top right photo of my mom with her two sisters.

Here's what the tag looks like (with the journaling blurred because TMI).  Notice the long strip across the bottom to prevent the tag from being pulled out of the layout.  Since it's so close to the top of the page protector,  I didn't cut a slit in the actual page protector to access this tag.


Thanks for letting me share this layout with you!  Be sure to journal, journal, journal, even if it's privately added to the back of your layout of hidden with an interactive element.  Future generations will thank you!  Since I am the creator of all of our layouts, I journal from my point of view.  (Now that my daughters are older, when I make layouts for their albums, I have them journal to tell their story.  I will include some of my own thoughts at times.)

Finally, don't be afraid of your "messy" handwriting or getting everything perfect!  Your family will treasure your handwritten notes more than anything typed.  (When I have a really long story to tell, then I usually type it up instead of handwriting it.)  Give it a try!

Wednesday, October 18, 2023

October’s From Owl of Us Halloween Card #1

To create this cute Halloween card, I combined October’s stamp of the month, From Owl of Us, with the I Want Candy collection.


I used a fun sketch from Make It From Your Heart, Vol. 6, Pattern 25.  I love that this stamp set had the option purchase coordinating Thin Cuts!  

I made the "moon" pop with a little Mink ink distressing and lots of clear shimmer brush.  I used our new colored pencils to color the owl and branch.  Happy 'Owloween!

Wednesday, October 11, 2023

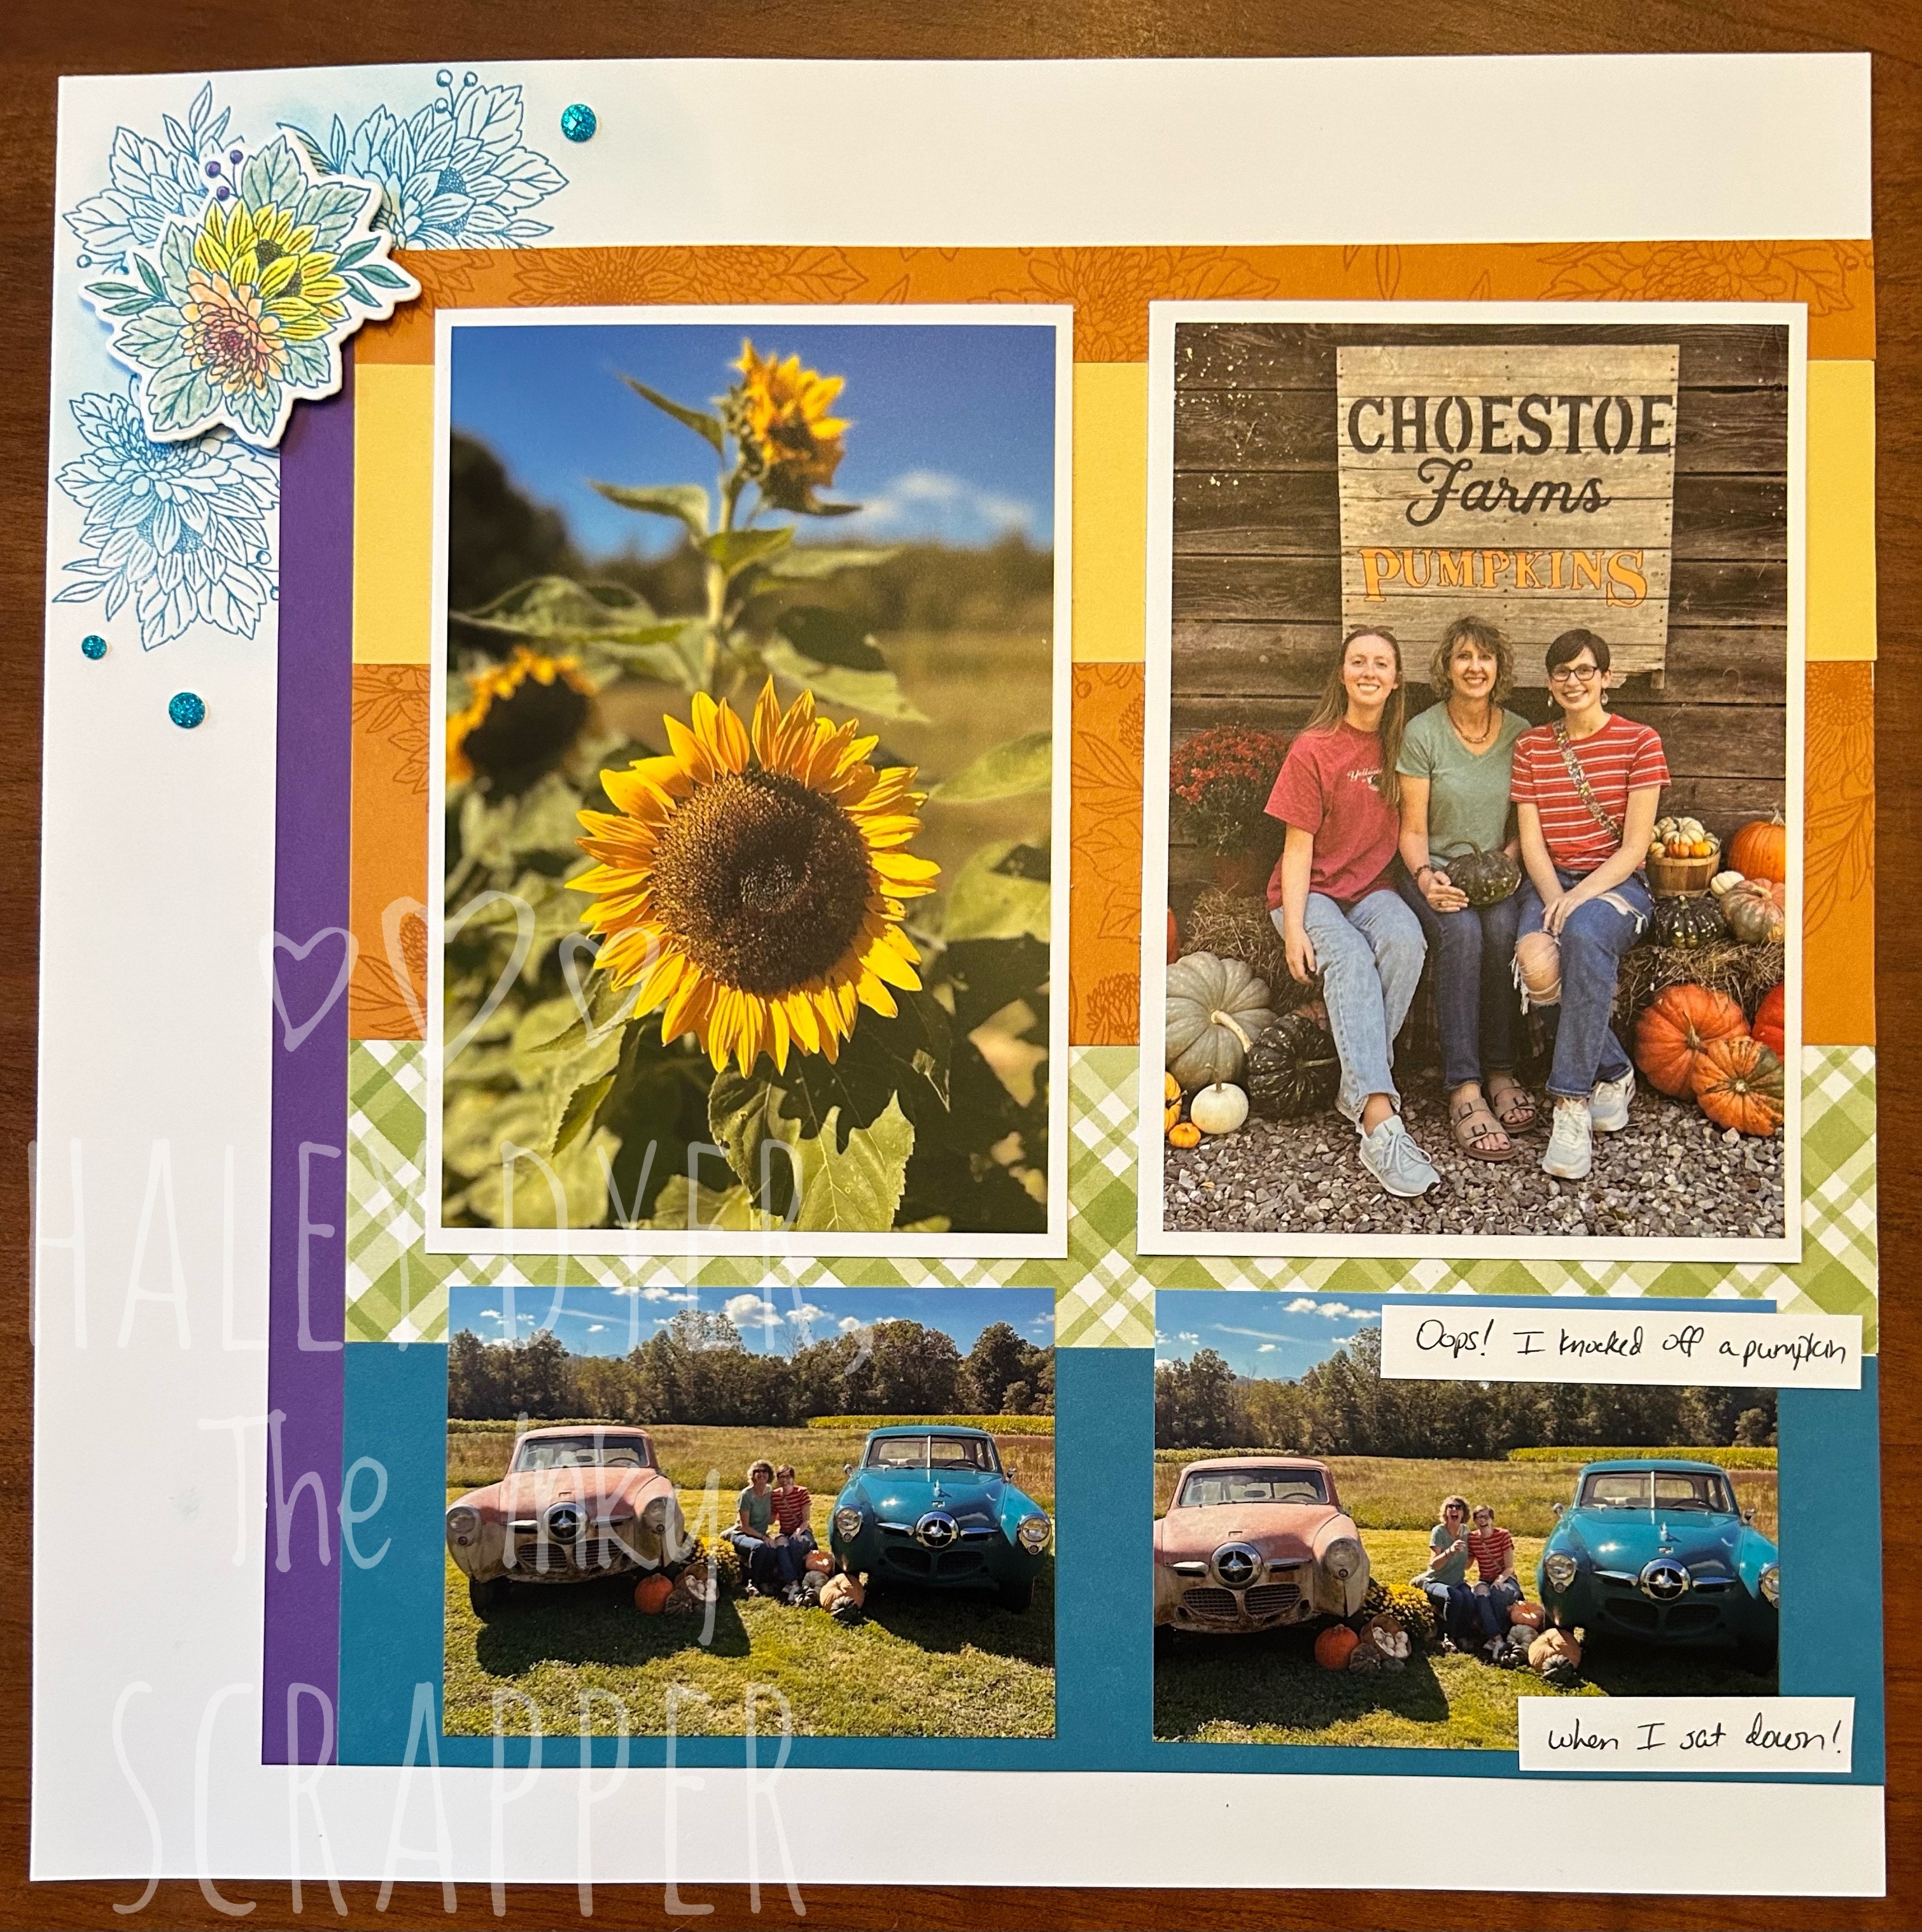
Pick of the Patch Layout

At my recent scrapbooking class, we created this fun fall layout that was perfect for our recent pumpkin patch adventure!

I started with a sketch from the NEW Make It From Your Heart, Vol. 6, which features single- and two-page layouts and cards.  I used Pumpkin, Honey Butter, Limeade (plaid from the Gnome for All Seasons- Autumn collection), Journey, and a pop of Royal.

To create this pretty cluster, I stamped the floral image from the Floral Notes stamp set on the background with Journey ink, and then use the blending brush to blend in a little more Journey. After stamping in Journey on the Thin Cut piece, I used our beautiful new colored pencils to color the flowers.  Notice how I used this technique and clusters in three places to move your eyes across the layout.  You can also see how I randomly stamped flowers in Pumpkin on the Pumpkin cardstock.


The stripes from the left page carry over to the right.


Here’s another close-up to show the title and the accent stamping.  I intentionally used a larger floral cluster on the bottom right to give this side a little more weight.


Don’t be afraid to mix fonts for a fun look!

Tuesday, September 26, 2023

Retreat Layout

This particular layout started with The Good Life collection and my new Make It From Hour Heart, Volume 6. I selected this layout for its versatility and then found photos to scrapbook that went really well with the sketch.


It didn't hurt that I was coming off of our second annual leaders retreat, so I was definitely inspired to scrapbook the first retreat.  I had lots of fun embellishing the layout with stamping with the September stamp of the month, Thoughtful Tokens, in Mist, to coordinate nicely with The Good Life palette.

The title is stamped in Mocha with a retired alphabet stamp set.

I decided to journal directly onto the Mist circles rather than cut smaller White Daisy circles to mat.  I liked adding a little stamping to the two that weren't completely filled with journaling.

Here's a fun tip to print smaller (3"x4") photos: use a photo collage app and upload two photos to a 4"x6" rectangle, then order your prints!


LinkWithin

Related Posts with Thumbnails