Wednesday, July 18, 2012

Hunting Island Footloose Layout

My family has loved to camp at Hunting Island State Park in South Carolina many, many times, and here are pictures from our very first trip there.  Our baby was two and having a great time! 
I used a 6"x12" flip flap to extend this page and show off more of my picures.  It is closed, above, and open, below.
Most of my projects get some type of distressing to them, and this one is no exception. My go-to distressing technique is direct-to-paper, where you swipe the edges of the paper with an ink pad.  You can add a lot of ink or only a little.  Any of our neutral ink colors work well, but you can even distress with the same color or a darker one.  Two reasons that I love this technique are that it helps to disguise any flaws in your project ;) and it also can add dimension and texture without bulk.  Each piece of card stock and B&T paper from the Footloose paper pack was distressed with Desert Sand ink before adhering onto my layout.
 Below is a close up of some of the distressing on this page.

I used a 6"x12" flip flap to expand my right side page.  (The photos below show it closed and then it open.) Here's a close up of the right page with the flip flap closed.  (Sorry for the glare!)  When the entire page is in its page protector, I will adhere the left side of the turtle Dimensional Elements chipboard piece to the page protector, which will allow me to tuck the flap behind its legs.

Since Heart 2 Heart Challenges has thrown down a "water fun" challenge for July, I have to link this layout up!  You too can add your water fun project to the H2H challenge blog IF it includes some CTMH products.  What better way to cool off- some water fun and then some crafty time?

**Many thanks to Tresa Black who designed the 10-page workshop that I used to create this layout!

CTMH Supplies used: Fooloose paper pack and Dimensional Elements chipboard Complements; The Works alphabet stamp set; Desert Sand and Cocoa inks; blue and green button assortments; natural hemp; Stardust glitter glitz gel; flip flaps

Monday, July 16, 2012

H2H Sketch Challenge

Heart 2 Heart Challenges has a great sketch for you to try this month!  (You can participate in any of our July challenges until Aug. 4!)

As you can see, I turned the sketch but stayed pretty true to the original.  I used the beautiful Soar butterfly image from the July stamp of the month, Live Out Loud as my focal piece.  (I inked it up in Creme Brulee, Sunset, Tulip, Lagoon, Olive, and Cocoa to achieve this rainbow effect.)  The papers are from the Stella paper pack.  (To get the zip strip in the middle, I cut a piece to fit my card front, and then cut off an inch and brought that bottom piece up to the top.)  My half circles are Just Blooms Paradise paper flowers assortment: I just folded the paper flowers in half and tucked them behind the zip strip.  They are really pretty in person!  The flourishes are the bottom left scroll of the "S" in Soar.

Here's a close up of the Soar image:

Now, it's your turn to try this sketch!  Just remember to use some CTMH products and link up to the H2H blog before the end of the month.  Go check out my team's beautiful projects this week for more inspiration!

Perfect Pairs Special: Lucky Paper Pack & My Stickease

Now through 7/20 (or while supplies last), the Lucky paper pack and My Stickease assortment are available on my website as part of the Perfect Pairs promotions (details on tab above).
This layout was actually made in Studio J but its elements are very similar to the paper pack and My Stickease.

Sunday, July 15, 2012

CTMH Product Spotlight Blog Hop: Distressing Tools

This month, a small group of CTMH consultants have joined together to show you how to de-stress by distressing. (This hop makes a complete circle, so you can jump on anywhere you like. If you're already hopping, then you should have arrived from Wendy's blog and you'll visit Luisa or Lori next.)   
 For this card, I used the edge distresser to roughen up the edges of the card base and the sentiment piece.  I used the direct-to-paper ink distressing technique on each banner and the chipboard flower (from the Footloose Complements).
 To make the Lagoon patterned banners pop off the Lagoon background, I sanded them with the sanding block.  It sanded off the edges and showed the white core.  A little lucky distressing happened when the edge of the banner pulled up and curled (thanks to the sanding block; not intentional at all!).  I decided to ink the edges in Cocoa to give them even more definition.
I also pounced the sentiment strip with Cocoa ink and the black stubble tool to make it look a bit sandy. 

Now don't stress; head to Luisa's blog or Lori's next!

Friday, July 13, 2012

Retiring Soon!

Here's a list of all the wonderful Close To My Heart products that will be retiring soon (as in the end of this month or while supplies last).  ALL of our markers are going as are ALL of the cardstock shades packs.  We're also losing some favorite colors- inkpads, markers, cardstock, etc.- so if you love some of these (see list below), you will want to get them before they are gone!  Also, some of my favorite paper packs and their accompanying accessories from the Summer Idea Book won't be back: Footloose, Cruisin', Lucy, and Superhero.  Get 'em before they're gone!

If you'd like to order anything, either contact me directly or visit my website.  Feel free to "join" the Cruisin' Scrapbook Class (bottom right) to help Ann get credit towards her gathering.  It doesn't hurt you in any way and could help her.  Thanks!

Here are the colors that won't be available after 7/31:
Grey Wool
Grey Flannel
Vanilla Cream
Parchment
Brown Bag
Baby Pink
Taffy
Sunkiss Yellow
Key Lime
Heavenly Blue
Lilac Mist
Amethyst
Holiday Red
Sunflower
Sunny Yellow
Dutch Blue
Moonstruck
Vineyard Berry
Tulip
Garden Green
Spring Iris
Petal
Garnet
Pansy Purple

And the rest of the products by item # and description:

Item # Description
9030 Imagine™
9034 Magic™ Scrapbook Program
G1032 Workshops on the Go™ Stella Kit
G1033 Workshops on the Go™ Pemberley Kit
X7149B Lucy Paper Packet & X7149C Lucy Complements Glittery Rub-Ons
G1034 Workshops on the Go™ Lucy Kit
G1035 Workshops on the Go™ Victory Kit
X7151B Footloose Paper Packet & X7151C Footloose Complements Dimensional Elements
G1036 Workshops on the Go™ Footloose Kit
X7152B Superhero Paper Packet & X7152C Superhero Complements Rub-Ons
G1037 Workshops on the Go™ Superhero Kit
G1038 Workshops on the Go™ Florentine Kit
X7154B Cruisin’ Paper Packet & X7154C Cruisin’ Complements Silver Foil Images
G1039 Workshops on the Go™ Cruisin’ Kit
X7139B Typeset Paper Packet & X7139C Typeset Complements Canvas Shapes
X7140B Roxie Paper Packet & X7140C Roxie My Stickease Assortment
X7141B Elemental Paper Packet & X7141C Elemental Complements Dimensional Elements
X7143B Sonoma Paper Packet & X7143C Sonoma My Stickease Assortment

Z2300 Marker Amethyst
Z2301 Marker Autumn Terracotta 
Z2302 Marker Baby Pink
Z2303 Marker Bamboo
Z2304 Marker Barn Red
Z2305 Marker Black          
Z2306 Marker Blush          
Z2308 Marker Brown Bag
Z2310 Marker Buttercup
Z2311 Marker Chocolate
Z2314 Marker Cocoa         
Z2315 Marker Colonial White        
Z2316 Marker Cranberry
Z2317 Marker Crystal Blue
Z2318 Marker Desert Sand           
Z2319 Marker Dutch Blue
Z2320 Marker Garden Green        
Z2321 Marker Garnet        
Z2323 Marker Goldrush
Z2324 Marker Grey Flannel          
Z2325 Marker Grey Wool
Z2326 Marker Heavenly Blue        
Z2327 Marker Holiday Red           
Z2328 Marker Hollyhock
Z2330 Marker Indian Corn Blue    
Z2331 Marker Key Lime
Z2333 Marker Lilac Mist    
Z2334 Marker Moonstruck
Z2335 Marker New England Ivy    
Z2337 Marker Olive           
Z2340 Marker Outdoor Denim      
Z2341 Marker Pansy Purple          
Z2342 Marker Parchment
Z2345 Marker Ponderosa Pine      
Z2347 Marker Smokey Plum        
Z2348 Marker Spring Iris   
Z2350 Marker Sunflower
Z2351 Marker Sunkiss Yellow       
Z2352 Marker Sunny Yellow         
Z2353 Marker Sweet Leaf           
Z2354 Marker Taffy           
Z2355 Marker Topiary       
Z2356 Marker Vanilla Cream        
Z2357 Marker Vineyard Berry       
Z2359 Marker White Daisy
Z2360 Marker Twilight       
Z2361 Marker Petal           
Z2362 Marker Honey         
Z2364 Marker Sorbet         
Z2365 Marker Juniper       
Z2366 Marker Tulip
Z2367 Marker Crème Brulee         
Z2390 Marker Gypsy         
Z2391 Marker Sunset        
Z2392 Marker Pacifica      
Z2393 Marker Cotton Candy         
Z2394 Marker Sky
Z2395 Marker Lagoon
Z2396 Marker Smoothie
Z2397 Marker Pear
X5902 Bright Blue Cardstock Shade Pack
X5903 Light Blue Cardstock Shade Pack 
X5904 Dark Blue Cardstock Shade Pack 
X5905 Bright Green Cardstock Shade Pack         
X5906 Dark Green Cardstock Shade Pack          
X5907 Light Green Cardstock Shade Pack          
X5908 Bright Red and Pink Cardstock Shade Pack         
X5909 Light Red and Pink Cardstock Shade Pack           
X5910 Dark Red and Pink Cardstock Shade Pack          
X5911 Black and Grey Cardstock Shade Pack    
X5912 Dark Neutral Cardstock Shade Pack         
X5913 Light Neutral Cardstock Shade Pack         
X5914 Light Yellow and Orange Cardstock Shade Pack  
X5915 Dark Yellow and Orange Cardstock Shade Pack 
X5916 Purple Cardstock Shade Pack       

Wednesday, July 11, 2012

Perfect Pairs Special: Fanfare Paper & Assortment

From now through 7/15 (or while supplies last), the Perfect Pairs special offer is the Fanfare paper pack and Level 2 assortment.  (See the tab above for complete details.)  Here are a few past Fanfare projects to inspire you:


Monday, July 9, 2012

Kraft 6"x6" Mini Album

My parents just celebrated their 44th anniversary, so I made a little something to commemorate this day and their life together so far: a mini album using Close To My Heart's 6"x6" kraft card and envelopes.  I paired the "album" bases with the Roxie paper pack and the Card Chatter- Love stamp set, adding in various embellishments that I had on hand.  (Here's the whole gang: my parents, my siblings and their families, my family, and my mom's sister.)

Before I began decorating, I used my 3-hole punch (you know, from the office supply store) to punch two holes in each card and each envelope.  Using the 3-hole punch allowed the holes to be uniformly punched on each "page."
Here is the front cover:

Pages 1 & 2:

The envelope flap opened with the pull-out tag:
The right page opened up to make another layout (sketch from Imagine):
Pages 3 & 4:

The right side, opened:
Pages 5 & 6:

Opening the right envelope flap:
See how the flap will tuck behind the photo mat?

Pages 7 & 8:
The slide-out tag from page 8 (the card was turned with the flap at the top and then I cut off about an inch off the right side):
Page 9 (with the same tag from the photo above showing):
Pages 9 & 10:

Somehow I missed a photo of page 10 opened up to show the inside of the envelope and its pull-out tag!  Finally, here is the back cover:
If you're still with me, I'll close with a picture of my hubby and me, because we also just celebrated our anniversary.  We're looking forward to 44 years together, but it will be a while!

Sunday, July 8, 2012

Perfect Pairs Special Offer: Dreamin' and Harvest Charms

Right now on my CTMH website, if you purchase $75 worth of product, you'll get the Dreamin' paper pack and Harvest charms automatically added to your order.  (The Perfect Pairs special is going on all month; the Dreamin' combo is available 7/6-10 or while supplies last.)

I thought I'd share two of my favorite (past) projects using this beautiful paper pack.  You can find all the details HERE if you'd like to learn more about the Clock card, and the original link to the Double-Z fold card is HERE.

Saturday, July 7, 2012

Another Red, White, & Blue Layout

In addition to working on getting my house purged and reorganized, I am also working on my scrapbooks- getting pictures scrapped and layouts in albums.  (After each day's job is finished, I get some scrapping or reading time!)  Even though our daughter's first birthday party wasn't red, white, and blue, her pictures have a lot of those colors.  The (retired) CTMH Fanfare pack seemed like a great match, as did the It's Your Day and the Friendship Alphabet stamp sets.

The current Lasting Memories Layout Challenge #95 is Red, White, and Blue (or Red and White), and I can't resist linking up my layout. I like how the yellow touches keep the layout from being too patriotic.

Thursday, July 5, 2012

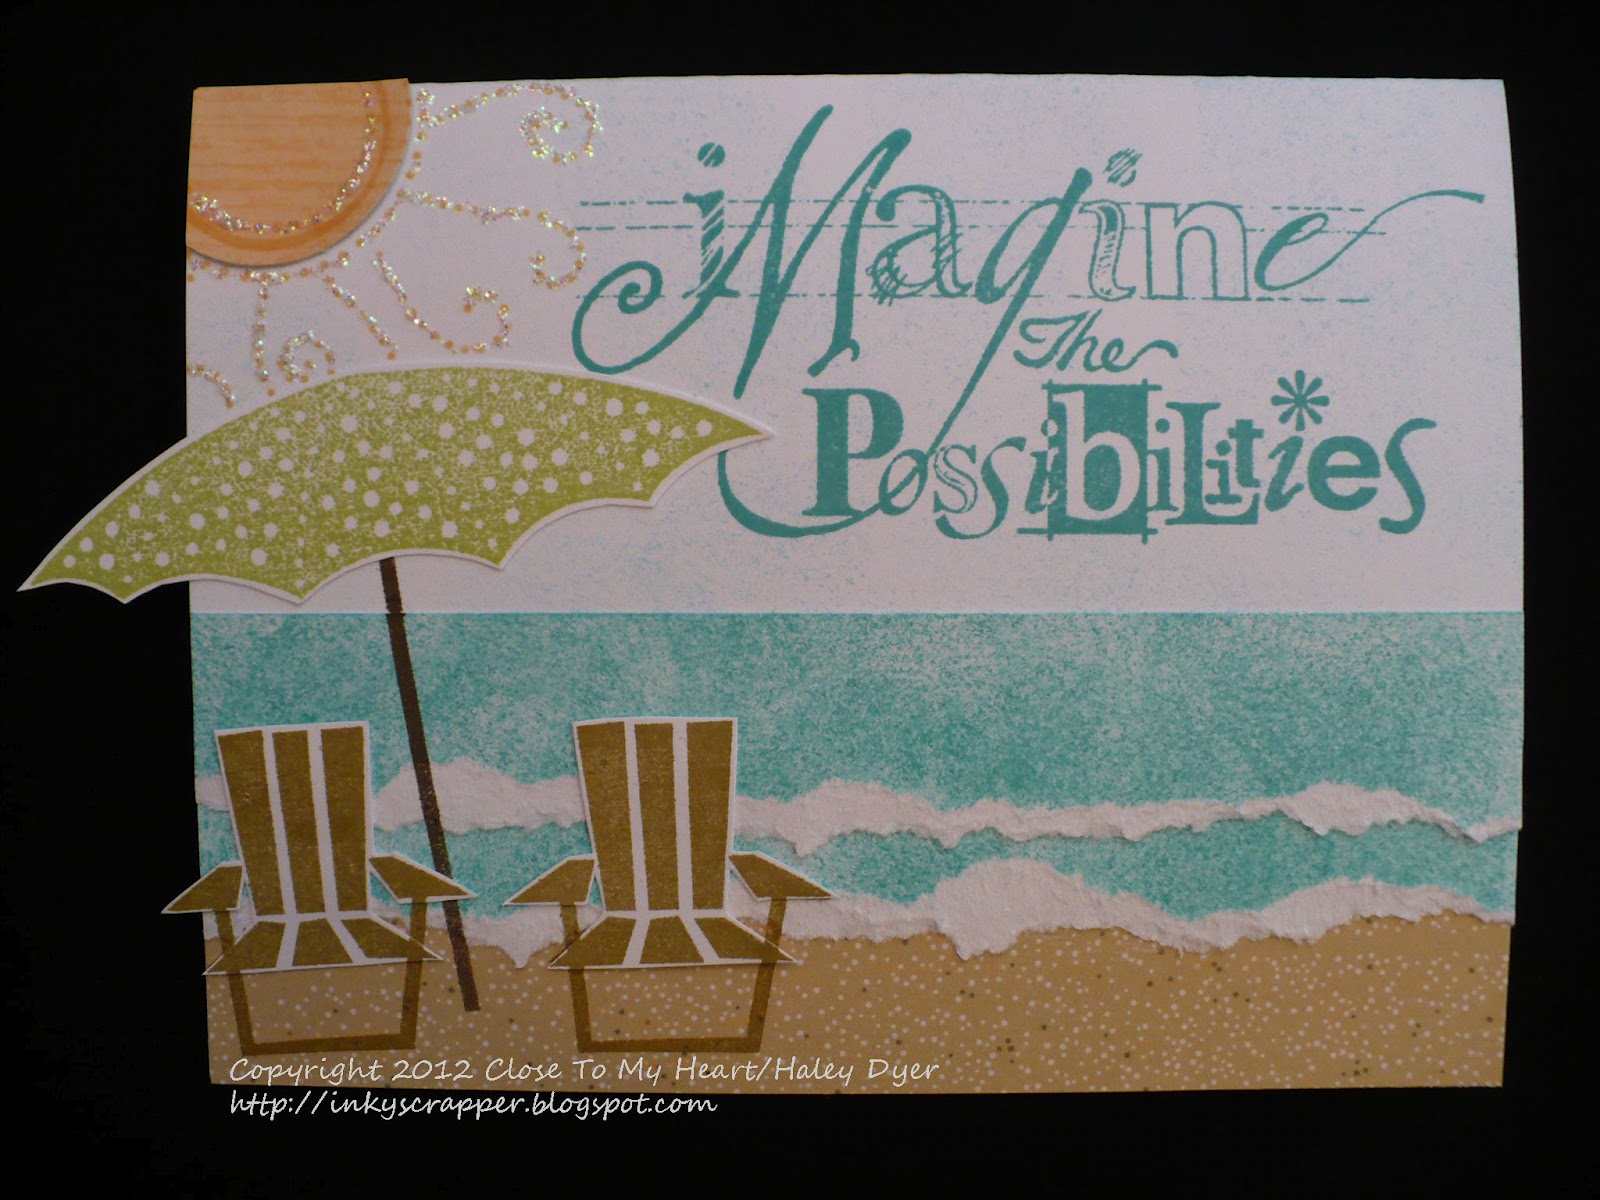
Imagine the Possibilities (July SOTM Card)

When I looked at my beachy card from my recent stamp class, I began to imagine the possibilities...

Don't you think this would make a great retirement card?  If you'd like the details on how to make this card, click HERE.  The only differences are that I lightly sponged the sky background with Lagoon ink, paper pieced the sun center, and stamped the sentiment from the July stamp of the month, Live Out Loud, with Lagoon ink.  (I think the sentiment needs to be over to the right just a bit more, but I can live with this one.)

Whether you're retired or not, imagine the possibilities and enjoy all that life has to offer!

Tuesday, July 3, 2012

Scrap Our Stash July Challenge: Seeing Stars

Scrap Our Stash is a fun monthly challenge blog where all skill levels, products, etc., are welcome!  We definitely encourage you to use up some of your stash each month.  The July challenge is STARS, so I dug deep into my photo stash to scrap these pictures of my then-15-month-old (who is now 11!).  I am working hard this summer to get all my layouts in albums and to go back and scrap old photos like these.
For the left page, I wrote my journaling first (fortunately I had written it way back then and stuck my notes with the photos) and then stamped the stars along the journaling.  The stars are from the Close To My Heart American Celebration and (retired) Shining Stars stamp sets.  (For both pages, stamp your largest image first, then go back in and fill in with the smaller stamps, working from smallest to largest.)  Then, I cut along the edges of the stars to create the border.  Finally, I backed it with the striped paper from the CTMH Superhero paper pack.


I embellished both pages with red, white, and blue sparkles, (retired) gold star brads, and red Glitter Glitz Gel.
For this largest star, I first inked it up in Cranberry, rolled the edges in black, and then stamped it on the bottom left of my 12"x12" Colonial White card stock.  I then stamped the star again on scrap card stock in Moonstruck, sky, and Sunkiss Yellow (the colors of the Superhero paper).  I cut out the pieces that I wanted to use and then glued them to the base star.  When my photo mat hid the right "arm" of the star, I used an exacto knife to cut it and was able to slide the mat behind it.
Now it's your turn!  Visit the SOS blog and link up your starry project.  It doesn't have to be patriotic, and you'll find some great inspiration over there.  Happy scrapping and to all my American friends, happy Fourth of July!

Monday, July 2, 2012

H2H Challenges Patriotism Meets JUGS Stars & Sparkle!

Today I am super-excited to share the first July challenge from Heart 2 Heart Challenges!  First, it's a great one with one of my favorite subjects: patriotism.  However you would like to interpret that subject is fine by us as long as you use some Close To My Heart products on your project.  (Remember, we have a new challenge each Monday, but you have all month to play along.)  Second, we are introducing a brand new design team to you this week!  Please visit the H2H Blog to check out our new gals and their great work!  They are sure to inspire you these next six months.

Also, if you noticed from my title, Just Us Girls has a "wild card" challenge (#143) going on right now: stars and sparkles.  I think this card has the stars, stripes, and spangles for both challenges.

If this card looks a little familiar to you, it's because I made it with pieces leftover from my recent card class.  I used the Superhero paper pack and a card sketch from Originals (retired).  You can't see it well in the photo, but I misted the main panel with Sky ink before overstamping it with the music score from the Universal Backgrounds stamp set in Moonstruck.  The Cranberry heart is stamped with the large circle design from the American Celebration stamp set.  The blue and red stars were also cut with the Cricut Art Philosphy cartridge.  (The red one is covered in Red Glitter Glitz Gel as is the zigzag stripe on the border.)  The kraft Milestones corrugated cardboard shape was distressed with Sky ink.  A Cranberry sparkle and knotted grosgrain ribbon finish off the main panel.  I then highlighted the stars and a few stripes on the bottom pieces with Liguid Glass for more shine.

Thanks for taking a look at my patriotic card.  God Bless the USA and happy Fourth of July!  Take some time to get crafty this holiday week and link up your projects to the H2H Challenges blog and/or the Just Us Girls blog.

LinkWithin

Related Posts with Thumbnails