Monday, July 10, 2017

Stampaganza Blast from the Past Blog Hop

Close To My Heart has such a fun special this month!  Stampaganza is back (buy 2, get 1 free) with a bonus: CTMH is also offering a selection of retired stamps, including the amazing Word Puzzle sets, THIS MONTH ONLY!  (You can find see them all HERE.)  This blog hop is throwing back to these "blast from the past" sets with a variety of old and new artwork to inspire you.  (If you're already hopping then you've probably arrived from Melinda's blog.  From here, you will visit Michelle's blog next.)
One of my faves in in the group is the lovely Paper Bird set that I am featuring in this hop.  I actually used it recently to make a set of thank you cards.  All of my cards used the recently retired Dreamin' Big paper pack.  As you can see, this set includes a lovely butterfly in addition to the bird and heart.

Before you head on over to Michelle's blog, you might enjoy a few of my older creations with this set.

You can read more about all three of these cards HERE.

Thanks for stopping in.  Please leave a comment before you go.  Now it's time to get more ideas at the next stop on the hop at Michelle Loncar's blog.

{Click HERE for all the hop participants and their blogs.}


H2H Challenges: Oh, the Place You'll Go!

This week's Heart2Heart Challenge is really open to interpretation.  It's certainly the season for travel, but this is also the title of a Dr. Seuss book that is often given at graduations because of its inspiring message.  Of course I had to go with the travel idea!
When we were in Copenhagen last summer visiting my cousin, he took us so many places, but two of the highlights featured amazing sculptures by the Danish artist, Thorvaldsen.
We first visited the Cathedral of Our Lady of Copenhagen.  It is really worth enlarging this picture to see his amazing statue of Jesus and the angel baptismal font.  Because I had a lot to say, I typed up my journaling and printed it onto our White Daisy card stock (cut it down to 8.5"x11" and run it right through your printer).  I had so many pictures that I decided to use a flip flap with the cathedral exterior on the front and the journaling underneath.
Because of the beautiful gold, grays, and whites in my photos, that was the exact palette I used: White Daisy, Whisper, Slate, Goldrush, and of course gold.  I used a mix of current and retired gold embellishments to accent my layout.  If you haven't tried the All About Gold Fundamentals, you need to get a pack before they're gone!  (They are the diagonal striped pieces on both pages.  It's hard to tell on the right page, but I used it as an overlay on the Whisper piece on the top left.)  The gold foil and gold sequins are also still available if you're interested.

Be sure to check out all of the inspiration from the H2H Design Team and join us before the month ends!  Bon voyage!

Wednesday, July 5, 2017

Europe 2016 Layout 1: Introduction & Overview

Last summer, we took our girls on an epic European adventure.  I have been ordering pictures when there are sales (and still have a ton to order) and am committed to getting this trip into an album this summer.  (Summer is already halfway over for this teacher, too...)  I will be randomly posting my layouts so thanks for reliving the trip with us!
This layout is all about the story: planning the trip and the first day/flight escapade.  I also wanted to have our itinerary here as a guide.  Don't be afraid to create a layout with few if any photos.
After I typed up my journaling, I printed it on our White Daisy card stock.  Both pages of the layout use Cranberry as the base for a huge pop of color.  It boldly accents the Memo Fundamentals map paper and coordinates with my Air Canada tickets.
The embellishments are mostly current: red enamel and gold glitter gems, School 7-12 Complements and retired washi tape.  I stamped my title with the Framework alphabet with Cranberry ink.  Don't be afraid to mix and match products and use up your stash!

Monday, July 3, 2017

H2H Challenges: No Worries

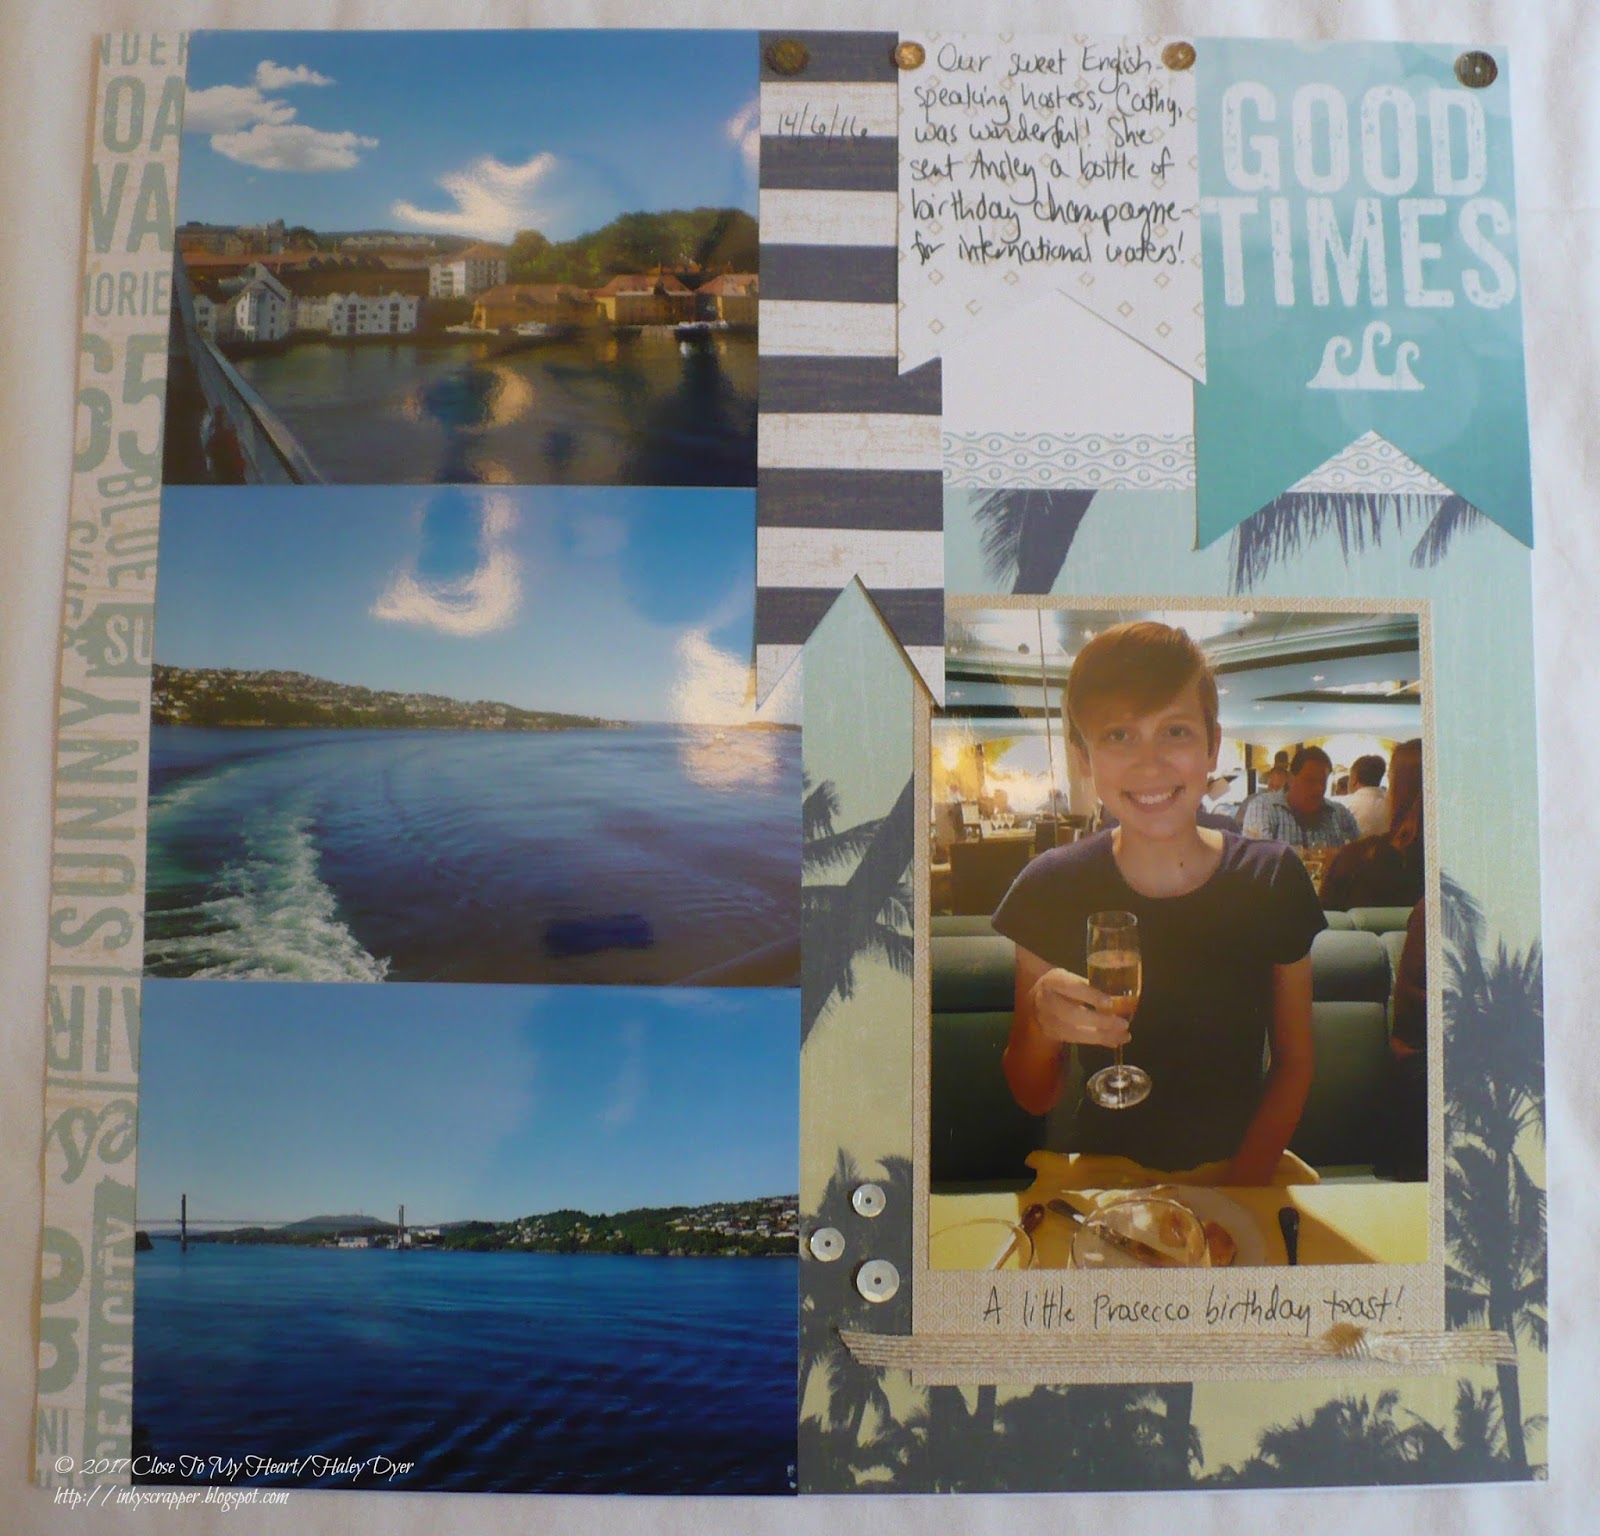
If you follow or have frequented my blog, then you know that the No Worries collection is my favorite from the current Seasonal Expressions!  (I like the other collections, but I LOVE No Worries!)  I have had absolutely no trouble creating with this paper pack!  My current summer goal is to scrapbook our pictures from our amazing European adventure last year.  No Worries came to the rescue, of course!
The great thing about the Workshop Your Way collections is that you get embellishments and artwork (stickers, etc.) to complement the paper pack.  Everything I used came straight from the No Worries Workshop Your Way.


Both pages of my layout were based on sketches from Reflections. On the right page, I cut down the "Good Times" 4"x6" Picture My Life card to make a banner.

Thanks for checking out my No Worries project!  If you don't have the paper pack, you can still participate by using the beautiful No Worries colors!  Thanks for letting me share a little bit of our amazing, epic adventure with you!  Be sure to join us at H2H!

Saturday, July 1, 2017

July Stamp of the Month Blog Hop: Storybook Alphabet

The Close To My Heart July stamp of the month is a fun font set called Storybook Alphabet.  Follow this blog hop for lots of great ideas from 16 talented CTMH consultants.  (If you're already hopping then you've probably arrived from Sheila Bennett's blog.  From here, you'll go to my friend Alyson's blog next.)
We took an amazing trip to Europe last summer (and I am enjoying reliving it in my Facebook memories), so my goal this summer is to get it all scrapbooked.  I thought that the Storybook Alphabet might pass as a Scandinavian font so I grabbed photos from our visit to Bergen, Norway and ended up pairing them with the Enchantment palette of Sapphire, Poppy, and Saffron.
But wait, there's more!  I added a pocket page in between my traditional layout because I have sooo many photos!
 Here's a close up of the Storybook Alphabet.  For this project, I stamped my letters with Sapphire ink and then went back and colored in details with our ShinHan Twin Touch markers.  (Did you know that there is a color chart to help you blend colors to match our colors?  I'll be happy to share it with you if you don't have it already.)

 Here is a close up of the left page.  Do you know where my embellishments came from?
If you guessed the School 7-12 Complements you would be correct!  I also used some No Worries sequins.
 Here is the right page.  On both of my journaling boxes, I started my paragraph with the first letter stamped, like an illuminated manuscript.

Thanks for letting me share my memories of this great day on this great trip!  Please leave me a comment before you go.  It's now time to go see how the amazingly talented Alyson will wow you with the Storybook Alphabet!  (Just click on her name to go to her blog.)
{Click HERE for all the hop participants and their blogs.}

Thursday, June 29, 2017

Live Beautifully Birthday Card (with a Pocket)

Did you know that the Live Beautifully May special (paper pack, stamp set, and Cut Above layout kit) are still available while supplies last?  (You can find them HERE if you'd like to get yours before they are completely gone!)  I am still in love with the collection and thought it would make a pretty card for a sweet young lady who just turned 19.
The front features a stack of presents.  For the center one, the white gold-embossed card stock did not stand out against the background, so I sponged it with a little Lemon ink.  The gold-and-white ribbon bow makes it more festive (and less like a wedding cake).
The inside shows you both sides of the pretty Live Beautifully paper pack.  I used the Happy Thoughts stamp set (available HERE in English, French, or Spanish) on the inside panel, stamping the sentiment in Eggplant and the flowers in Sea Glass (which is also retiring soon!)
The pocket is embellished with white shimmer trim along the edge.

Here is a quick tutorial of how I made my pocket card.  I began with a piece of 5.5"x12" double-sided patterened paper.  I folded it onto itself at 4" and 8" with both the left and right sections folding into the center panel.  While this makes your card a little skinnier than usual, I don't think anyone will notice, and you can make make the card out of one piece of paper.
Unfold the card and turn it so that the BACK of the center panel is facing up.  (You folds should be folding the outside panels DOWN.)  Line up the top of your card and the left fold on your paper cutter and cut down 2.5" (see picture, above).
Then turn the card base 90 degrees.  You want to cut this piece at an angle to make your pocket.  (I kept about an inch of the outside edge at the bottom and lined that up with the point where I can cut the slit in the fold, and then cut that off.

If any of the tutorial doesn't make sense, please post your question here or send me an email (info at my CTMH website).  I'm linking this card up to the Heart 2 Heart June Pretty Pockets challenge. Thanks for visiting!

Sunday, June 25, 2017

H2H Challenges: Watercolors

The final June Heart 2 Heart Challenge is watercolors, and there are so many ways to interpret this one!  I used a "watercolor smoosh" for my technique and card.
 To begin, lay a piece of plastic wrap at least twice as big as your project onto your work space.  (My "work space"/canvasw was a piece of 4"x5.25" piece of watercolor paper.  Begin by adding drops of clean water to the area that your card panel will cover.  Next, add drops of color onto the plastic wrap wher eyour card stock piece will go.  I used two shades of blue and two shades of purple.  Finally, place your watercolor panel onto the plastic wrap.  Wrap the edges around the card stock and then flip over.  Smooch and spread out as many wrinkles as possible.
My watercolors best matched Crystal Blue (card stock base), plus Thistle and Pansy.  The sentiment (from Happy to Be Friends) was stamped in Pansy and the flowers (from the same set) was stamped with Thistle.  I embellished my flowers with some pretty sparkles.

If you haven't played around with CTMH's watercolors, then you should give them a try!  Google a few videos and then get started!  This is the last H2H challenge for June, so be sure to play along!  Thanks!

Happy 19th Birthday!

Our oldest turned 19 this month, so I had to make her a special card.  I decided to use the Little Dreamer collection and the (retired) Kaleidoscope Workshop on the Go stamp set.
(If you'd like to know how I made this card, you can find more info HERE with the card that I made for my aunt's birthday.)

It was much easier to put 19 candles on her stamped cake than on the real one!
We were blessed to have lots of family come over to help celebrate!

Saturday, June 17, 2017

No Worries Blog Hop

The No Worries collection is my favorite in the current Seasonal Expressions 2 Idea Book!  (The other 3 are cute too, but honestly this one's my fave.)  I was super excited to join this blog hop featuring this summer-y, nautical collection!  (If you're already hopping then you've arrived from my friend Melissa's blog.  From here, you'll visit Elly's blog next.)
For this blog hop, I am featuring a card that I made for my aunt's 80th birthday! This collection is perfect for her as she lives in the Sunshine State and chose to meet in our hometown (in Georgia) to be central to a lot of her family.)
To make this collection more feminine, I added Smoothie to the tropical No Worries palette.
To have matching shimmer trim (on the cake and on the second panel of the card), I started with silver shimmer trim and colored it with the Marina Blue Shin Han Twin Touch alcohol marker. All of the cuts were made with the CTMH/Cricut Artistry collection.  All of the embellishments (sequins and burlap ribbon) are part of the No Worries Workshop Your Way collection.
This cool card style started with a piece of 8" tall by 10.5" wide B & T.  I scored this piece at 3.5" from both ends, one a mountain fold and the other a valley fold, to create this cool card design.  Keep the back panel at its complete height and width, but trim the other two at an angle.  I then added in all of my elements.  (Keep the piece that you cut off to help guide the mattes that you might like to make.)
Hopefully my aunt will love this card, because I had so much fun making it for her!  Please leave me a comment before you head off to Elly's blog next.


Friday, June 16, 2017

Retiring Stamp Sets Blog Hop

It's that time of year!  Close To My Heart has announced their retiring list of items that are only available through July, while supplies last, to make room for tons of new product that will be unveiled in August.  (Click HERE to download a PDF of the retiring list.)  This blog hop features many of the stamp sets that are retiring.  (If you're already hopping, then you've arrived from Priscilla's blog.  From here, you'll go to Brenda's blog next.)  I've chosen to feature our state stamps, and specifically my home state of Georgia.  (CTMH offers all 50 states and all of the Canadian provinces through the end of July.)
Both cards feature Sorbet (for the Peach State) and Sweet Leaf with patterned paper from the Whimsy collection.  I used both green and coral shimmer trim on these cards.  (The adorable heart shimmer trim was cut with a hand-held punch that is not from CTMH.)
This first card measures 4"x4" and also features a retired greetings sentiment.
This standard-sized card uses a pattern from Wishes with an added Sweet Leaf polka dot background and green epoxy triangles (if you look closely).

Thank you for hopping by!  Be sure to get your must-have stamp sets before they retire!  I'd appreciate a comment before you head off to Brenda's blog next!
{Click HERE for all the hop participants and their blogs.}


Thursday, June 1, 2017

June Stamp of the Month Blog Hop: Hello Foxy

The CTMH June stamp of the month, Hello Foxy, is absolutely adorable, and we have a great blog hop showcasing it.  (If you're already hopping, then you should have arrived from Judy Faye's blog.  From here, you'll visit Krista next.)

For my card set, I challenged myself to use a current paper pack in a different way. Can you guess which one it is? I did add Fern and Smoothie for my florals. Did you guess No Worries?   Not a nautical design in sight!  I did use the embellishments from the workshop your way kit: the sequins, the burlap ribbon, and even a few Complements.

All of my cards are based on sketches from Make It From Your Heart, Volume 2. I also used a water brush to color all of the images.  As adorable as those foxes are, I wanted to show how pretty the set was if you did not include them.
Can you see how I popped up the center of the sentiment banner?  I bent it first and then attached the ends with glue dots.  Glue dots also hold the burlap ribbon well!
This card combines a mix of the Complements (hearts) and sequins.

Since those foxes are so cute, I couldn't resist a Hello Foxy card to round out the set.

Thanks for visiting!  Please visit Krista's blog next!
{Click HERE for all the hop participants and their blogs.}

LinkWithin

Related Posts with Thumbnails